Showing posts with label chain. Show all posts

Monday, January 13, 2014

Garnet Glitz

I've decided to try my hand at making more jewelry this year. You could say it's a kind of New Year's resolution to practice some jewelry making techniques. So to start, I'm making a garnet bracelet and earring set for January. I got the idea for this bracelet and earring set from a craft magazine and decided to make a few changes to it to use findings and materials I had on hand. If you didn't know, garnet is January's gemstone.


Here's a picture of the finished bracelet all shiny and pretty. To complete this project, you'll need some silver chain, 4mm and 6mm jump rings, garnet colored glass beads, a toggle clasp, jewelry wire, crimp tubes, and some pewter findings.


First things first, cut your chain into 10 lengths of 2 and 1/8 inches. 5 pieces of chain get slipped onto a 4mm jump ring, and then another jump ring is added to the opposite side of the chains. You do this twice to make two sets of dangly chain pieces.


Next, add the toggle clasps, one to each chain set with a 6mm jump ring. On the opposite side of one of those sets, loop jewelry wire onto the 4mm jump ring and set with a crimp tube. Then you'll thread a bicone, a pewter finding, a bicone, a pewter finding, and finally another bicone, onto the wire. Finish the bracelet off by making another loop around the unused chain set and secure with another crimp tube to the unused chain set.


Done! This was a great way for me to start my beading practice because there was just enough technique involved to make it interesting but no crazy wire wrapping to make me frustrated. Check out our blog next week for the next installment; we're finishing up this set with a pair of matching garnet glitz earrings.

Thanks for reading!
Puna @ Enchanted Lake

P.S. If you're thinking that this would make a great Valentine's Day gift, you're really on top of things. Scroll down to see today's episode of Crankin' Out Crafts featuring a fun Valentine's idea.

Monday, July 8, 2013

Spectacle Necklace


Did you know that we have a national holiday for geeks? It's called "Embrace Your Geekness Day" and it's coming up soon! In fact, it's this Saturday, July 13th. But in honor of my personal geekness, I decided to celebrate for the whole month starting with this quirky spectacle necklace.


Here's a bunch of pendants I made in a few different colors. All I did was print up a picture of eyeglasses and then trace the picture onto clear shrink film using Sharpie markers. Then I cut out my designs, punched the holes in either end, and put them in a 300 degree oven for about 3 minutes until they shrunk down to about half their size and were laying flat on the cookie sheet.


This is what the finished necklace looks like. It's 18" long including the pendant. I think the shrink film is the best media for this off-the-wall kind of jewelry, don't you?

Puna @ Enchanted Lake

Monday, February 25, 2013

Typography Necklace

Do you swoon over a new font you found on the Internet? Do you stop and stare at a well printed sign? Do you love typography and all things wordy? Do you love type so much that you never, ever want to be parted from it? So much so that you want to wear wonderfully font-tastic jewelry every where you go?

If you answered yes to any of these questions, I made this necklace just for you! It's the perfect accompaniment to any word nerd's attire, and as you can see, it's a testament to your gumption, courage, and general moxie-tude.


If you want to create your own typographic statement jewelry, all you need is some shrink plastic (yes, I am talking about those good old shrinky-dinks that you used to play with when you were seven and had to bug your parents to stick in the oven for you), a 1/4" hole punch, some chain, jump rings, a clasp, and a sparkly crystal on a head pin for the extra accent.

Then, you can download your new favorite font, print up a wonderful word (like moxie) and simply trace your word onto your piece of shrink plastic. The necklace above is made with matte shrink plastic and a slick writer pen from American Crafts. Don't forget to cut out your word and punch your holes before you start to shrink. String everything up on a chain and show off your new word nerd style. Oh the moxie-ness of it all!

Puna @ Enchanted Lake

Whoops! Almost forgot to let you know that there's a post before this one. Please scroll down and check it out.

Thursday, June 30, 2011

So Many Charms....

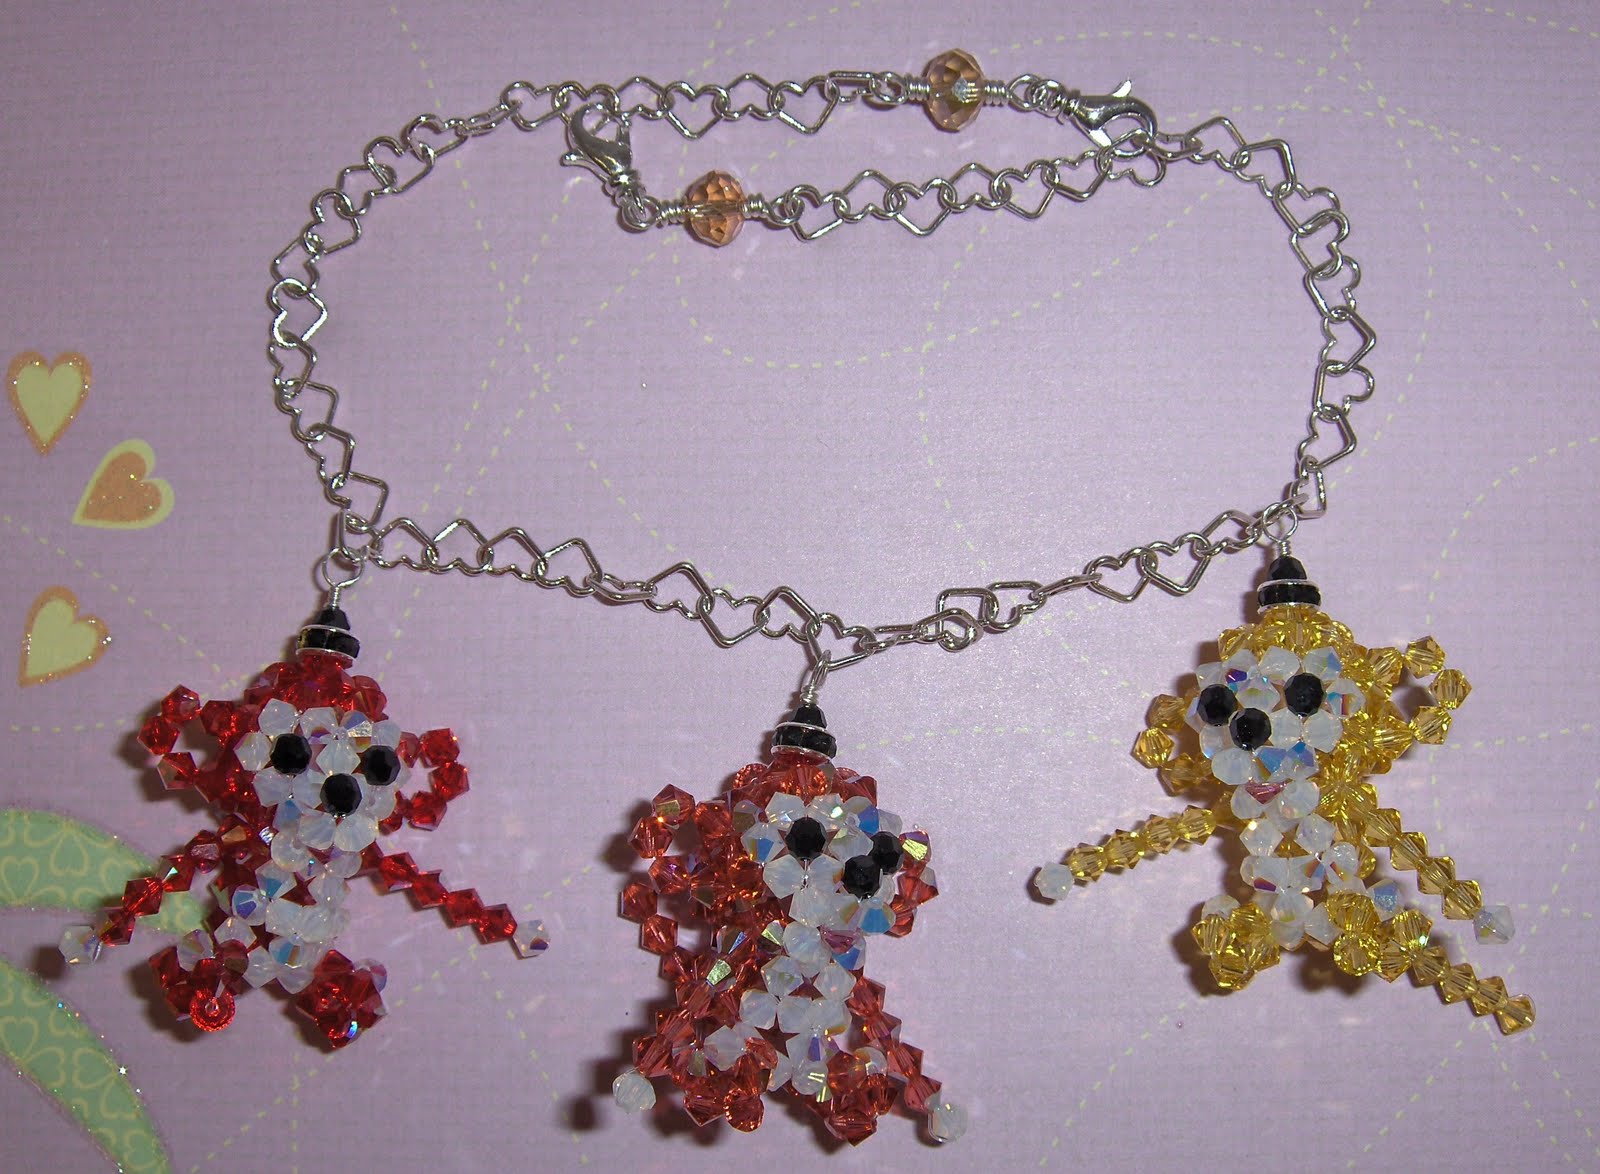
So I love dimensional charms, the ones made out of Swarovski crystal that people attach to their cell phones or purses...I LOVE them a lot and there are so many different designs out there that it's hard to just pick a few to decorate my purse. But sometimes having a bunch of them each individually attached to your purse via cell phone straps can get overwhelming and what if heaven forbid one breaks off? Well here's what I've been doing...


Get a length of chain, here I used 12 inches worth but the length will vary depending on how many charms you want to attach and how you want to have it on your purse which we will get into shortly. Attach a lobster claw clasp on each end. I attached my charms to the chain but purposely kept a few inches of chain on each end free of any charms. Then attach to your purse in 2 different ways...


The chain can go directly across from one end of the purse to the other by attaching the ends to the purse straps, the lobster claw clasp can be hooked directly onto the chain after looping through the purse ring or strap. This gives a very nice display of your charms.

The second way has the chain looping around just one purse strap, this allows you to have a slight overlap of the ends of the chain (again the lobster claws are hooked directly onto the chain) which results in a very secure closing because you now have 2 catch points! If one lobster claw fails then the chain is still attached together by the other lobster claw.

Because I wanted my chain very secure I did 3 things.
First, I made sure that all the links of the chain were closed links (soldered close) which is usually the case with sterling silver chain rather then base metal chain which stands the chance of being able to be pulled apart due to open links (like jump rings).
Second, I attached the lobster claws by wire wrapping them to the chain.
And Third, I wire wrapped the charms to the chain. Now you could attach your charms to the chain via a lobster claw clasp which would allow you more versatility since you would be able to then easily change out the charms. Or you could attach the charms via a split ring but I got turned off from split rings after one snagged into one of my purses, but hey...that's just me. Attach your charms the way you like best!

I really like this method not only because it allows you to display your charms but because you can also do it in a theme! Special thanks go out to Stephanie, our administrative assistant at Mapunapuna, for allowing me to use her purse as a model! By the way, the instructions for the monkeys are in that beading book I blogged about a few weeks ago so come pick up the book if you want to make some yourself!

Have a great weekend and I'll see ya later!

Lynn @ Mapunapuna Bead Shop