
Happy Halloween, everyone!
Well, Happy "Week of" Halloween. ;) It's right around the corner and we all know Halloween parties are tons of spooky fun! So, I have a cute little centerpiece that's very simple to make, fast and very affordable. If you suddenly decided to host a Halloween party, this is a great project for you!
~~~~~~~~~~~~~~~~~~~~~~~~~~~~~~~~~~~~~~~~~~~~~~~~~
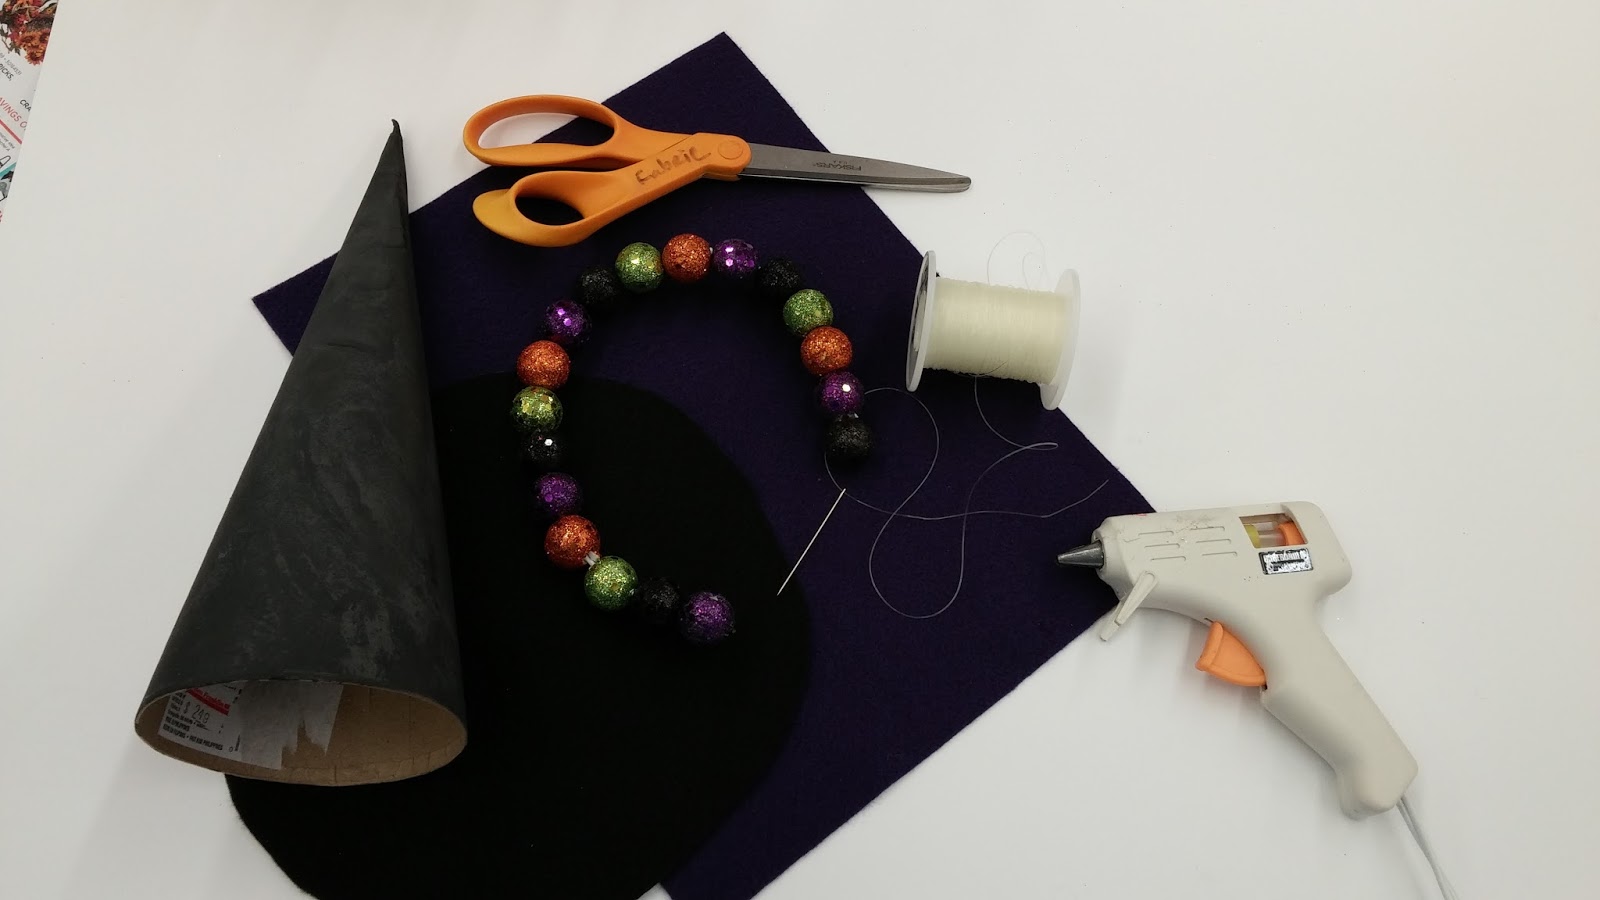
Supplies Needed
Paper Mache Cone
Black Spray Paint
Black Felt
Purple Felt
Decorative Halloween Pick (glitter ball one)
Hot Glue Gun
Fabric Scissors
Elastic Cord
~~~~~~~~~~~~~~~~~~~~~~~~~~~~~~~~~~~~~~~~~~~~~~~
Let's get started!
First, spray paint the paper mache cone black. (I did it before I took the picture.)
After that, cut a circle out of the felt. Try to use the whole width of the felt sheet.

 Then, sew a small circle about 3 inches in diameter at the very center of the circle and pull on it to sort of "scrunch" it. This becomes the wavy brim of the witch's hat. It doesn't need to be wavy if you don't want it to. I would actually suggest using the black 2mm foam sheet as the brim if you are planning on making the brim straight.

Next, cut a strip of purple felt about 2.5" x 12". Hot glue it to the bottom of the cone.
I left a 1/4 in. space from the bottom of the cone. Hot glue the brim to the cone base.
 Lastly, cut a branch off the glittered ball pick and wrap it around the base of the cone to cover up the empty space and add a little something extra. And there you have it!
This is a very simple centerpiece which could easily be turned into a place marker by writing the name of your guest on the cone with some acrylic paint pens such as the Deco Paint or Montana markers. Some extra glitter and color wouldn't hurt as well. Hey, the hat doesn't have to be black. Why not invert the colors, or maybe even make it orange or chartreuse to keep with the Halloween color scheme?
Have fun and we hope you have a fun and safe Halloween!
Erika @ PC
First, spray paint the paper mache cone black. (I did it before I took the picture.)
After that, cut a circle out of the felt. Try to use the whole width of the felt sheet.


Next, cut a strip of purple felt about 2.5" x 12". Hot glue it to the bottom of the cone.
I left a 1/4 in. space from the bottom of the cone. Hot glue the brim to the cone base.

This is a very simple centerpiece which could easily be turned into a place marker by writing the name of your guest on the cone with some acrylic paint pens such as the Deco Paint or Montana markers. Some extra glitter and color wouldn't hurt as well. Hey, the hat doesn't have to be black. Why not invert the colors, or maybe even make it orange or chartreuse to keep with the Halloween color scheme?
Have fun and we hope you have a fun and safe Halloween!
Erika @ PC


