Showing posts with label pony beads. Show all posts

Thursday, April 2, 2015

Oodles of Noodles- How to make a lei out of pool noddles!

 Hi there! Today I will be showing you how to make a lei out of pool noodles! These leis are a lot of fun and are really easy to make. 

You'll need the following supplies:
- Pool noodle, more than one if you want to make a multi colored lei
- Upholstery thread or suji
- Long lei needle
- Styrofoam cutter or long serrated knife
- an assortment of beads


First, cut your noodle(s) into 1.5" disks.  The amount you need depends on how long your lei is and how many beads your string between each disk. I used 12 for my lei. 


Measure out your length of thread or suji.  Add 6 inches to each end to leave enough room to tie.  String your thread through the lei needles.  Tie a big knot at the end of your thread to keep the noodle from sliding off.  Now you can begin to string your lei! I put beads between each disk to make it a little fancier. 


You can use any type of bead but the bigger ones tend to stand out more. You can also string a bead in the noodle hole and tie a not on either end of the bead so it is suspended in the hole.  Continue alternating noodle and beads until you fill your thread.  Tie the ends together.  You can add a bow or just leave it like that!


These noodle leis are super cute and shouldn't take more than 10 minutes to complete so if you're looking for a quick but unique lei then look no further!

Until next time, happy crafting!
Rachel @ Mapunapuna


Monday, April 22, 2013

Ready to Pinterest Party?

So I'm really, really excited about our upcoming Pinspiration Pinterest Party happening this Saturday, April 27th from 10am-2pm! We're going to have so many great make 'n takes and demos going on, prize giveaways, and fun, fun, fun! We really hope that you'll be able to take a break from your hectic schedule and join us for Pinterest crafting fun.

Anyway, here are three more projects that we'll be featuring that day.

 Pony Bead Cake Stand

This awesomely shiny cake stand was made by melting pony beads in a cake pan until they fuse into this wonderfully colorful plastic disc. We'll have a FREE demonstration from 1-1:30pm showing how to make mini discs like this for cupcake holders and sun-catchers.


Straw Lei

Want to learn how to make a beautiful lei in 30 minutes or less? Join us from 11-1pm on Saturday to make your own lei for just a $1 with a purchase of yarn. Your lei is guaranteed to turn out amazing.


Washi Pencil Set

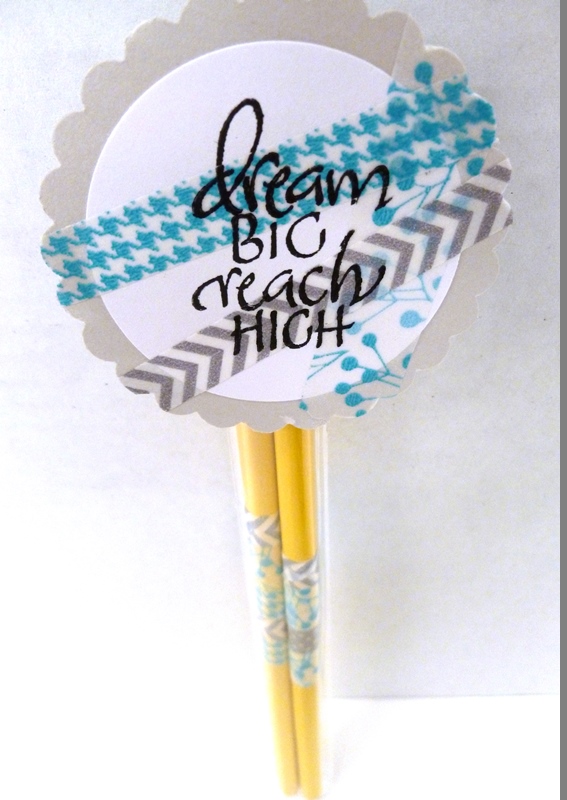
What can't we washi? We're making a simple and speedy washi pencil set on April 27th from 1:30-2pm. A $2 fee includes the pencils, washi tape, and smiles while making this cute favor or teacher gift.

Here's the complete party schedule if you want all the details.

Pinterest Pinspiration Party
 See you there!

Puna @ Enchanted Lake

Monday, March 4, 2013

Pony Up the Goods

Believe it or not, pony beads can be used for more than just bracelets or hair braids. Melt them down, and you can make some pretty cool, stained-glass-looking things. I decided to give it a try with a display stand for our store. Here's what I ended up with:


It's a lot easier to make then you think. All I did was pour about half of our one pound bag of pony beads into a 10" cake pan and melt them in the oven at 425 degrees for 30 minutes. It smelled a bit like melting plastic in the house while I was doing this experiment, but that was pretty much what I expected to happen.


When they were cool, I just popped the piece out of the pan and sanded down the edge to take off some sharper pieces. Truthfully, there was a very small line of plastic left in the pan which was easily washed away. The amazing thing to me was that the entire piece pictured below came out whole without any more encouragement than just turning the pan over.


To make my stand look nice and shiny, I finished it up with a coat of Design Master's Master Shine. It also filled in some of the small holes left from air bubbles. When everything was dry, I used E6000 to attach a glass candle holder to the bottom. Instant decorative stand.

Hope you liked the idea, I had so much fun that I'm trying to think of other melted pony bead projects. Let me know if you can think of any!

Puna @ Enchanted Lake

There's a post from earlier today too, it links to our first Crankin' Out Crafts episode about fans. You should check it out!