Showing posts with label cute. Show all posts

Tuesday, April 11, 2017

Graduation Centerpiece

If our stores' AWESOME displays haven't already given it away, Graduation Season has officially started!  It's time to start weaving and braiding those leis, to send out those Senior portraits to relatives you may not have been aware of until now, and to start ordering those graduation posters and banners!;)   Another thing that probably every parent has had on their  "HAVING A CHILD" To-Do List for the past 17 or 18 years is of course their graduate's GRADUATION PARTY!
 I've seen everyone from the last minute decorators to those who come in right after Valentine's Day, searching for ideas and inspiration (See what I did there?) on how to decorate for their child's grad party.  I'm talking banners, centerpieces, cake stands, table covers, favors and more.  
Well, today I have a centerpiece project that is really easy and quick to make!
All you need are a few items!


For the cap I used a 12x12" piece of black chipboard that I cut down to a 9x9 square, 12x12" black cardstock, embroidery floss for the tassel, and a black brad.   I made the base of the cap with the cardstock, cutting two 3 1/2 x 12" wide strips, with one of the strips having a triangular shape coming out at least one more inch.  This is for that front part of the cap that goes over the forehead.  I made a basic tassel by winding the floss around four of my fingers and tying it off at the center.  Then I secured the end of the tassel to the center of the grad cap with the brad.
 

On the bubble vase, I took some alcohol inks and then, me being a Pearl City graduate, dripped some purple, silver and cool pearl (lavender) straight onto the glass.  To give it a splattered look, I blew on some small drops that I squeezed onto the glass and let the ink sort of spread to create a "fuzzy" look.  Letting some of the ink dry in the dripping state also adds to the paint splatter look. 
After I let the alcohol inks completely dry, I wrote on top of the design using a white oil-based marker.  Oil-based paint markers are always going to be the best for glass when you want an opaque and permanent line.  Also, they won't scratch off like their acrylic counterparts!  I gave the letters a shadow detail using a thinner black oil-based marker and then filled the vase with a strand of the warm white firefly lights!  That is really what makes this centerpiece shine!
 
 
If you really want to make things fun (and take advantage of the lights), how about a cute face?  Yes!  This can be double-sided!  You could even cut your graduate's school logo out from vinyl and stick it onto the glass.  Coordinate the color of the lights to the school!  Red for Radford and Kaimuki, Blue for Moanalua or Waipahu?  Even the hat and tassel can be changed up! 
Have fun!
 
Erika @ PC

Tuesday, November 29, 2016

Pinecone Christmas Tree

Oh Christmas Tree, Oh Christmas tree...
How lovely are thy branches...
A tree always kicks off the Christmas season for my family!  It really doesn't feel
like the holidays until we bring a nice 6 foot tree home and shake out it's branches, its
refreshingly sharp smell wafting through the house...
If you want to bring a little of that feeling Christmas cheer to work, I have one craft that is simple,
festive and downright ADORABLE.

 
Mini Pinecone Christmas tree! 
All you need are a few items.
 
1. Pinecone
2. Green Acrylic Paint
3. Pom Poms
4. Firefly lights
5. Mini Terracotta Pot
 
First, Paint your pinecone!  I chose a traditional Christmas green, but you can mix up the colors if you'd like.  You can even leave it as is for a nice neutral and rustic palette.  White pompoms or Snow Tex would be great for trimming it.  Or why not try a cutesy pastel palette?  Maybe an ice blue tree with iridescent twinkle flakes and pink pompoms? 
 
Second: Glue your mini pompoms onto your pinecone after it's fully dry.  Then, take your firefly lights and wrap them around you tree starting from the top.  Because I had chosen the 10 bulb firefly lights, I was able to hide its small battery pack inside the Terracotta pot, which I placed the pinecone "tree" onto for a base.  You can go ahead and paint the pot as well! 
 
And that's all she wrote!
This is a great activity for kids as well, so don't pass up the chance to make some great holiday memories.  Have fun!
Erika @ PC


Friday, October 28, 2016

Minimal Fall Garland

Well, it's almost the end of October, and it honestly makes me feel so sad!
The Autumn season is fleeting!  It's time to make the best of it.
We've got one more month to go, so it's never too late to put up some fall décor.
The project I have today is very minimalist and requires only a few supplies. 
Don't fret!  It's simple quality is what makes it ADORABLE.  Also, it's great for kids!
Although, because this requires basic sewing skills, close supervision might be needed for younger children under 7. 
Let's get started!
 
+ + + + + + + + + + + + + + + + + + + + + + + + +
 
 
Supplies Needed
Felt in Autumn Colors
Embroidery Floss in Autumn Colors
Embroidery needles
Scissors
Yarn or Jute Twine
Permanent Marker (optional)

+ + + + + + + + + + + + + + + + + + + + + + + + +
 
 
First, cut out leaf shapes from your pieces of felt!  I chose orange, olive green, golden yellow, maroon and brown.  The simpler your leaf shape, the better.  You can use a marker to draw your
leaves first as well.


Second, use the embroidery floss to sew on some veins.  I have a step-by-step-process pictured below.  Basically, you want to work your way up from the bottom of your lead and sew the veins from the sides to the middle.

After the veins, go ahead and cut out some letters if you'd like.  I cut out the word "FALL", but other words like "GIVE THANKS" or "AUTUMN" would be really cute as well!  You can use any color, but for this garland, I chose black so that the word stands out from the leaves.


After that, hot glue your leaves and letters onto some yarn or jute twine and hang it up! 
Now you can enjoy the beauty of autumn leaves in your home.  For us in Hawaii,
(who can only see the leaves change color on dying mango trees) this would be a great
garland to make and put up year after year.
 
Have fun!
Erika @ PC


Tuesday, September 27, 2016

Joyful Tassel Tote

Holy Baker's Twine!
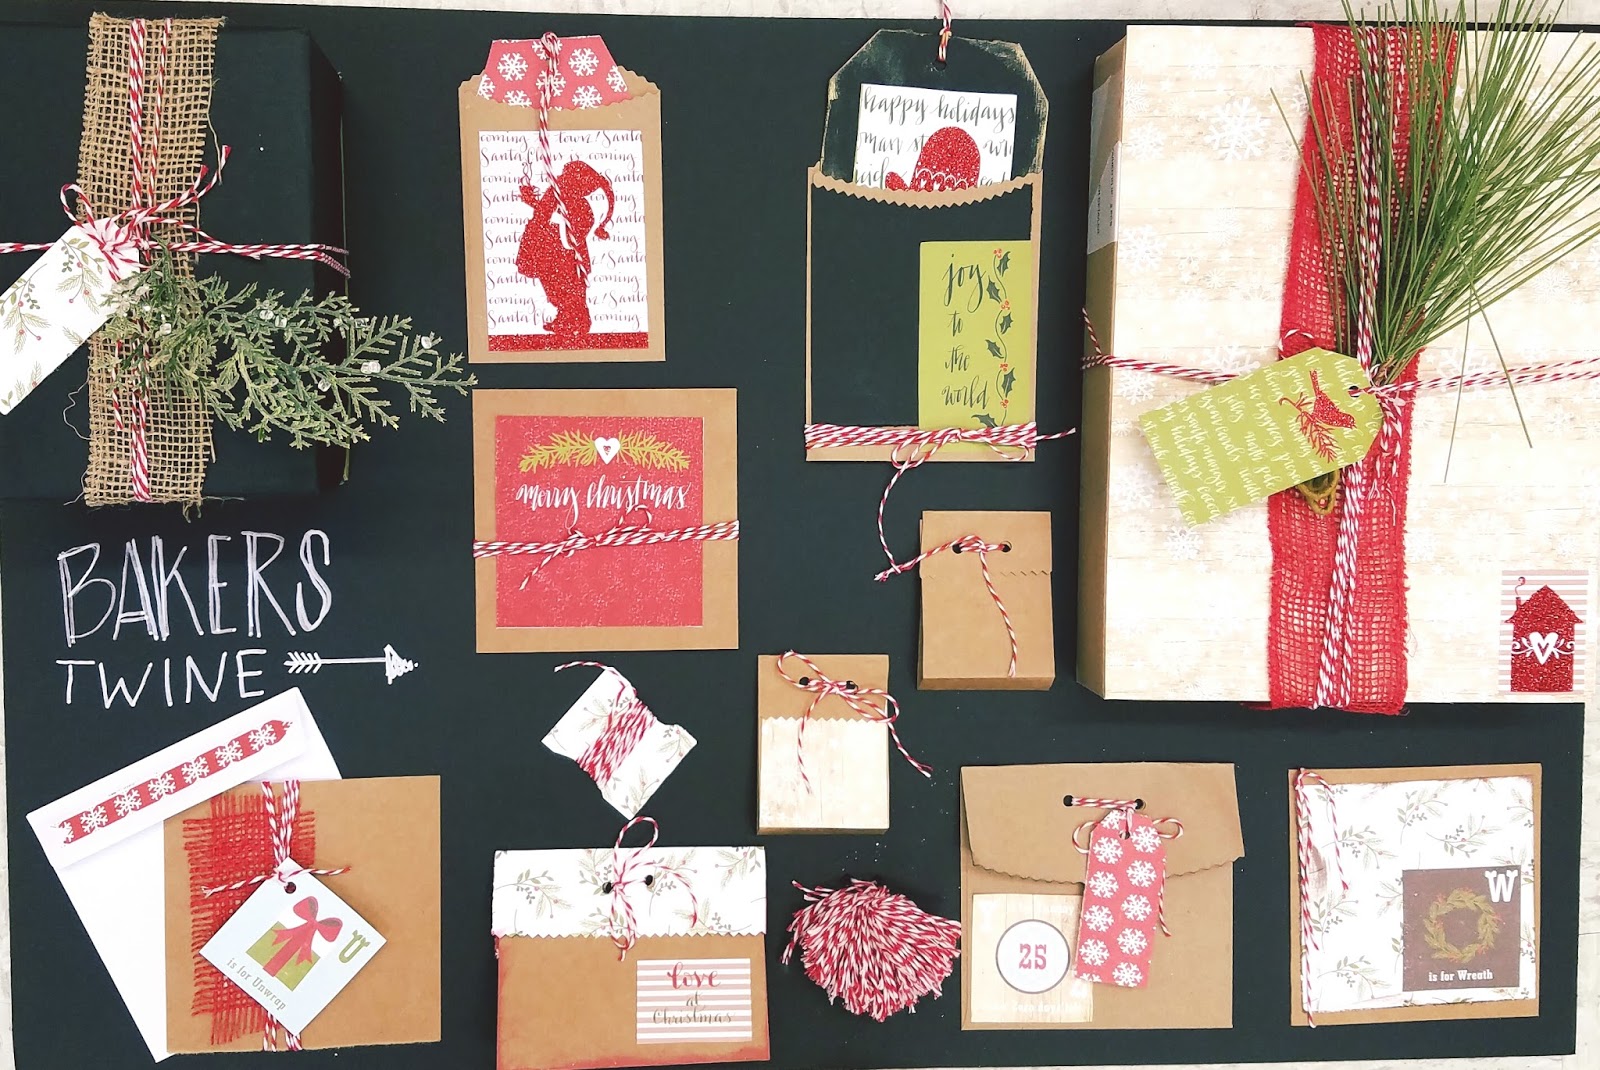
Our stores have STOCKED UP on that classic Red and White Baker's Twine; a staple
of holiday crafters everywhere.  It's time to roll up our sleeves and get.. packaging!
That's right!  What's some cute Christmas packing without that twisted candy cane-like twine looped around or tied in a dainty little bow at the top? 
 
 
Not only is it great for some simple sprucing up on packaging, but it can be used in scrapbooking, art journaling, planning, as well as fiber arts.  It is a fabric twine after all.   Which means it's great for adding that decorative element to a simple hand towel or placemat.  Sew it!  Crochet it!  The possibilities are endless.!  Today's project is an easy and fun holiday tote that's sure to "bring joy" wherever you go.
 
* * * * * * * * * * * * * * * * * * * * * * * * * * *
 
 
Here's what you'll need!
- Baker's Twine
- Cardstock
- Tote Bag
- Red Felt
- Scissors
- Needle
- Sewing Thread
- Fabric Glue
 
* * * * * * * * * * * * * * * * * * * * * * * * * * *
Let's get started!
 
 
First thing's first:  Tassels!  These are going to be the head-turning detail that is going on your tote bag.  What you do is wrap the bakers twine around the bas of your fingers about thirty times.  Cut the string connecting the spool and then slip the entire loop off your fingers.


Use a three inch length of twine to tie off the top of the loop.  Then, get a length of twine about 5 inches long and wrap both sides of your loop together.  You want to leave about half an inch of space from the top.  Cut the strings at the bottom of the loop.  You can make as many of these tassels as you need to line the bottom of your tote bag.  I made five.
 
 
Sew these babies on!  You can make as many as you want.  It could even look cool with tassels going up the sides of the tote too!
 
 
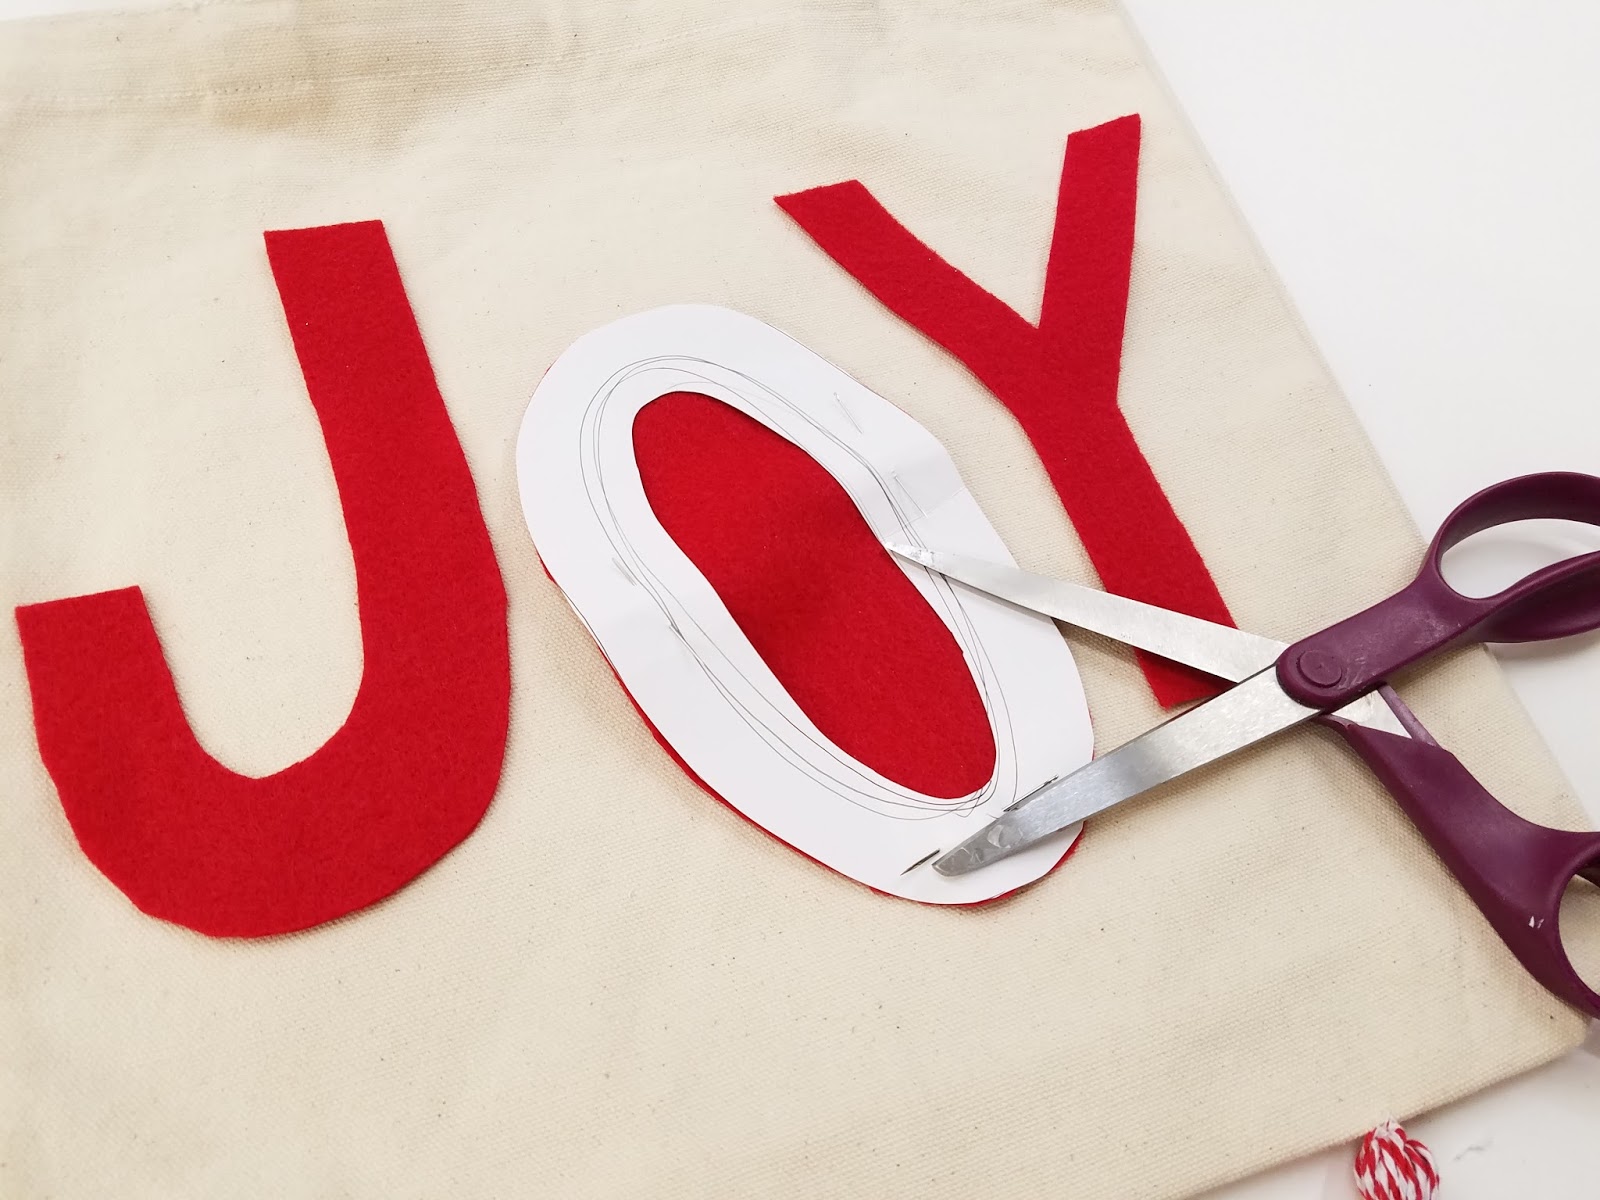
Next, make a few letter templates on your cardstock, cut them out and use them to cut out your felt letters.  The other option is just cutting out your letters free-hand!  I chose to cut out "JOY"  Other fun and cute Christmas-y words or quotes would be "Bag of Coal", "Noel", "Christmas Gifts", Merry", "Ho Ho Ho!"...  The list goes on.  Take your pick!
 
 
Next, you can use the baker's twine OR embroidery thread to make some embroidered embellishments on your letters or around your tote bag.  Here, I used a thinner baker's twine to add some basic embroidery stitches.  I did a Running Stitch on the 'J', French knots on the 'O' and a loose Satin Stitch on the 'Y'. 


There you have it!  This is such a fun and easy project that would work great with yarn as well!  The kids will love it, and teens would definitely love to join in!  Who doesn't want to make a DIY tote bag?  This is a very simple design that could be built upon.  Looking at it now, some mini pom poms, jingle bells, or even some extra decorative embroidery would be amazing, especially around the top of the bag and handles.  Make a baker's twine pom pom keychain to hang from the handles!
It's up to you!
 
Have fun and Happy Crafting!
Erika @ PC


Wednesday, September 21, 2016

Cute Pumpkin Vase

            Pumpkin Spice, Pumpkin Pie, Pumpkin Soup...  Everyone loves pumpkins!  They are a symbol of Fall and are there for simple and organic decor pieces that are perfect for said season.  Want to step up your pumpkin game further? The perfect time would be for Halloween, the time for that age-old tradition: CARVING JACK-O-LANTERNS!  A little bit of history on these spooky lanterns:  They were first used during the late 1600's to represent the Will 'o the Wisps that were seen floating around peat bogs at night.  Cool, huh?   Today, I'll show you how to make your very own Jack-o-Lantern! But, this one's going to be one that won't spoil and attract gnats and flies after two week...
                 
        
 + + + + + + + + + + + + + + + + + + + + + + + + + + + + +

Supplies Needed 
- Bubble Vase
-Tint spray paint in Mango
- Burlap sheet
- Fine Tip Montana Marker in Black
- Moss & Leaf pieces from a Fall Floral Spray
-Green Raffia
- Hot glue
-Scissors
-Firefly Lights
-Scrap piece of Cardboard


+ + + + + + + + + + + + + + + + + + + + + + + + + + + + + +

Let's get started!

            Step 1:  First thing's first:  Spray a few coats of the Mango tint onto your bubble vase.  I had already done that before I took the picture above.  This took about 3 to 4 coats.   Be sure to let each layer dry for a minute or two before spraying on the next one.

            Step 2: Use the Montana marker to draw a cute (or scary) Jack-o-Lantern face onto your vase.
Tip:  When coloring in a large area, use short strokes and be sure to lift your pen up between each stroke.  No back & forth strokes!  This is because the tint spray paint creates really thin layers that tend to peel off or scratch off.  You don't want a lumpy face!


           Step 3: Measure the top of your vase and cut a circle just a little bigger out of your scrap of cardboard.   I cut out a piece of burlap about an inch or so bigger than the cardboard piece.


          Step 4:  Hot glue the ends of your burlap onto the cardboard.  It doesn't have to be perfect!
Just make sure that there are no stray pieces sticking up.  If it's wrinkled and bumpy, it's totally fine.  It will actually help to add more texture and make it look more natural!


          Step 5: Next, roll up a piece of burlap and hot glue.  This will be the stem of your pumpkin.  You can cut the top to make it more even, or leave it as.  For my stem, it was a little too long, so I cut about an inch.  Hot glue your stem onto your burlap disc.


          Step 6: Start gluing some moss onto your pumpkin top.  this is where the uneven surface helps you out.  It will start looking amazing once you start doing this.  The moss is KEY to this project, because it adds the organic element.  


          Step 7: roll three pieces of raffia together until it starts to curl naturally.  Hot glue both ends to the base of of your burlap stem.  This will be the wilted vine. After this, you can glue a leaf or two onto it. 


 Add your firefly lights inside, top it off with it's cute little stem top and your new Halloween Jack-o-Lantern is done!  What's great about this Jack-o-Lantern is that it lasts for years!  All you have to do is replace the lights' batteries every once in a while.  It can also be a cute centerpiece for a Halloween party or even a great piece of decor for your mantel or coffee table.

Have fun and see you next week!
Erika @ PC

Tuesday, September 13, 2016

Halloween Apothecary Jar

     Are you ready for some frightful fun?  Halloween is next month, and it's about time for us crafters to get started on our spooky decor for the holiday.  Today, I have the perfect project lined up so that you will be ready for some ghoulish fun... A Halloween Apothecary Jar!  

^ ^ ^ ^ ^ ^ ^ ^ ^ ^ ^ ^ ^ ^ ^ ^ ^ ^ ^ ^ ^ ^
Let's get started!

You will need
Glass jar
Black Chalky Finish
Acrylic Paint (Assorted Colors) 
Brown Paint or Distress Ink
Brown or Black Paint Marker or Felt Pen
Scissors
Glue Gun
Cardstock


^ ^ ^ ^ ^ ^ ^ ^ ^ ^ ^ ^ ^ ^ ^ ^ ^ ^ ^ ^ ^ ^ 


Step 1: Take the top off your jar if it comes with one. Squirt some hot glue onto the rim of the jar and let it run down the sides.  Don't let it run too much!

Step 2(not pictured): After your glue is dry, paint the entire jar with the black chalky finish.  It doesn't have to be perfect!  Remember, it's old and distressed.  Unless you want to sand it later, let your dry brush to all the work.  Leave some pockets of glass visible.  Streaks?  Who cares! Also, keep in mind that you want to leave the glue gun "leaks" on the rim of your jar as clear as you can.

Step 3: Draw/write your label onto your cardstock and cut it out.  I recommend using a brown or black pen to stick to the vintage look. 


Step 4: Crumble up your label.  Yup.  Do it.  This will make it look more old and distressed because of the added texture.

 
Step 5: Now you want to unfold your label again and then weather your label with some brown paint.  Use a dry brush and very little paint.  Mod Podge this label onto your jar and let dry.

Step 6: Distress your jar even further by using your dry brush and some green paint to add more detail to the leaks. You can make it more dimensional by adding gold to your leaks.  I decided to streak just a little bit of the green and gold onto the rest of the jar as well.  It's okay if you go over the label a little bit too, as long as you stick to the borders.


 Step 7: This part is optional, but hot-gluing some moss onto the sides and top of your jar will add a really creepy and Witch-y look.
Also, if you have a cork that fits your jar, or if you're lucky and your jar already cam with one, you can make it look dingier by lightly staining it brown to make it darker.  After that, hot glue bits of moss onto it and glue it back onto your jar!


     All you Potterheads out there, make some noise!  Apothecary jars are that perfect mix of creepy, dark, mysterious, magical and fascinating.  What's cooler feeling like you have all the different ingredients around you to make a potion or conduct a spell?  Now, you can!  Create your own apothecary and potion jars this Halloween for some magical decor!  Then, you can invite friends and family to "Come sit for a spell.." (Ba dum TSS!)  

As always, have FUN and see you next week!
Erika @ PC

"BOO" Halloween Sign

September's here, which means FALL is right around the corner!  
It's time for pumpkin-spiced everything, cozy sweater weather and beautiful oranges, reds, golds and yellows.  Love those autumn colors!  
But right now, we're going to focus on Halloween, which means we'll get to play up those gorgeous shades of Onyx Black, Passion Purple, Pumpkin Orange and Chartreuse Green.  This fun palette is what makes this spooky and spunky "BOO" sign pop! 
Let's get crafting!

+ + + + + + + + + + + + + + + + + + + + + + + + + + + + + + + +

Supplies Needed
- 8" Wooden Letters
- Acrylic Paint in Various Colors
- Scrapbook Paper
- Halloween trimmings
-Acryling Paint Markers in Various Colors
- Ribbon
- Mod Podge (not pictured)
- Hot Glue Gun (not pictured)
- Scissors


+ + + + + + + + + + + + + + + + + + + + + + + + + + + + + + + + + + +

Step 1: Paint your letters with your chosen BASE coats.  I chose to paint my "B" purple and one of my "O"s in black.  I decided to leave my other "O" blank because I wanted to Mod Podge a sheet of scrapbook paper onto it.
 

Step 2. After your base coats are dry, you can start drawing your designs, pictures and patterns onto them!  I used a light green marker to draw some really cool spider webs onto my purple "B" and then took a dry natural bristle brush to distress the sides with some black paint.


 Here, I used a white paint marker to draw polka dots onto my second "O", dabbed some orange paint on with a dry brush, then, with the same dry bristle brush, distressed the sides with a bright Chartreuse green.


For anyone who is interested in Mod Podging paper onto their letters, all you have to do
 is brush a thick and even layer onto your letter and smooth the cardstock onto it.  Let dry.  After that, you can draw on details with an acrylic marker.  For example, I used a black Montana marker to doodle a haunted house onto the bright orange paper.


Step 3: After your letters are done, all you have to do is hot glue all your letters together and then embellish!  I took some spider web and and some decorative Halloween pieces to add more of that spooky and fun feel.  And it's done! 


 Enjoy making some awesome Halloween signs for your front door!
It's a great rainy-day activity for the family for any season.

Have fun, and Happy Crafting!  
See you next week!

Erika @ PC  

Wednesday, June 29, 2016

Fairy Garden Treasure Box

Happy Summer, Everyone!
The Summer Equinox has officially come around with an awesome display of the Strawberry Moon.
(Unfortunately, the cloudy sky made it difficult to see but at least we have something to look forward to in 2067.) 
It's the official time for reading!  Beach reads, Travel reads...  It's summer tradition!
My craft for this week is incorporating another big fad that we're bringing back this year: 
Fairy Gardens!
Whaaat?  Summer reading and Fairy Gardens?  
Not as crazy as you think.  See, I'm thinking fairies read too.  
I'm sure they have miniature books in their miniature shelves inside some oak tree library. 
So, they've got to be in on this summer reading thing too, right?  
Here's a peaceful little place I think a fairy can do just that. 


Here's what you'll need!
- Paper mache treasure box
-Acrylic Paint (not pictured)
- Plastic Succulent cuttings
- Moss 
- Floral Wire 
- Paper 
-Wood pieces
- Wire cutters
- Round-nosed pliers
-Hot glue gun


 I went ahead and painted the individual pieces of wood first to create my own furniture.  I also hot glued a loop of floral wire to create a chair backing.   You can use whatever colors you want for your furniture set.  While those were drying, I painted the treasure box in a Steel Grey (Delta Americana) and distressed it with Ceramcoat Metallic 14k Gold for some accents. 


I then took small squares of cardstock and stacked them to make mini book pages and hot glued them together.  After this, I cut a small piece of darker kraft paper cardstock to make a book cover.  After the treasure box was dry, I stuffed the bottom with Spanish moss and added some succulent cuttings in the corner to look like bushes, added a few drier pieces of moss to cover up the holes on the side and hot gued the furniture into the main carpet of moss.


That's all she wrote!  
This is a great summer project to do with the kids because it allows them to use their imagination to create their own world.  It's something fun that will definitely take their mind off sweltering summer heat, so save it for one of those rainy days when you need some enchantment.
Have fun and see you next week!
 
~ Erika @ PC ~

Tuesday, June 7, 2016

Mermaid Scale Frame

Get ready for a whole lot of purple!
Instead of the usual teal and pink combination that we usually associate with 
the mermaid, I'm putting another enchanting hue in the spotlight.
Over the past few months, mermaids have been EVERYWHERE.
(We even have a mermaid birthday party as this month's Pinspiration Station theme
at our Pearl City Store!)  So, what I've decided to make this week was a
 mermaid-themed gift that was simple to make, 
and REALLY affordable.  It's also a great summer project to do with your kids.
This project, my fellow crafters, is a Mermaid Scale Frame!


 ~~~~~~~~~~~~~~~~~~~~~~~~~~~~~~~~~~~~~~~~~~~~
 Let's get started!

***  Supplies Needed  ***
SPC Wooden Frame
4 inch Wooden Letter
Ceramcoat Acrylic Paint*
1 inch Flat Acrylic Paintbrush
Hot Glue Gun or Wood Glue
Paint Pen*

*use color(s) desired


 The colors I used for my frame were multiple shades of purple, teal and white.
The exact names are Passion Purple, Lavender, GP Purple, White and Coastal Waters.
(The last color mentioned was actually a Delta Americana acrylic paint, which basically just dries to
a Satin finish instead of matte like Ceramcoat.)
I made a scalloped, "scale" pattern starting from the bottom of my frame.  
Every time I painted the next layer of scales up, I made sure to overlap the previous one. 
This is where you can have fun with the colors.  Even if you have only four or five colors,
you can mix them up to make new shades or even add depth to your scales.  For example,
I blended a little of the dark GP Purple into the lighter Passion purple shade to get a nice shadow effect.  After letting your scales dry, you can even add some detail by dotting on dark paint over the light-colored scales and vice versa.  


I then painted the wooden letter and added pearl detailing using a BoBunny Pearl Pen.
This is basically a puffy paint for hard crafts and scrapbooking.  It works on wood, paper and clay
and dries to a pearlized finish.  After this, I glued the 'M' to the top right corner of my frame!
To personalize it even more, you can even write the name of your friend, mom, sister or whoever the 
receiver of this amazing gift is on your frame with a paint pen.  I used a black fine tip Montana marker.  That wraps up this project!  As always, don't hesitate to change it up and make it your own.
Have fun with it and enjoy!

See you all next week!
Erika @ PC

Tuesday, May 3, 2016

"Oh Whale..." Glass Box

"Whale" have I got an adorable project for everyone this week...
(*crickets chirping*)
Doodlebug has a great ocean-themed collection for us that is perfect for summer scrapbooking pages.  Bright colors, sea life, beach balls, palm trees and of course, mermaids!  But is all honesty, I do prefer the whales.  One, they are amazing creatures, and two, who could resist that vibrant color palette?  It went really well with the Ceramcoat Watermelon and Butter Yellow paints.
 
 
This is one of the glass top wooden boxes that all stores got in for Spring.  Because this particular design was a little more shallow than the others, I decided to use it as a shadow box instead of a storage container.  I Mod-Podged a piece of the whale paper onto the bottom of the box and then gave the inside of the box two coats of Butter Yellow Ceramcoat.  I then painted the outside with Watermelon.  After that dried, I used a dry bristle brush to distress the sides with a bit of Metallic 14K Gold Ceramcoat. 
I then wrote a cute pun right onto the whale paper as a finishing touch.
That's pretty much it for this project, but like always, experiment, make it your own and have fun!
 
Erika @ PC