Showing posts with label crafts. Show all posts

Monday, March 5, 2018

Mason Jar Football Centerpiece

It's almost that time!!
You guessed right!
Graduation season!!


Supplies:
mason jar
brown and yellow acrylic craft paint
paintbrush
white oil based DecoColor paint pen
green krinkle grass
foam oasis
football stickers
dowel rods / flat sticks
hot glue gun / hot glue sticks


First, paint your mason jar brown, and your dowel rods / sticks a bright yellow. Allow to dry. 

Place oasis inside jar, and stick dowel rods inside. Fill top with green krinkle shreds. 

Hot glue yellow sticks together to make the goal post. Stick into oasis. 
Using your oil based white marker, draw on the football strings on the front of your mason jar. 

Then stick on your football stickers from your matching set! If you feel like personalizing your centerpiece for your particular grad, print out their photo and glue it to one of the dowel rods! Have fun with it! 


Happy graduation season and have fun creating!!

Bethany and Dolly @Enchanted Lake

Monday, January 15, 2018

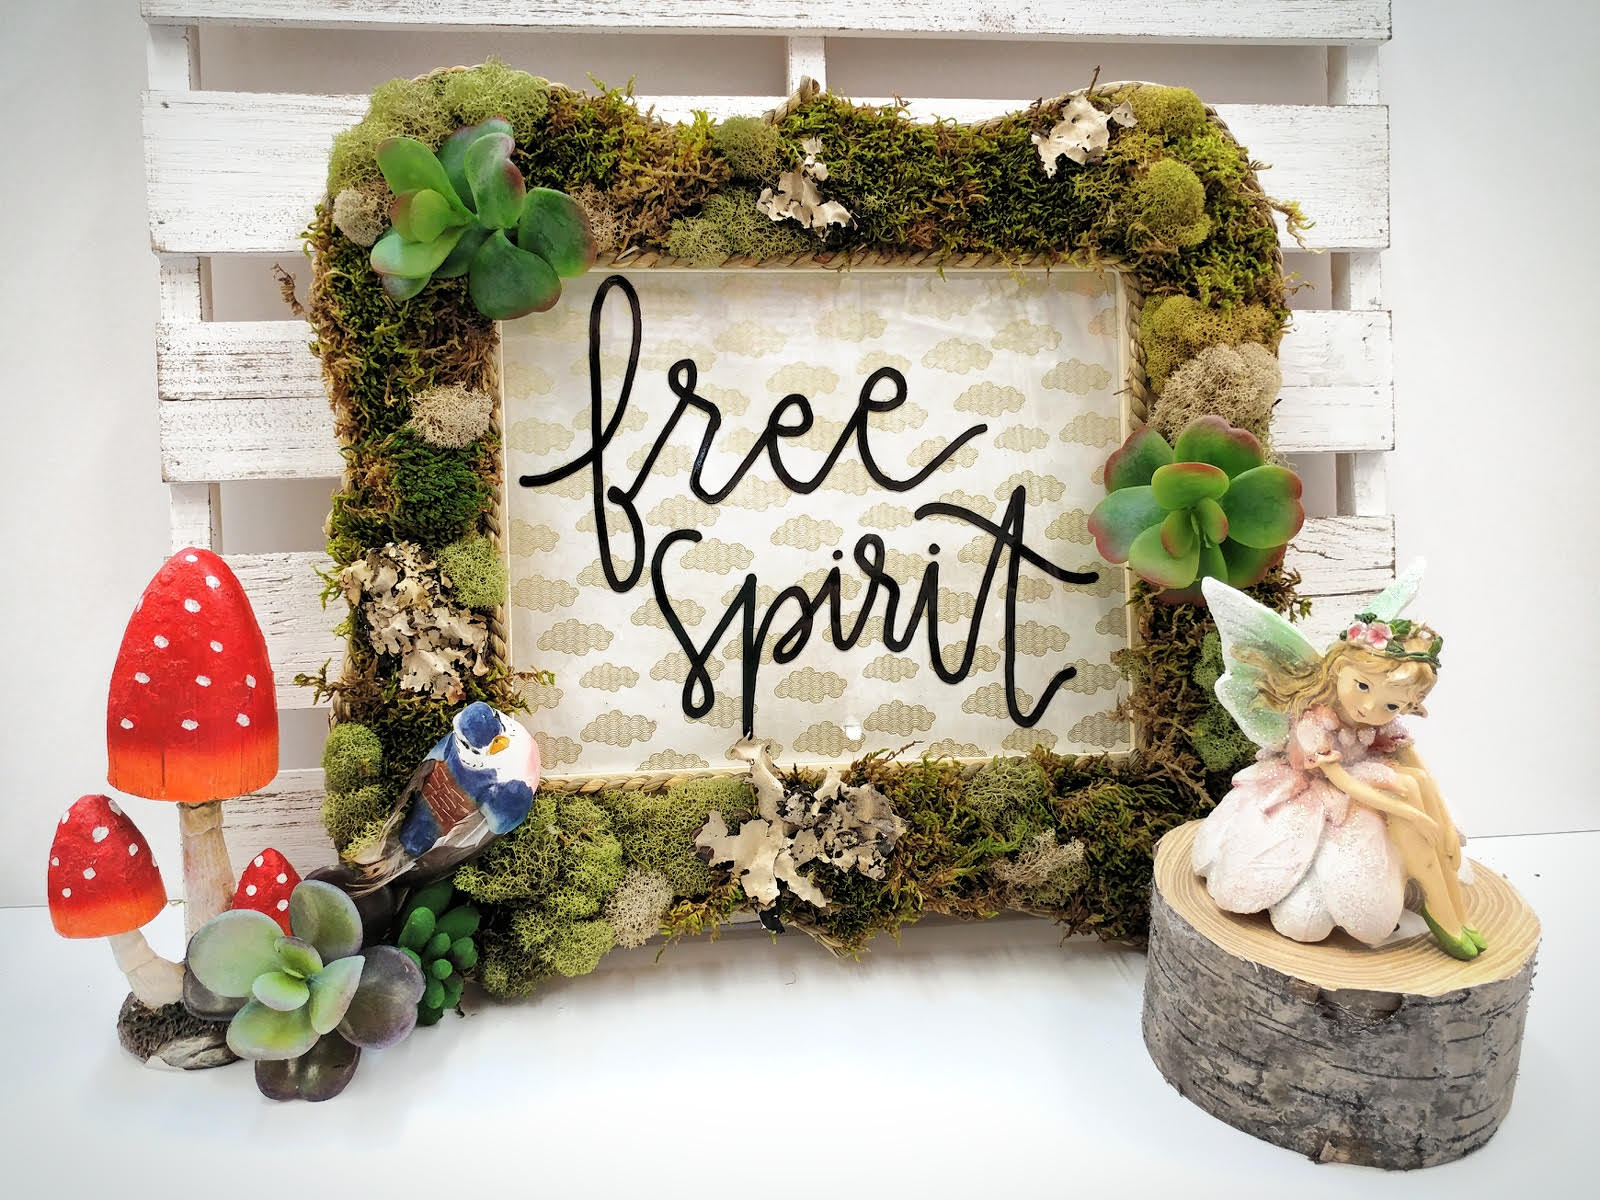
Moss Fairy Garden Frame

Happy New Year crafters!
I'm excited for spring and everything garden party! I was inspired by our collection of fairy garden decor trickling in and thought a frame would make the perfect addition!


Supplies:
wood frame
hot glue / hot glue gun
assorted moss
rope
oil based black paint pen
natural cardstock patterned paper
optional : mushrooms, succulents, fairies, butterflies, birds, sticks

First, cut your cardstock paper sheet to size, and place inside frame.

Trace your favorite quote or calligraphy phrase through the glass panel with the oil based marker. 
Allow to dry and then place in frame.

Then glue rope all around inside and outside edges, adding extra glue to the inner sides so that it is more secure.

Then glue in mosses and fun earthy natural accents! 


Ta Da!
All you would need is a cute little fountain and fairy scene to go with this cute frame!

Happy Spring!

Bethany @Enchanted Lake


Monday, January 1, 2018

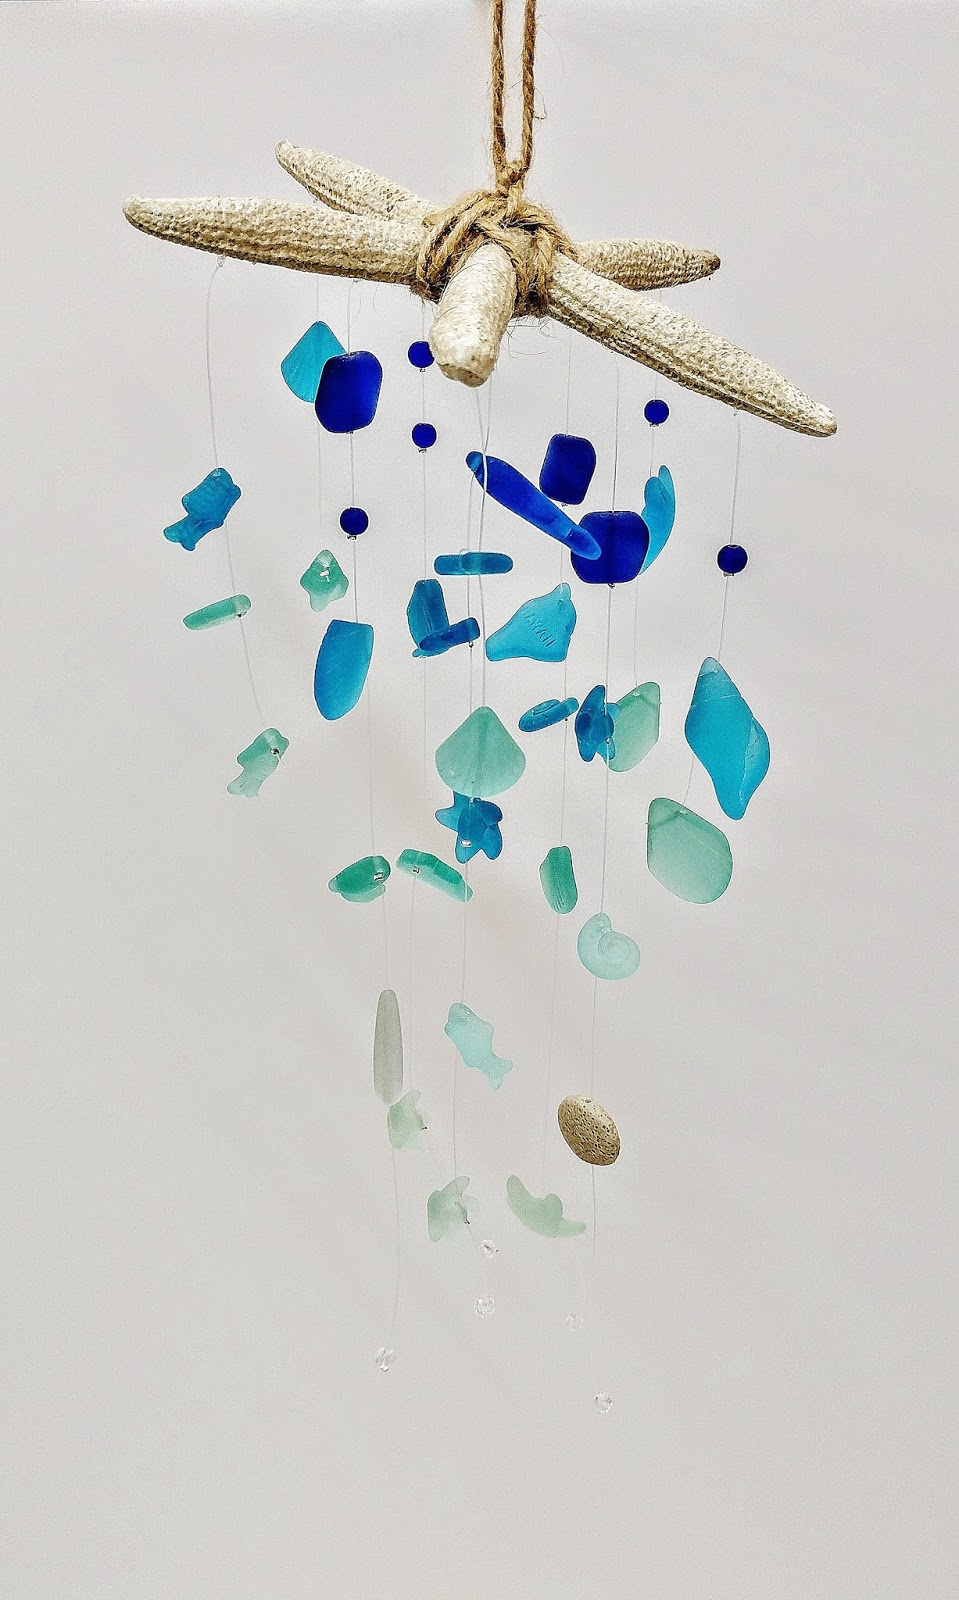
Sea Glass & Starfish Light Catcher

Happy Monday!
Let's have fun this week with some tropical sea glass mobiles! After all, Kailua is a beach town! I was inspired by the ombre sea glass colors available at HouseMart Ben Franklin and thought this mobile would be great for a baby's room or even outside the front door to greet guests as they enter the house!


Supplies:
Resin starfish (a real one would break)
clear beading plastic string or fishing line
scissors
small silver crimp beads
hand held crimper
assorted bags of sea glass
jute

First I tied 2 strings to each starfish leg that were 2 feet long. Then I started with the darkest blue of sea glass and put the bead through on to the string, and finished each bead off by placing a crimp bead, and using my hand held crimping pliers, flattened out said crimp bead so that the sea glass couldn't slide down the string! I kept stringing and crimping, going from dark to light. I put more beads on the center strings, and as I went down, I spaced out the beads further and further from each other. 

One of the sea glass strands came with a sand textured bead as well as small clear sparkling faceted beads, which I incorporated into the ends of the mobile so that they looked like water crystals. This was really fun to make, and using those crimp beads made a world of difference!

When I finished, I trimmed all the excess strings off the ends, and secured the center of the starfish with jute so that it could hang from the middle.

Have fun making your mobiles! Feel free to make different kinds using different beads, or even get crazy with it and use felt flowers! Have a great week!

Bethany @ Enchanted Lake


Monday, December 11, 2017

Cube Tree Ornament

Merry Christmas!
All of us at Ben Franklin are having so much fun decorating everything Christmas themed, from home decor, to ornaments, and from trees to centerpieces! Here is a quick tutorial on how to make a cube shaped "snow globe"!


Supplies: 
cube glass ornaments
powdered snow
E6000 glue
long pointed tweezers
festive red ribbon
oil based white paint marker
1 inch tall trees

optional: sea glass spray in 'ice' color


Spray very top of ornament with very light coating of 'ice' Sea Glass spray. This will make it look more frosted!
Use white oil based paint marker to make small dots over the top and the sides, to make it look like snow is falling!


Coat bottom of tiny tree with E6000 glue. Using tweezers, place tiny tree through the top of the ornament. 


 Add powdered snow!


Write 'Let it Snow' on the outside of your ornament with the oil based marker and adorn the top with your cute ribbon!
Ta Da!

Bethany @Enchanted Lake 

Monday, October 16, 2017

Rustic Wood Ornaments!

Hey everyone! 
Christmas is right around the corner, and I wanted to show you how easy and fun it is to use pretty holiday papers on wood slices and how you can further embellish them with shiny foil words, quotes, and patterns!


Supplies:
wood slices
matte Mod Podge
pretty holiday cardstock papers
scissors
pen / pencil
brush
assorted colors of Minc foil
Zig 2-way glue pen
assorted tree picks and sprays
hot glue / hot glue gun
laser wood cutout holiday silhouettes 


 First to make cute holiday backgrounds on your wood slices, trace circles around them onto the pretty papers, and then cut them out. Apply the matte Mod Podge with a brush to the wood slice and adhere cardstock circles to them.

In order to use the Zig 2-way glue pen and the Minc foil, write a word on the paper and allow to dry. (3-5 minutes) When the glue is fully dry it becomes tacky (as opposed to wet) so it can pull the foil from the sheet and become a pretty shiny design! 

If you want to get really fancy, you can add some laser cutout holiday images and use it as a dimensional accent to the top of your cardstock wood slice!


Once the glue is dry, apply foil (pretty side facing up) and press firmly with your finger until you see glued image showing through the foil. When you peel upwards, you'll find that your foil has transferred! Just in case the foil didn't full pull off the sheet, you can reapply the foil to any remaining tacky areas. Feel free to also reapply the glue pen and layer colors together! Have fun foiling!!  


Use your hot glue gun / hot glue to adhere silhouettes, or pieces of picks /  sprays to wood slices!
Ta Da!
So easy and so cute!!  

Have fun decorating!

Bethany @Enchanted Lake

Monday, October 9, 2017

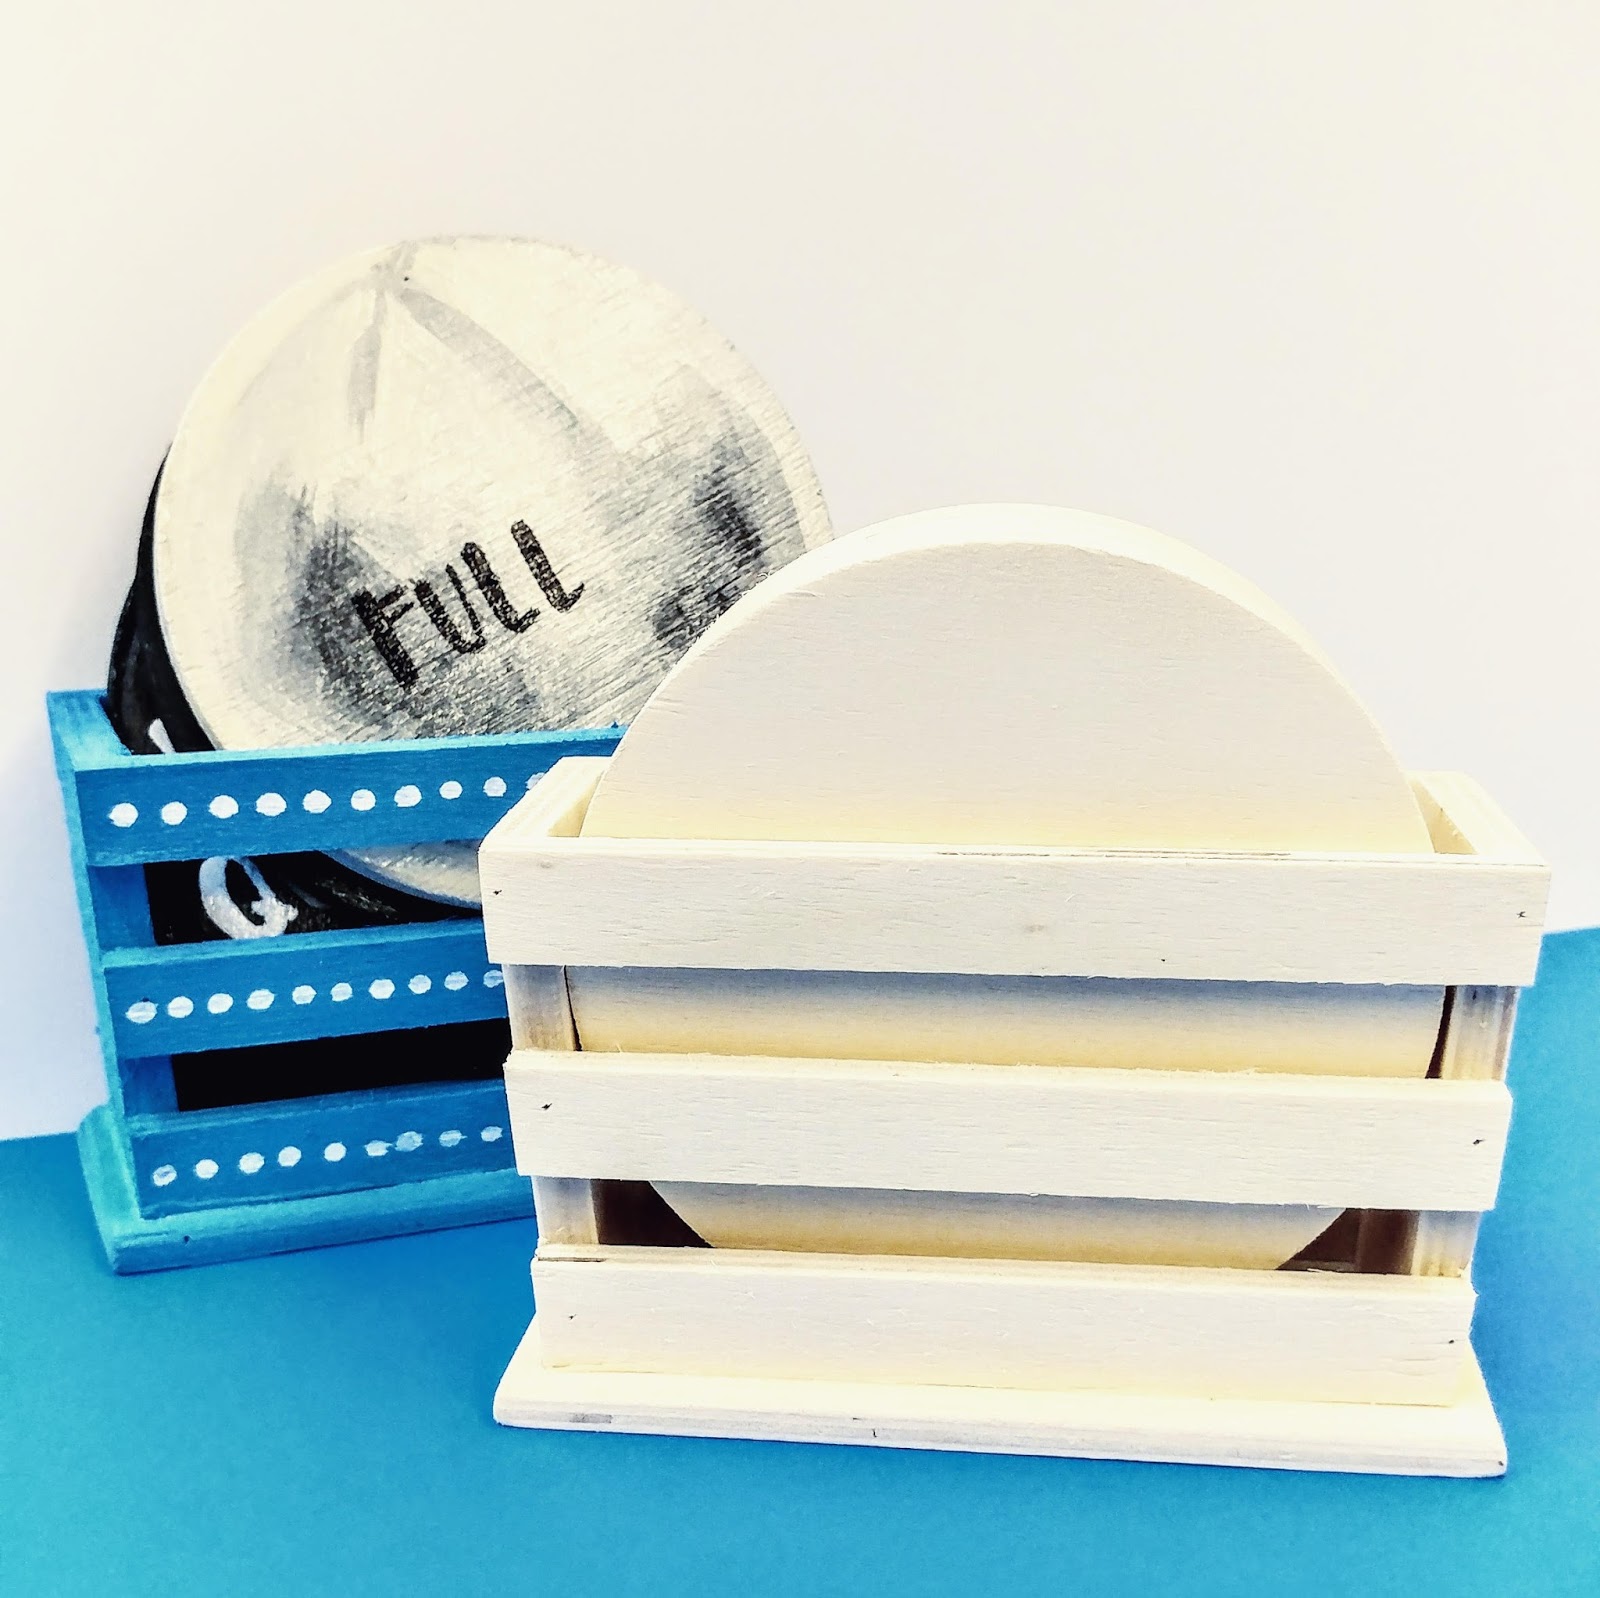
'Moon Phases' Coasters

Hey crafters!
HouseMart Ben Franklin has so many cute wood projects to decorate and customize!
As soon as I saw this coaster set, I knew I had to turn them into moon phases!


Supplies: 
wood coaster set
paintbrush
black, white, gray acrylic paints 
black or white water based acrylic fine tip paint pens
Krylon triple thick clear glaze spray


Paint your moon phases, or pretty designs of choice, then wait 10-20 minutes for paint to dry. Write your words with the paint pens, and then spray with your super glossy spray to protect the image from water damage! So cute and so fun to customize such practical house items! These would make great gifts as well! 

Happy Monday!

Bethany @Enchanted Lake 


Monday, October 2, 2017

Haunted Pumpkin Diorama!

Hey holiday DIY experts! 
Oh my goodness, I'm so obsessed with this new festive project! HouseMart Ben Franklin still has a few of these dense carve-able Styrofoam pumpkins left, and it occurred to me that I could build a scene inside of one!


Supplies:
Dense styrofoam pumpkin
xacto blade
acrylic paint in 2 colors of gray, black, red, butter yellow, and dark purple
1" wide nylon brush
cup of rinsing water / paper towel
black spray paint
BoBunny black Perler Pen
circular wood disc
sticks that look like a tree
Halloween resin miniatures (jack-o-lantern and gravestone)
copper wired firefly lights (3 AA batteries) 
hot glue / hot glue gun
assorted moss
paper cutout of a moon


First using your xacto blade, cut out an oval circle shape from your pumpkin. 


Next, paint your pumpkin outside dark gray. When dry, lightly and roughly brush the light gray over it. Spray paint the inside black and wait to dry.

Once dry, paint inside the pumpkin with acrylics a sky gradient with the colors blended from black, to purple, to red, to yellow all the way to the bottom, so that the inside of your pumpkin looks like a perfect background for a creepy sunset!

Wait to dry, and then set up wood disc and Firefly lights battery pack inside the base of your pumpkin. Hot glue in place. Allow for easy access to change batteries as necessary. 

Hot glue the paper moon to the inside ceiling of the pumpkin with a clear thread. Hot glue mosses and tree and resin miniatures in place. Again allow for easy battery changes. 


Hot glue the firefly lights every 3 bulbs to the inner circle of the pumpkin. This will create really nice front lighting. I avoided putting any lights too far back. 

Then I used the black BoBunny Perler Pen and made raised tiny black dots all the way around the opening of the pumpkin.


So super cute!
Hope everyone is having fun getting into the spirit of the season! Have a great week!

Bethany @Enchanted Lake

Monday, September 25, 2017

Spook-tacular Skull Wreath

Hi creative crafters! I'm so pumped for this autumn season and wanted to share with you guys a few spooky ideas to spruce up the house for Halloween! HouseMart Ben Franklin just got in a great selection of really cute and spooky Halloween items. Today's project is a skull wreath!


Supplies: 
1 roll of 1" wide black ribbon
1 roll of 1" wide white ribbon
12"-14" Styrofoam wreath 
hot glue / hot glue gun
bag of skulls 
1 black feather boa 

 First, wrap simultaneously the black and white ribbon around your Styrofoam wreath. Use hot glue to secure the beginning and the ending. You will wrap ribbon around 1/2 of the wreath.

 Next, wrap the feather boa around the other 1/2 of the wreath, hot gluing the two ends of the boa to the ribbon to secure it.

 Finally, hot glue your skulls in place! I placed mine off to the side for an asymmetrical feel to break up the symmetry of the stripes. I even used some of the net bag as a netting accent! And simple as that, it's ready for the front door! Have a spooky good time playing with Halloween Decor! 

Bethany @Enchanted Lake 

Monday, September 4, 2017

Mason Jar Mixed Media Decor

Happy Monday creative crafters! I've been having so much fun getting inspired to decorate mason jars, I thought I would share with you a few different techniques you can use to spruce up any jar or even vase or glass bowl! Today's project is mixed media! And all the supplies used can be found at any local House Mart Ben Franklin craft store!


Supplies:
vinyl
scissors
Montana Spray Paint in 2 different shades of pink
black oil based marker
black puffy paint / black BoBunny Perler pen

First, I cut out an oval from the vinyl sheet (contact paper) and placed it on the glass. Then I spray painted the whole thing in both colors of pink using the Montana brand.
Once the paint was dry, I peeled off the vinyl, outlined the oval with the black oil based marker, and squeezed out little dots around it using the puffy paint / BoBunny Perler pen!


Supplies:
crepe paper
matte Mod Podge
brush
holiday ribbon / red burlap ribbon
hot glue gun / hot glue sticks
Snow Tex textured paste
Holiday themed wood slice 

First coat entire surface with Mod Podge using your brush and wrap your crepe paper all the way around. I added an extra coat of Mod Podge on the outer surface to seal the paper and make it more translucent. Once dry (maybe 2 hours) hot glue your choice of holiday ribbon around the outside and hot glue your wood slice as your finishing touch (I used it to hide the ribbon ends.) Then I used a brush and Snow Tex paste to add more texture around the top of the jar. I even applied a little to the top of the wood slice and the top edges of the ribbons! This will take several hours to dry but it is oh so cute!


Supplies:
dark spray paint (I used dark purple)
Ceramcoat acrylic paint in the color lavender  
brush
Ceramcoat Crackle clear gel 

First paint the entire outer surface with the dark spray paint. Allow to fully dry, and then using your brush, apply the crackle gel to the entire outer surface with a generous coat and set aside to dry until tacky for 10-15 minutes. Then with a clean brush, "lay" strokes of lavender acrylic paint over the clear gel layer. As the paint dries, it will start to crackle! The thicker the paint strokes the wider the cracks! Be sure to only paint in one direction so your cracks will match each other.

Supplies:
sand colored stone spray
vinyl alphabet stickers
Design Master or Montana blue spray paint 

This process is very similar to the first process! Place your stickers on the glass, and then spray with first blue, and then your sandy stone spray! Because I sprayed the stone spray really really thickly, it had to dry for a few hours before I could remove the stickers without ripping or smudging. But how cool right? What a cute place to put your found seashells!


Supplies:
BoBunny Perler Pens in multiple colors 

This process uses minimal supplies, but definitely takes the most focus and patience! I started at the very top with dots, and then every third dot made a teardrop. Then every other teardrop I made a half circle. Use your shapes as a guide as well as a design! Keep building and adding detail. This process also takes about 1-2 hours to fully dry. 


So those are just a few mason jar ideas you can play and experiment with. Have fun and happy crafting!!

Bethany @EnchantedLake

Monday, May 29, 2017

Gel Glass Stain Feathers & Teacups


Hello Magic Monday crafters!
Today I'm experimenting with Glass Stain, and all the ways to combine images with typography! I was curious about combining a very flat matte sea glass spray with the glossy shine of the gel stain, and I have to say, I think they make a perfect pair! I also thought it could be fun to throw some glitter or textural elements into the gel stain as it was hardening and it looks so amazing!!


SUPPLIES:
glass vase with at least one flat side
assorted colors of Glass Stain
Glain Stain - black leading (don't worry, it's not really lead based!) 
glitter, foamie balls, confetti, micro-beads, or any other fun textural elements! 
Sea Glass Spray in the color "Ice"
DecoColor oil based marker pen in the color "black" 
twinkle firefly lights!


In order to draw complex pictures and designs you can use a coloring page and tape it to the inside of your glass vase and trace the lines using your black leading!


Next wait for you leading to harden for about 45 minutes!


Then squeeze your gel Glass Stain into your shapes! This gel is self leveling, so make sure the images you draw are closed shapes, as the leading borders will act like walls that keep the gel from running everywhere. Then throw some of that fun shiny glitter in there! I sprinkled just a pinch of it so that I could still see the color of the gel stain. This gel will need to completely cure overnight before it is hard enough to not get scratched. 


You can then add your lettering skills with the black oil based marker pen, and write straight on to the glass! 


On my "cup of tea" vase, I sprayed the sea glass spray as a base layer first before applying the gel stain to give it that etched frosty look. 

Have fun with your Glass Stain vases! And don't forget those twinkle lights to really make them pop!

Love, Bethany @Enchanted Lake 


Monday, May 22, 2017

Stenciled Succulent Love


Hey all!
Happy Monday! 
I am so in love with succulents, tiny plants, and little garden scenes and wanted to share with you how you can turn your love for succulents into a cute home decor wall hanging!

SUPPLIES:
succulent stencil
foam on a stick
acrylic/fabric paints in lavender, azure, mint, leaf green, lime
embroidery hoop
white leaf patterned fabric 
pinking shears or sharp scissors
hot glue
jute/twine


First thing's first: Take your fabric and tightly secure it into your embroidery hoop. Pull taught on all sides, and trim excess fabric with either your pinking shears or sharp scissors leaving a 1-2 inch border around the hoop.


Using your foam on a stick, dip lightly into your acrylic/fabric paint colors. Use a DABBING motion, not a brushing motion. If there is too much paint in the foam it may get blobby so test your technique on a scratch piece of fabric or paper! Hold your stencil very still, and dip your foamy stick into the other colors on your palette without cleaning your foamie in between dips. This technique will create a really smooth blended look. 

I focused on more blue in the center, and lavender on the outer tips of the leaves.

Then cut strips of jute/twine and hot glue them into words like 
fun,
relax,
summer,
and of course Succa!  aka succulent! 

SO MUCH CUTENESS!

Check out our blog every weekday for a new project!

Love, Bethany @Enchanted Lake

Saturday, May 20, 2017

We-R-Memory Keepers Tab Punch Board

Hey there, planner folks and scrapbooking lovers!
We just got in an awesome new punch board from the famous We-r-Memory line. 
They just keep on coming up with all these new boards, it's insane!
This new board is nice and compact, and is light blue and white just like their
popular Alpha punch boards.


Meet the new Tab Punch board!  This little guy's purpose is a simple one, and it is also
fairly simple to use, but there is so much you can do with it.  The tabs can be used to make dividers for planners, mini file folders, and even recipe cards!  Today, I will be showing you how to make mini folders with one of the papers from the incredibly adorable Simple Stories Emoji Love Scrapbook paper collection!  I cut out a 8x5 piece and then folded it, making one side of the fold about a 1/2 inch longer than the other.  This is so that there is room for the tab to pop out.

 
First, this little transparent blue bit, that you see right here can actually be moved around. Right now, it is lined up with the CORNER ROUNDER, which basically helps line the paper up to the puncher right above it so that, when punched, it creates a cute rounder edge on your page!


Next, the TAB!  Take the blue bit and move it over to the SIDE TAB notch.  This is what will make the puncher create the wavy sides of the tab.

 
Ta-DAAA!
 

To make the other side of the tab, flip the paper over.  There are Small, Medium and Large sizes that you can choose from.  All you have to do is line up the side that you already punched out to the indentation of whatever size you want on the board.  Here, I have it lined up to Medium.  Then, press that punch and you have your full tab! 


Lastly, time to get rid of that extra piece of paper that's just hanging out next to that tab!
Lift up the blue magnetic arm, take that iconic We-r-Memory cutting blade out of its little home and slide that sucker right over the piece of paper to cut!


Here is the finished little folder!  These would be so cute as inserts for planners as well as just little organizers for school, work or at home!  Here are examples of how you an decorate your little folders using the scrapbook papers that we carry at our stores.  Pictured are the Kaisercraft Island Escape collection and Amy Tangerine's On A Whim collection.  (I LOOOVE the gold letter "thickers" and tropical/summery clear stickers in Amy's collection!)


Have fun, and stay connected for more We-R-Memory Keepers news
and updates!

Erika @ PC