Monday, March 30, 2015

How to make a graduation tassel two different ways (Part one)

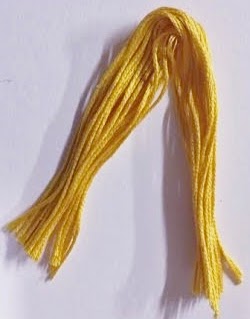
Here I will show you how to make a graduation tassel two different ways. This will be a Part 1 and Part 2 series.  You can use these tassels for graduation center pieces, party favors and much more.
Lets get started.

Supplies:
DMC Floss (color of your choice)
Scissors

Step One:
Get your DMC floss. You can take off the paper wrapped around the DMC floss (optional) or leave the paper on.

Cut off about 10-12 inches


 Cut DMC floss in half.


 Step Two:
Get one half of the DMC floss and find the center.

Cut your 10-12inch string in half and place it through the middle.


Tie a knot to secure the middle. Once the middle is secured tie a knot where the string adjoins towards the top to create a loop.


Step Three:
Take the other half of the string and start wrapping it around the tassel just below the knot. You can wrap it around 4 to 5 times. Tie a knot to secure the ends.


You can trim off the excess string or let it blend in with the tassel.  You can trim the bottom of the tassel if it's uneven.

And your tassel is complete.


Stay tuned for next week for part two.
Have a Craftastic Day!
Julie @ Enchanted Lakes


Sunday, March 29, 2015

Easter Crafts at Pearl City!


Claudia & Charlie joined the fun on Saturday at our Easter Crafting event!  If you missed the event, it's not to late....we have the project sheets and all the supplies for you.  Have some fun & create with your family and friends at your Easter event.  As you can see from Leasi's smile, the fun was not limited to Keiki. Leasi stopped by to make a few projects too!
 
There's always something crafty going on at Pearl City!  Happy Easter!  Happy Spring!
gloria @ Pearl City


Thursday, March 26, 2015

Liquitex Photo Transfer

Hi there! Photo transfer projects are very popular right now, so today I will show you how it's done so you can jump on this trend!

You will need the following supplies:
-Any size canvas, depending on the size of photo to be transferred
-Liquitex Gloss Medium and Varnish (can also use Liquitex Gloss Gel, Heavy Gloss Gel or Super Heavy Gloss Gel)
-Acrylic Paint
-Paint brushes
-A photo or magazine cut out (it will be destroyed so I don't recommend using originals unless you have duplicates)

First, place your photo on a nonstick surface.  I used a spare piece of glass. Brush the Liquitex gloss medium over your photo to adhere it. Apply several coats so you have a thick layer of medium.  Set it aside to dry.


While your gloss medium is drying, paint your canvas with a background that will match your photo. Keep in mind the photo transfer will be transparent so your background will show through.  For my project, I painted the canvas a solid color then painted a large peony on one side, leaving space for my photo transfer.


Set your canvas aside and go back to your photo.  When it is dry it will be completely transparent, not cloudy.  Carefully peel off your photo from the nonstick surface and place it in a bowl of water.  Let it soak for at least 10 minutes.


After it is completely saturated, take it out of the water.  Flip it over and gently rub off the paper.  You can use your fingers or a wet sponge.  Be careful so you don't rip the layer of gloss medium as it is very fragile.  Once all the paper is removed you will be left with your transfer.


Let the water dry or gently wipe dry with a paper towel.  Flip it back over so the side you just rubbed off the paper from is underneath.  Adhere your transfer to your canvas by placing it down where you want it then brushing over with more Liquitex Gloss Medium and Varnish.  I recommend using your fingers to smooth down the edges and any bubbles that might form.  Continue to brush the gloss medium over the entire surface.  Let it dry then enjoy your new masterpiece!


This project is perfect for a personalized gift or your own unique decoration.  The transfer can also be applied to wood for a more rustic, shabby chic look.


As a side note, our stores are hiring so if you're interested in working with crafts all day long then apply today!  See our website, http://hmstores.com/careers/ for more information.

Until next time, happy crafting!

Rachel @ Mapunapuna


Wednesday, March 25, 2015

Crankin' Out Crafts Episode 412 - Decorating Driftwood & More Samples

New driftwood pieces came in to our stores this spring. Check out how to embellish them with moss, seashells, and succulents.  

Decorating Driftwood

See the different ways you can decorate driftwood here: Crankin' Out Crafts Episode 412 - Decorating Driftwood

Supplies:
driftwood
hot glue gun & gluesticks
Super Moss
succulents
seashells 
starfish 

Keep watching the video for more unique driftwood samples!

Monday, March 23, 2015

Crankin' Out Crafts Episode 411 - Distressing Driftwood

Watch as JFlo demonstrates how to distress wood with acrylic paint and a stamp pad.  

Distress wood with paint or a stamp pad


Supplies:
driftwood or wood piece
acrylic paint (we used Americana Satin Paint)
raised stamp pad (we used Distress Ink)
flat paintbrush

Check out our next episode coming up this week as we teach you how to decorate driftwood pieces with a variety of embellishments.

New Class offered at Enchanted Lakes Ben Franklin Crafts

Hey Everyone,

We have a new class here at Enchanted Lakes Ben Franklin Crafts.  It's called Dreamin In Mini and the instructors are Kim and Kerstin.  If you always wanted to learn about polymer clay and miniatures, this class is for you.  Come on by Enchanted Lakes and sign up.  Their class will be held on Sunday, March 29 from 12pm to 1:30pm. This will be a series of 4 sessions and it'll be $25 per session. Take a look below for more information.


Have a Craftastic Day!
Julie @ Enchanted Lakes

Thursday, March 19, 2015

Swing Into Spring with this Fun Wreath

Spring is in the air with this cute wreath! It's fun to make and will really get you into the season.


You will need the following supplies:
- 12" Styrofoam wreath
- 1 skein Nohea eyelash yarn in Lime Green
- a bush of spring flowers
- small chalkboard
- hot glue gun


First wrap the Styrofoam wreath with the Nohea yarn.  Glue down the start of the yarn and apply strips of glue while you go.


Once the entire wreath is wrapped glue the end of the yarn down.  Pick off the flowers from your bunch and glue on one side of the wreath.


Using a piece of chalk or  chalk pen, write a cute spring saying on the chalkboard.  Glue the chalkboard on the side diagonal from your flowers.  Glue a few small flowers to the chalkboard frame.


There you have it! Now your wreath is ready to be hung.  If you want an Easter wreath, instead of flowers you can glue on mini Easter eggs! Have fun making this wreath your own.

Until next time, happy crafting!
Rachel @ Mapunapuna


MARCH MADNESS AT PEARL CITY

March Madness is Leis at Pearl City!  Lei workshops!  Lei demonstrations!
 
Mondays:  10am-12pm  Leis from our Lei Books
                  4-5pm  Straw Leis
Tuesdays:  10am-12pm  Leis from our Lei Books
Wednesdays:  10-11am  EZ Ribbon Lei
                       4 - 6pm  Crochet Leis
Thursdays:  10:30am-1pm   Deluxe Ribbon Leis with Kalo
                   10am-12pm  Leis from our Lei Books
Fridays:  10am-12pm  Money Folding
                                  Money Rose ($3 workshop fee)
                                  *Bring crisp $$ bills
               4-5pm  Straw Leis
Saturdays:  Meet & Greet with Locker Vendors
                  March 21  10am-12pm  King's Woodcrafts
Sundays:  10-11am & 2-3pm  Straw Leis

*$8 Lei Workshop Fee includes grossgrain ribbon & straw
   Must purchase yarns

One of the easiest and fastest leis to make is the One Straw Lei!  Check with any associate and they will be happy to demonstrate one!

Friday, March 13, 2015

Crankin' Out Crafts Episode 410 - We R Pinwheel Punchboard: Double Pinwheel

Learn how to create a 2-layered Pinwheel with the Pinwheel Punchboard Tool by We R Memory Keepers.

Double Pinwheel

Catch our latest episode on YouTube: Crankin' Out Crafts Episode 410 - We R Pinwheel Punchboard: Double Pinwheel

Supplies:
We R Memory Keepers Pinwheel Punchboard
2-qty. 6x6-in. double-sided cardstock
We R Memory Keepers Attachment Kit (includes pin, cap, straw attachment & decorative straw)

Thanks for joining us this week for our Pinwheel Punchboard segments. We'll be back again soon for more quick 'n easy projects for you on Crankin' Out Crafts!

Thursday, March 12, 2015

Craft Classes at Mapunapuna!

We are offering a lot of great classes this month at our Mapunapuna location and it's not too late to sign up! Come check them out!


Knitting with Flo 
Come and join Flo as she teaches you the basics of knitting if you are a beginner.  All levels are welcome and advanced patterns are learned.
Date:  Tuesday, March 24 
Time:  9:30am - 11:30am
Fee: $10.00 per session


Bling Your Thing with Eileen Tokita 
Join the master crafter Eileen Tokita for a spectacular class.  She teaches you how to create dazzling designs on almost anything, using Swarovski Flatback Crystals.  Eileen has been “Blinging” things for over 20 years and will show you her trade secret and share helpful tips.   
Date: Saturday, March 21
Demo at 12noon 
Time: 1pm - 5pm
Fee:  $35.00 plus cost of kit.
 

Jewelry Making…Yes You Can!

Costume jewelry construction.  Come in and join Stephanie to learn how to use beads and or accents of your choice coupled with your imagination to create jewelry you will love to wear or give as a gift.   
Date:  Saturday, March 21
Time:  11:30am – 12:30pm
Fee    $10.00


Scrapbooking with Kelli
Card class
Make 8 greeting cards.  For all levels of crafters!  Everything is pre-cut, see supply list for class supplies. Theme: For the Girls!
Date: Friday, March 20
Time: 5:00pm-6:30pm
Fee: $15.00


Project Class 
Get comfortable with using your WeR gift bag punch board to make a variety of treat bags. See supply list for class supplies. Theme: For the Girls!
Date: Tuesday, March 24
Time: 5:00pm-6:30pm
Fee: $20.00

Scrapbooking Layout Class
Create fun scrapbook pages + a simple project with your scraps!  See supply list for class supplies.  Theme: For the Girls!
Date: Friday, March 27
Time: 5:00-6:30pm
Fee: $20.00

Onestroke Flowers - with Frank Dumlao   
Basic knowledge of one stroke painting needed for flower bouquet. Basic knowledge of one stroke painting needed for all flower classes. These classes are for the One Stroke painter to enrich technique and style. Painting using the onestroke technique. This is an intermediate class.  Adults only please.
Date:  Sunday, March 15
Time: 2 – 4pm
Fee:  $15.00 per session   (Student provide own supplies)


Onestroke Landscape with Frank Dumlao   
This class is open to interested students who want to paint for fun a landscape in one session. Open project open to all levels. Adults only please.
Date:  Sunday, March 29
Time: 2 – 4pm
Fee:  $15.00 per session   (Student provide own supplies)

Miniatures in Clay
Use “Fimo”and “Sculpey” brand polymer clay to mold and form miniature objects for doll houses, room boxes, wood shelves, etc.  These objects include but are not limited to fruits, vegetables, candies, etc.  All ages welcome.
Date: Wednesday, March 18
Demo @ 3:00pm
Time: 4:00pm-5:30pm
Fee: $25

Date: Sunday, March 22
Demo @ 12:00pm
Time: 1:00pm-2:30pm
Fee: $25
                                     
Lei Making with Bobbi
Join Bobbi as she shows you how to make the kumihimo yarn and rattail lei.  You do not have to know how to use the kumihimo disk; she will help you get started as well as share some hints and tips! See supply list for required materials.
Date: Sunday, March 15
Time: 10:30am-12:00pm
Date: Friday, March 20
Time: 6:00pm-7:30pm
Fee: $5

Have fun learning how to make a 4 straw flat lei.  It’s easier than it looks and Bobbi will help you get started on making this fun lei.  See supply list for required materials.
Date: Sunday, March 29
Time: 10:30am-12:00pm
Fee: $5

Classes are available at all locations so please check our website, http://www.benfranklinhawaii.com, for more details! 

Until next time, happy crafting!
Rachel @ Mapunapuna