Monday, May 30, 2016

THANK U Cards

for Your Guest after the Graduation Party


I have a friend who always writes thank you cards for everything. She has her kids write thank you cards too for all their birthday presents, Christmas gifts, and everything in between. Since it's graduation season, we thought it'd be nice to set you guys up with and send those thank you cards out this year! Since you'll have to make quite a few (ok, a lot), it'll be super easy and quick.

Here's what you're going to need...
  • 5"x 7" Cards
  • 5"x 7" Envelopes
  • Card Stock - 2 Colors/Prints
  • 1/4" Double Sided Tape
  • Fiskars Paper Trimmer
  • We R - ABC Punch Board (Or visit us in store for the Accucut Machine)
  • Alphabet Stamps (Sizix's Lynda Kanase - Alphabet Stamp Set, $12.99, as seen)
  • Clear Acrylic Stamp Block
  • Any Graduation Stamp
  • Black, Gold or Silver Metallic Stamp Pad
**If you want to pre-print out your special greeting inside the card, do so before decorating.**

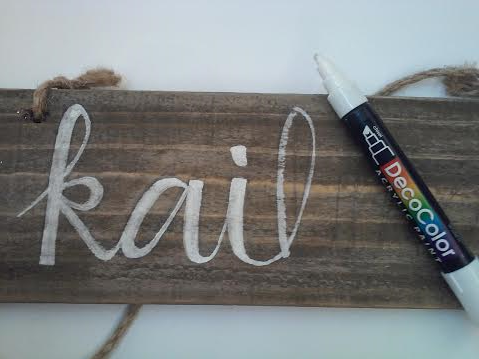
All you have to do is trim you card stock down (with your paper trimmer) to 6.5"x 4.5" and center it on the front of the blank card with your double sided tape. Then with your second color cardstock and alphabet punch board, make a bunch of U's for every card and with your double sided tape, place it in the bottom right corner. If you haven't picked up a alphabet punch board yet, each Ben Franklin's Craft has an Accucut Machine with some preselected fonts and sizes that you can use. It is free to use, as long as the paper was purchased within a Ben Franklin's Craft store. Now go ahead and set up your alphabet stamp to spell out "THANK', but backwards onto your clear acrylic stamping block. Stamp it onto your desired color ink pad and place your stamp at the top right of your U. Continue decorating with your other graduation stamps on the front, or if you'd like, on the inside too.

And what's nice about this stamp set from Sizix's is that it also comes with a "To" and "From" stamp. Perfect for the outside of your envelope to mail!

If you'd like to add a more personalized touch, pick up an envelope punch board by WE R. Choose an extra 12"x 12" color cardstock since the dimensions required for a 5"x 7" card is a 9.5"x 9.5".

Thank you for Crafting with KrazyGoo!


Felt Succulents in Painted Pots


Hey everyone! Today's project is just too adorable, and involves not only making your own succulent plant, but decorating the pot it sits in!


Supplies:
1 sheet of olive green felt (1 per plant)
scissors
Hot glue gun/sticks
pen or pencil for tracing
1 piece of thick cardstock or thin chipboard (as tracing template)
terra cotta pots 3in - 4in diameter
assorted colors of Americana acrylic paint 
assorted paintbrush, but 1/2 in wide is easiest
cup of water and paper towel
terra cotta pot spray clear sealer by Design Master

Optional Accents:
BoBunny Perler Pen (white or black)
black cardstock cut into circle or oval
extra fine tip white paint pen (for black cardstock)
assorted colors of paint pens by Montana Marker or DecoColor
washi tape


First step is to paint the pots. You can either paint the whole pot one color or paint stripes on the sides. I painted most of the inside of the pot as well. After you're done clean in the brush in your cup of water and dry with your paper towel.
 Set the pots aside to dry for 30 mins, and start with your felt templates.
 
There are two different templates I made: one in the shape of a circular sun with a second smaller center layer, and the other like a squiggly line.
I found the squiggly line template on Pinterest under : Felt Rose Pattern


Then if you're doing this with a group of friends or kids, trace this shape on to your thick card stock paper or thin chipboard, and cut out your own templates! 

Trace these on to your felt sheets. Each large shape should be traced 3 times for succulent fullness, and the smaller shape traced maybe once or twice. Then hot glue the ends together! The squiggly line will come together on the underside of each point. Each arch will touch at the bottom like a fortune cookie. For the pointed circular template, glue it in a spiral on itself either flattened in the middle or rolled. And the little ones go in the middle.


---


Now back to the painted pot, you can go wild in decorating! In my black and white sample, I used a white extra fine tip Montana Marker and just drew straight on to the side.  


So cute! For the other smaller pots, I drew on the sides with other assorted paint pens (regular markers won't be opaque enough) and my friend and coworker Brandon, drew out the "Dream" portion on a black card stock oval with a white fine tip paint pen. I then just hot glued it to the side of the pot. For the black dots I used the BoBunny Perler Pen to get those perfect pearl shapes. Those take about an hour of dry time.

So fancy! When you're all done don't forget to spray it down with your sealer to protect it!

These are great for pretty much everywhere!


Bethany @ Enchanted Lake

Saturday, May 21, 2016

Project: Congratulations Sign
       
                                                          
Materials used:
-           We are Memory Alphabet Punch board
-           Any color Cardstock

-           Darcie Metallic Cord
-           1/8 Hole punch
-          2 Mylar Balloons to hold the sign on


Procedure:
-          The alphabet punch comes with complete instruction book. All you have to do is follow the book.
-          It also cuts the cardstock to the correct size. So no need any other cutter.
-          After you cut out all you letter, you can paste to a board or hang on cord.  I used the 1/8 Hole Punch to make the two holes at the top of each letter.
-          I used the Darcie metallic cord to string the letter together.
I took two Mylar balloon and put into the post of the row. To hang the sign.

I know you can do so much with this new punch. It so much fun and so easy to do,

Monday, May 16, 2016

For Classy Pet's Only, Or Who Want to Be


In correspondence with national pet month.
This week we decided to dress up our pet's with this quick and easy craft.

Here's what you're going to need...
 
Black Felt Sheet
White Felt Sheet, XLG
Three Black Buttons
Velcro
High Temperature Glue Gun
Glue Sticks
Ruler


Here's what you're going to do...

Take you're pet's collar, and cut a piece of white felt, approx. 2-3 inches wider than the collar (depending on how large your pet is), and to the length of the collar w/o the buckle.


Cut three 1 inch long pieces of Velcro. (If your Velcro comes separated in two strips, it's easiest to cut and measure when stuck together.) Do not separate them, use an abundance of Hot Glue for each piece of Velcro and place them near both corners (not too close) and one in the middle along one side (length way). Then add more glue on the Velcro and fold over your felt piece in half. Your pet's collar should fit in the faux white collar.

Next, cut out another piece of white felt into a rectangle (again, depending on how big your pet is). Cut off two smaller rectangles to create a 1-2 inch strip/tab on your rectangle and trip into a blunt point, this piece will cover the buckle on the collar. Then trim the bottom to resemble a 'U'. This will be the bib. Cut another 1 inch Velcro and glue it right below where the buckle would lie. Add more glue to the top and fold over the long tab.

 
Glue two more 1 inch Velcro to the bib on the top outer corners. Glue again on the Velcro and attach to the faux white felt collar from the inside. Glue two black buttons onto the bib, and one on the tab.

To make your bow, cut out a 7-inch x 3-inch from the black felt. Fold over the corners and glue down. Then fold in that folded corner and glue down. Cut a scrap piece of black felt and tie it around the middle of the bow and fluff. Glue your bow onto the white felt, covering the buckle.

Voila! You've now creating your own personal mini butler!

Thank you for Crafting with KrazyGoo!

Thursday, May 12, 2016

Colorful Feather Jewelry

Hi there, Crafters! 

Today I have a double feature for you; fun and funky earrings and a matching pendant. This project was actually inspired by Bethany over at our Enchanted Lakes location. After she introduced me to the awesomeness that is shrinky dinks, I just couldn't resist using this new medium to go back to my  jewelry making roots, and make some colorful new pieces. 

This was an amazingly simple project, only requiring four steps. 

Step 1 is to outline and color your chosen design on the matte shrinky dink film and cut them out. Here's what they looked like once they'd been colored:

Step 2 is the fun part; shrinking them! You can use a heat tool or a toaster oven to do this. It's so cool watching them curl and shrink! Check out the difference in size in this picture where there's one of each design pre and post shrinking:


For step 3 they all get coated in UV resin and hardened to make them super durable.

The 4th and final step is to add detailing such as beads, wire wrapping and the findings that turned these adorable feathers in to wearable art. How adorable are these!? 


I had so much fun making these, hopefully you will too!

-Chelsea @ Mapunapuna

Monday, May 9, 2016

Painted Beach Sign

Aloha crafters!
Today we are going to make this painted beachy sign for Kailua, Hawai'i using hand lettering skills, and a few easy to find supplies.


***The Craft Coordinator Erika currently offers a fantastic hand lettering class at our Pearl City location where you can take home new calligraphy writing skills and give all your cards and sayings new flair!


The Supplies we will need:

  • Acrylic paint in the colors Lime Sorbet and Turquoise
or Yellow and Coral
  • Fine round tip brush small enough for lettering
  • Pretreated ready to decorate wood sign with rope handle
  • E6000 glue in clear
  • Decocolor acrylic paint marker in white
  • pencil and eraser
  • Stickles glitter glue in diamond
  • One large white starfish
  • package of shells


First, sketch your beachy town name on to the middle of your sign, leaving room on the ends for the shells and starfish. You can always erase your lines if you make a mistake.


Next, you'll want to use your white Decocolor acrylic marker and fill in the letters you drew with pencil. This will make your paint nice and bright, so the white will act as a clean background and a guide.


Then after waiting for 5 mins for the white paint to dry, begin your ombre paint look. Use your fine tip detailing brush. Pour out each color of paint on your palette. Then make another mixture of the two colors as your in-between color. This will ensure a super smooth gradient.


Paint your outside color on each side of your word. Then clean your brush with water and paint your inside color on the middle of the word. Using the new mixture you made, smooth out the transition and use water if necessary to help blend even more.


After paint is completely dry, (minimal dry time of 30 mins), take your Stickles Diamond glitter glue and squeeze a tiny bit out along some of your letters as sparkly highlights. Either use a brush or your finger to smooth it out along the letter. Because this sign is a natural wood, I used minimal touches of glitter to keep it more on the subtle side.


Then for the finishing touches, use your E6000 glue to adhere your starfish, shells and net!
Let sit overnight to completely cure. There you have it! Super cute beachy sign. This would be cute to customize as someone's name as a gift, or use your own beachy town as the word. Even use calming words like "love, inspire, create, simplify, relax, breathe, etc" would be adorable. Have fun! Use any two similar colors to put your own twist on it.


Bethany @ Enchanted Lake

Saturday, May 7, 2016

Mother's Day - Decorated Frame


Mother's Day is just around the corner folks (May 8th). Looking for "ideas?" Need some "inspiration?" Here's one, who doesn't enjoy hanging pictures?

Here's what you're going to need...
  • 12"x12" Picture frame
  • Preferred Color of Ceramcoat or Americana Acrylic Paint ('Lisa Pink' as seen)
  • Any Synthetic Flat Brush No. 4 or 6
  • Plastic or Ceramic dish/pallet
  • High Temperature Glue Gun and Glue Sticks
  • 12"x12" Cork Board (Optional, as seen in image)
  • Thumb Tacks
  • Any Colored Cardstock for Letters (Glitter Gold as seen)
  • Any Printing Cardstock for Background
  • Heiko 1" Double Sided Tape
  • Silk Flowers, Scrapbooking Flowers or 3D Popping Sticker Flowers as seen.
Here's what you're going to do...

Take your 12"x12" frame and remove the backing and glass. That way, when you paint the frame you won't get it on the glass. Pour some of your acrylic paint into a plastic or ceramic dish/pallet (the paint is easily removed with soap and water from your dishes). Take your synthetic brush and begin painting, don't forget to paint the outside and inner edges. Let dry.

Get your Printed Cardstock for the background and attach it with Heiko's 1" double sided tape to the frame's backing. You could scrapbook style some photo's into the frame using the double sided tape.

For the Cork Board option as seen, just switch out the frame's glass for the cork board, and hot glue gun the cork to the frame backing. That way you can thumb tack your pictures and reorganize or switch out with new pictures anytime.

After the frame is dry, get your High Temperature Glue gun and start sticking your flowers around the corners of the frame. Keep in mind, if your frame is a table stand frame it may be best to keep the flower's around the top.

Set your frame backing back in, and voila! You're done! A super pretty idea for mother's day.

Thank you for Crafting with KrazyGoo!

Project: Decorated multi occasion Card Box


Materials used:

-           1 foam core 32” x 40” cut into (4) 12” x 12” squares and (2) 12”x 11 5/8”.

-            5 single sheet 12” x 12” paper of a pattern/color appropriate to your occasion.

-          1 roll of “bling” ribbon (available in different widths)

-           Hot glue gun

-          Utility knife to cut opening for card drop and retrieval.    

Procedure:

-           Place one 12” x 12” foam core piece flat on your working surface.

-          Using the hot glue gun attach 2 of the 12 x 12 pieces upright facing each other forming two sides of the box. Place the 12 x 11 5/8” pieces upright between the first two sides forming a box without a top.    

-          Before attaching the top piece, glue the paper to the foam core and then cut out the drop slot (make sure a small hand can fit so you can get the cards out as there is no trap door in this design).

-          Glue paper to the other sides then glue the top to the sides completing the box.

-          Cut the bling ribbon to lengths that would fit each side to hide the outside corners then trim with a pair of sharp scissors.                           
                                                      Hilo Ben Franklin

Thursday, May 5, 2016

Pretty Peony Jewelry Box

Hey, Crafters!

With mother's day around the corner, my mindset seems to be geared toward pretty, feminine things. When I sat down to think about what I wanted to make for my blog post today there was no question that it needed to be pretty, pink, and have flowers and finally it needed to be functional.

I give you -- drum roll, please -- the Peony Jewelry Box! 


This project was so simple! I started by painting one of our awesome ready to decorate wood pieces using 3 different shades to create the ombre effect. The accents on the top and front were created using a mix of washi tape, a journaling card and one of the cute pieces of word art made for the Minc foiling machine, (I used the pastel pink foil, if anyone is wondering,) which were simply stuck and/or glued on, trimmed as needed and finished to make sure everything is where it needed to be.


For a final touch, I glued two different tones of felt down to the bottoms of the cubbies.


-Chelsea @Mapunapuna

Tuesday, May 3, 2016

"Oh Whale..." Glass Box

"Whale" have I got an adorable project for everyone this week...
(*crickets chirping*)
Doodlebug has a great ocean-themed collection for us that is perfect for summer scrapbooking pages.  Bright colors, sea life, beach balls, palm trees and of course, mermaids!  But is all honesty, I do prefer the whales.  One, they are amazing creatures, and two, who could resist that vibrant color palette?  It went really well with the Ceramcoat Watermelon and Butter Yellow paints.
 
 
This is one of the glass top wooden boxes that all stores got in for Spring.  Because this particular design was a little more shallow than the others, I decided to use it as a shadow box instead of a storage container.  I Mod-Podged a piece of the whale paper onto the bottom of the box and then gave the inside of the box two coats of Butter Yellow Ceramcoat.  I then painted the outside with Watermelon.  After that dried, I used a dry bristle brush to distress the sides with a bit of Metallic 14K Gold Ceramcoat. 
I then wrote a cute pun right onto the whale paper as a finishing touch.
That's pretty much it for this project, but like always, experiment, make it your own and have fun!
 
Erika @ PC


Monday, May 2, 2016

Ombre Seaglass Mermaid Vase

For a beautiful mermaid vase or centerpiece, look no further!
Today we are making our very own using an ombre spray technique and a few ocean accents!
You can even include Firefly lights to give it a whimsical glow.


Supplies:

textured tall glass vase (two sizes are sold at Ben Franklin in Hawai'i)
Krylon Sea Glass Spray in the color aqua
dark brown burlap ribbon 1in wide
jute/twine
white starfish
dark brown netting
hot glue gun/glue sticks
*warm white Firefly lights


First,
After finding a place outdoors, and laying down some cardboard or newspaper,
turn your vase upside down and spray from the top down. The longer the spray is over the glass the darker the color will become. In order to get that ombre look, zig zag spray downwards, spending barely any time at the top of the vase. That will ensure that the top of your vase is almost perfectly clear, and the bottom is nice and dark. Continue this zig zag pattern on all sides and let dry for 30 mins.


Once the paint is dry, cut 2 strips of dark burlap ribbon and hot glue it to the sides of the vase.


Then hot glue your jute twine around the middle, overlapping the middle edges of the brown ribbon, but leaving room for it to show on either side of the top and bottom. Then glue starfish and netting!
So easy!