Tuesday, June 27, 2017

Hilo/Tutera Inspired Felt Flowers!


Happy Tuesday again, everyone! This week I was scrolling through our older blogs and I re-stumbled on Hilo's felt flower tutorial, and I thought that the idea was just sooo cute! Then I recalled my older post on the new Tutera line of wedding dies, and I though, why not recreate something like that.. but with FELT? So kudos to the two of them for this blog post today, I hope everyone can enjoy. :) It's really very simple- no die or Sizzix required today, just some good 'ol fashioned crafting. 


Materials: 

  • Felt Squares (Colors of your choice)
  • Scratch Paper (To make your stencil)
  • Cardstock (If you are planning to re-use your stencils, cardstock is a much safer option)
  • Scissors 
  • Sharpie Pen (Dark-Colored)
  • Hot Glue Gun & Gluesticks


Instructions
  • Starting with your scratch paper or cardstock, trace or draw out your desired petal shape, then cut them out, these are now your stencils!
  • Select the color of felt you'd like to use for your petals. I picked this bright pink color! Then, trace out the petals. This particular flower will have 5 petals. Then cut out all the petals you've traced.

  • Once all your petals have been cut out, cut a half-inch incision up from the base on each petal. Next, put a dot of hot glue on one flap, then cross the other flap over to secure it down. Repeat this on all petals.

  • Once you have done this, you are ready to glue your petals together- I usually do this by putting a small dollop of glue on the right side of the petal base and attaching the next petal in the same fashion, repeating this until your flower is closed and complete.

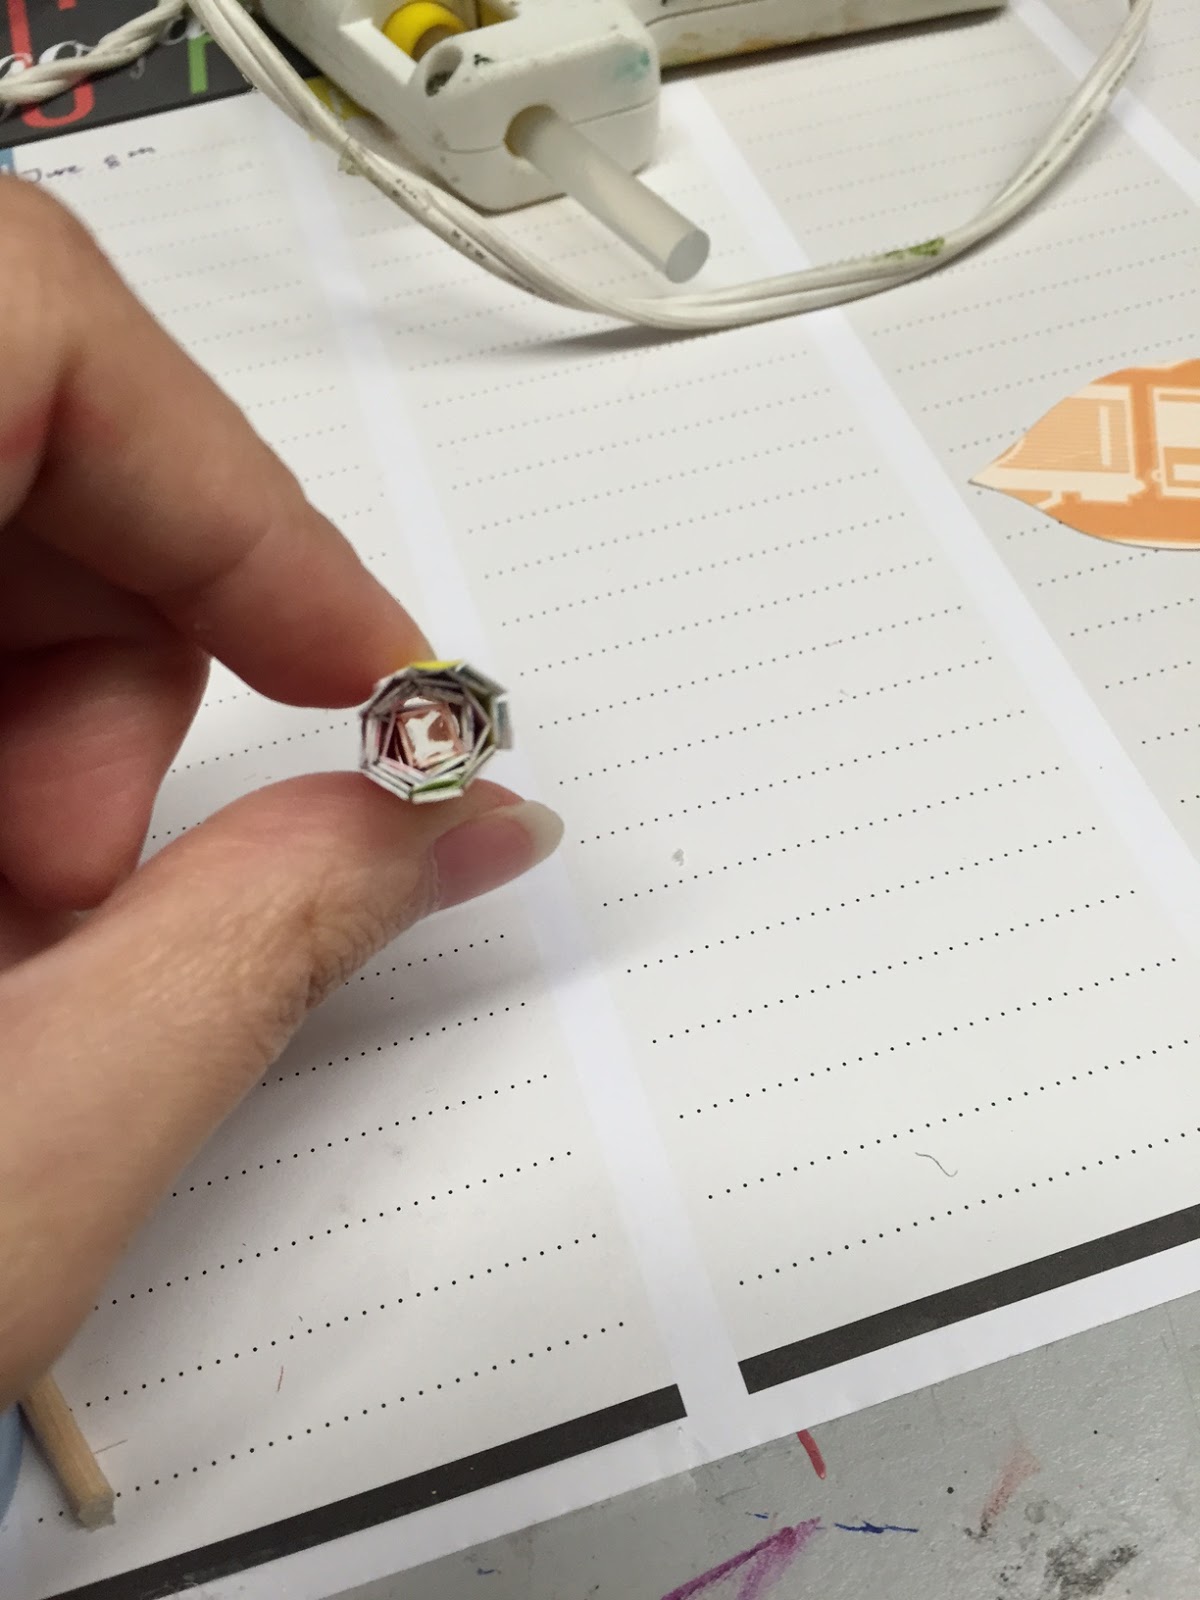
  • For the pistil(center) of the flower, take a thin 1/4 inch strip of yellow or very light green felt and roll it up so that it creates a tight, messy spiral. *TIP*  You can also twist the strip as you roll it to create an interesting look, as shown here.

  • When you have rolled it all the way to the end, glue the end down, then glue the spiral down to the center of the flower. You are now done with your blossom!

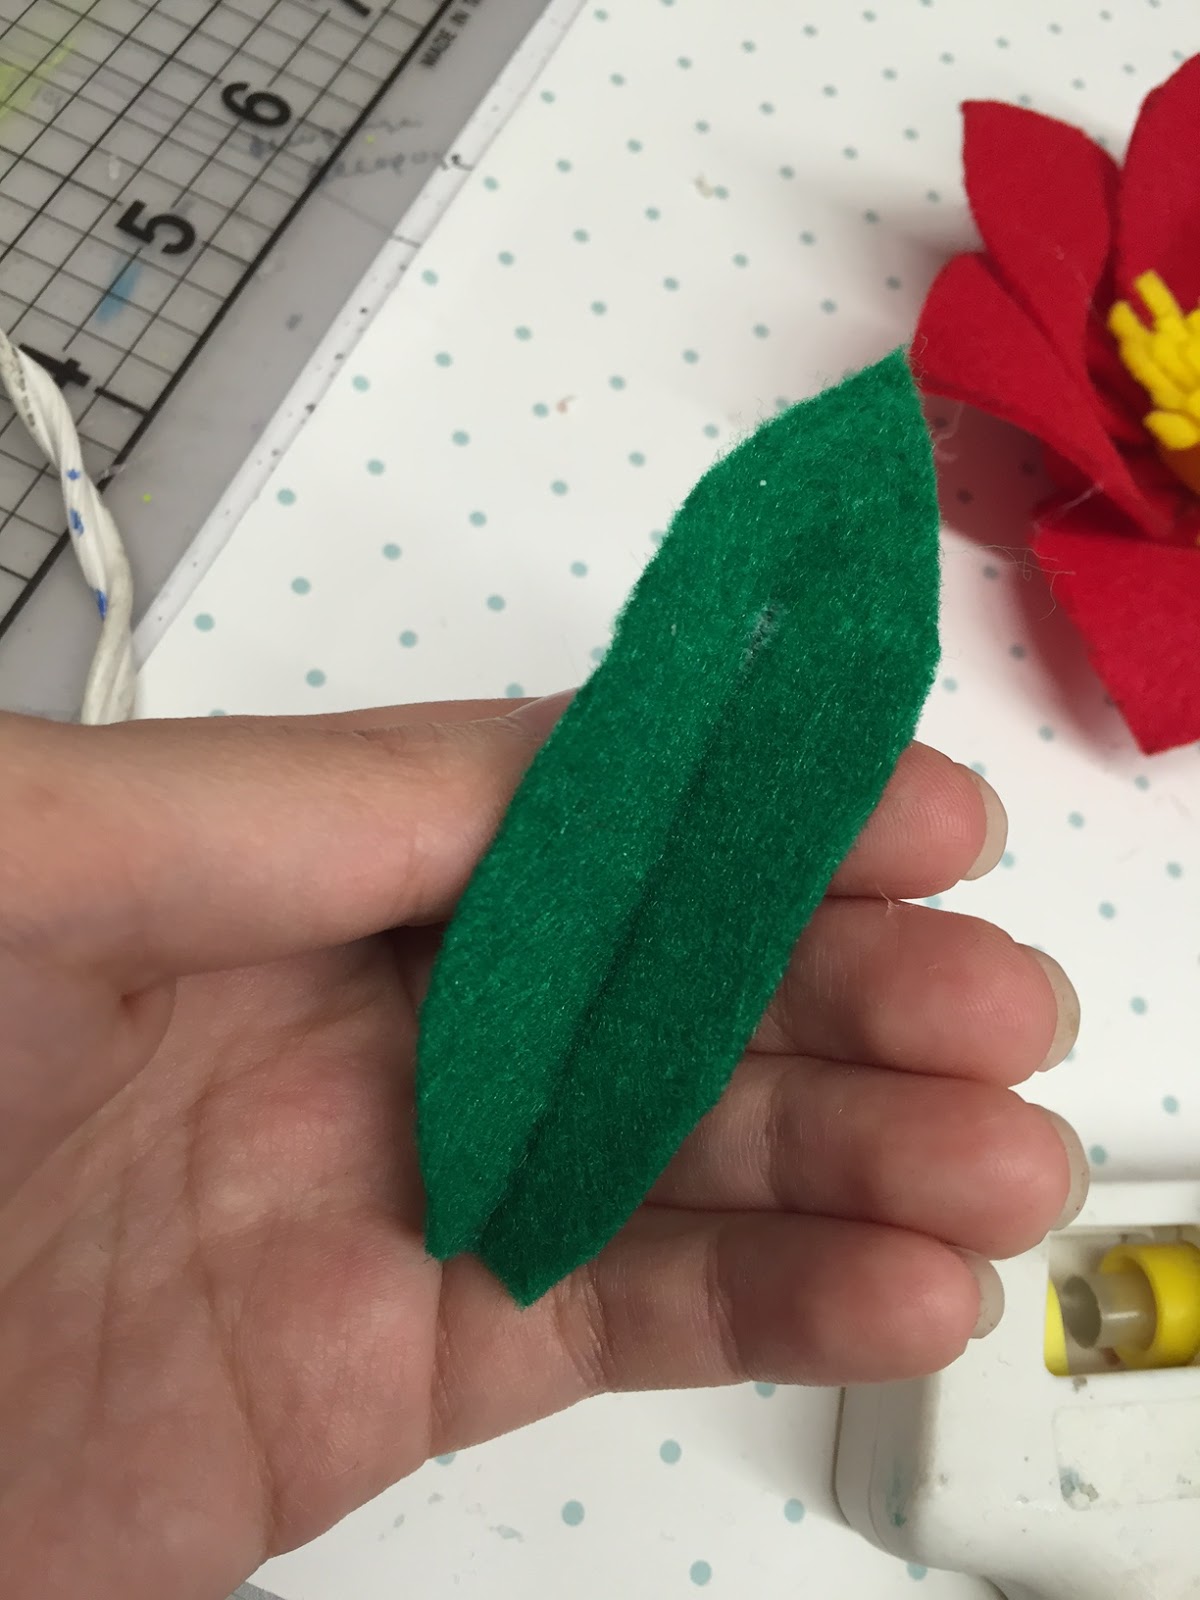
  • Now, if you wish to add leaves, simply cut out a leaf-shape out of green felt, and put down a thin line of hot glue down the center.

  • Fold the leaf along the line of hot glue, using generous pressure when creasing. 

  • Now, open the leaf up and flatten if desired. Voila! You have a lovely leaf. 

  • I created a second flower with a pointier stencil and used red felt this time around- for this pistil, I simply cut a thicker yellow strip and just cut perpendicularly straight down about halfway, then roll it up and glue it down! This gives the flower a different look.


-Helen C.-
Craft Coordinator
Kahului Ben Franklin Crafts


Saturday, June 24, 2017

Alcohol Ink Pineapple

                Alcohol Ink Pineapple


Supply List:

Ceramic pineapple
Alcohol inks   colors:  citrus –orange- butterscotch-watermelon
Sponge brushes


Dab orange all over the bottom of the pineapple ¾ way to the top. Set to dry
Add a little of the watermelon color over it.  Set to dry
When dry take the Butterscotch color and dab over the whole pineapple. set to dry
Dab lightly over the orange part.  Add a little of butterscotch to the top , then add the citrus to it.
 Set to dry


   Hilo Ben Franklin

Tuesday, June 20, 2017

Tassel Earrings

Tuesday has come around again, and I hope everyone has had a wonderful Father's Day weekend! This week I have created cute and simple pair of beaded tassel earrings with crochet thread- easy to make for beginners in beading and perfect for everyday wear (I even wear them with my work uniform!). If you already do basic jewelry making, you should be all set for the tools- if not, there plenty of sets in our store that definitely have all the tools you'd need in one package; these do not take much at all to make! Let's get started!

Materials 
  • Crochet Thread (color of your choice)
  • 20 Gauge Wire (same color as earring hooks)
  • Earring Hooks
  • Beads (w/hole big enough to string on the wire)
  • Needle Nose Pliers
  • Round Nose Pliers
  • Wire Cutters
  • Scissors 
  • Beadalon Tassel Maker
Instructions

  • First, take the crochet thread and measure 2 lengths of about 10.5 feet. You can measure out more or less, depending on how full you want your tassel to be. Next, set up your tassel maker, putting both pins at the second to the outermost hole on each side, then wind one of the lengths of crochet thread until it is completely wrapped around the two pegs.


  • Next, cut four 6-inch pieces of thread. Take one piece and tie the wrapped thread around the center, and make sure it's tight! Tying a double or triple knot should suffice. You can then slide the thread off the maker. Fold the bundle of thread in half where you tied the knots, then take another 6-inch piece  and tie the folded bundle, making a taut knot towards the folded top portion. 


  • Taking your scissors, slip them through the bottom looped portion of the tassel, and then snip the adjoined thread. You can now trim the excess pieces and trim the bottom of the tassel to adjust the length. You now have a completed tassel! 

  • Next, cut a 3 to 4 inch piece of 20 gauge wire. Slip one end of the wire through the center of the tassel where it is folded in half, and wrap around that joint piece once or twice, tucking any excess wire into the center to avoid poking. 


  • Now, you are ready to string your beads! I picked a shiny spacer bead and a blue bead the colors go nicely together.string the beads through the wire so they sit on the tassel.

  • Taking your flat nose pliers, bend the wire right above the beads into a 90 degree angle, then switch to your round nose pliers (holding the same spot) and wrap the wire back over the top so you now have a loop. take out the pliers and slip an earring hook into the open loop.


  • With the excess wire from the loop, wrap the wire around and over the top of the bead until you have no excess wire left. (Alternatively, you can trim the wire down if you are not fond of the wire wrap look)

  • You are now done! (With one earring) Now, repeat these steps one more time to get your second earring, and now you are done for real this time! Have fun with your lovely new pair of earrings!


-Helen C. -
Craft Coordinator
Kahului Ben Franklin Crafts

Saturday, June 17, 2017

Glass Rock

                            Glass Rock


 Glass jar with cork
Blue twine
Frame Mat 5x7
Extra piece of mat board (for the back)
Small rock
Black and White Deco Marker
Sand
Glue dots
Double stick tape
Letters stickers


Tape the Frame mat to the extra piece of mat board.
With the glass bottle, wrap the twine around the top of it; put a drop of hot glue on the back to make sure it does not come apart.
Make your eyes with the deco markers, first the white and then a small black dot in the middle.
Add a small amount of sand to the bottom of the bottle, just enough to cover.
Add the rock to the bottle and close with the cork,
Glue dot the bottle to the frame (in the middle, on the bottom)
Write you DAD YOU Rock with the sticker’s letter above the bottle.

  Happy Father’s day to the all dad’s to there


                         Hilo Ben Franklin


Tuesday, June 13, 2017

David Tutera Flower Die Set

Hi, everyone! It's Tuesday and I've been playing with the new Tutera line of Sizzix dies- they're all so gorgeous! Today I wanted to focus on one in particular: the 9 piece thinlets flower set. This set makes one lovely flower that's my personal favorite; it's perfect for embellishment or just to put anywhere! While there are instructions on the packaging, I just thought I'd make a post to see if I could make it easier. :)

Materials:

  • Sizzix Big Shot -or- Big Kick
  • 2 Standard Cutting Pads + Multipurpose Platform
  • 6x12 Cardstock Paper (cutting a 12x12 sheet in half is perfect!) 
  • Hot Glue Gun + Gluesticks
  • Dowel/Pencil (optional)
Instructions
  • First, let's cut out all our pieces! place all the dies onto the cutting pad, then put your cardstock sheet over them, making sure they are covered completely. The sandwich I am using here is the Multipurpose platform on tab 2, then just the two cutting pads with the dies in between. And if you are new to Sizzix, don't be alarmed by the cracking and crunching when the die go through the machine- it's completely normal. :)
*TIP* I like picking cute, bright double sided paper with contrasting prints and colors! It gives a nice effect and saves you from needing 2 different sheets and colors of cardstock for the leaves and petals!
  • You only need to run the center piece and leaf die once (or twice for the leaves, it's totally up to you!) so you can remove those after you've cut out the first set, but you will need to run the petal dies through 2 more times so that you will have 3 of each petal type.
  •  Alternatively, you can run it through 2 times with the large 3-pronged flower die and petals, then remove the petals and run the three-pronged die through one more time. (This is okay because you don't necessarily need to use each individual petal; I actually use about 12 pieces total unless I'm making something extravagant!)
*TIP* If you're new to Sizzix or die-cutting in general, you may notice that paper often stick to the die. A simple fix is simply flipping the die over and using either a tool or a needle/skinny object to poke the paper out.
  • Now that you have all your pieces, time to prep them! To prep, simply use a drop of hot glue and fold the tabs inward, like so:
  • The leaf simply needs to be creased along the embossed line, and the centerpiece can be curled by hand or with the help of tweezers or a dowel, then fan out the feather-like pieces.


*TIP* Make sure the color you want showing on the centerpiece is on the inside when you are curling, not showing on the outside!


  • Now you are ready to put it all together! Simply glue the pieces in trios, making sure the 3 petals are of a similar size, then glue these down to the large flower base from largest to smallest. Next, apply a generous amount of hot glue to the bottom of the centerpiece and secure it to the center if the flower. Applying hot glue to the leaf, glue it to the bottom of the flower with the desired color face-up.


YOU ARE DONE! Yaaay! And look at how pretty the flower is. To embellish it further, you can crease the petals along their embossed crease, or you can do what I did here and use a pencil to curl the petals to create a more round shape! Try all kinds of decorations and things, the possibilities are endless!


-Helen C.-
Craft Coordinator
Kahului Ben Franklin