Showing posts with label PearlCity. Show all posts

Thursday, May 4, 2017

Pineapple Quote!

Pineapples!
Just can't get enough of this fun tropical fruit!
We've been getting in TONS of pineapple-themed goods at our stores including bags, ceramics and wooden serving platters.  This is the perfect time to stock up for summer entertaining, so it's time to come on down and get crafty!
Today, I have a great painting project that would be great for kids as well as adults for those artsy get-togethers.  It's time to bring the fun of the boozy painting classes home!  All you need are basic pineapple colors like yellows, oranges, greens, oranges and some tans, as well as a cool tropical blue and white for the contrasting background.  You will also need a tan Stabilo marker, a black fine tip acrylic Montana or DecoColor marker, as well as a White Gelly Roll. 
Here, I painted on a natural slice of wood for a rustic feel, but feel free to paint on a canvas or wooden pallet.  Whatever floats your boat!
 
 
I first laid down a coat of white and then, while it was still wet, blended in some Delta Americana AcrylicTropical Blue for a lighter toned turquoise blue.  Once that background layer was dry, I used Ceramcoat Acrylic in Butter Yellow to paint the top three quarters of an oblong shape for the pineapple.  This took two coats for good coverage. 

 
After this was dry, I went ahead and painted the leaves.  Using upstrokes, I started at the top of the pineapple and tapered the tops of the leaves by slowly turning my brush sideways. (As a note, I used a 1 inch synthetic flat brush.)  I mixed a different shades of green such as Ceramcoat Spring Green and Delta Americana Chartreuse just to add more depth and dimension.  Just don't add too much!  You will be writing over the pineapple afterwards, so don't put too much effort into making it too detailed! 

 
I then used the Stabilo pen to lightly sketch the "eyes" of the pineapple.  This is where I brought a bit more detail into the painting, but feel free to use a paint marker or regular acrylic paint.  You can add a little more detail in this area, depending on how long of a quote you use.  After this was dry, I wrote the quote "You are the pineapple of my eye." in black Montana marker straight over the pineapple.
 
 
Afterwards, I used the white Gelly Roll gel pen to add some 3D effects to the letters!  I love the sketchy look, so I went over my lines multiple times.
 
 
Once everything was dry, I sprayed the painting with a light and even coat of Acrylic Sealer.  This is to prevent the water-based pens like the Stabilo and the Gelly Roll from smudging in the future.
 
 
And there you have it! 
Again, you can always experiment and make it your own.  The steps I used only took me about an hour.  Having a blow dryer or heat gun on hand would help in speeding up the process.  (Waiting for paint to dry can be a real drag.)  If you want to have a more detailed pineapple, go for it!  Want to use a different quote?  Fantastic!  If you're having a painting party, everyone can put their own spin on their painting.  Seeing everyone's unique style is always the best part!  Plus, what better party favor to go home with than a piece of summery décor and some renewed artistic confidence?
 
Cheers!
Erika


Tuesday, April 25, 2017

Distressed Mason Jars

Mason jars!
The number of uses of this beloved jar has grown so much since its uni-tasking canning days.
(Bringing a little bit of Good Eats reference into this..😄)
Now it can be used as storage for small craft items or random doodads, soap dispensers for those
Urban or Industrial Chic bathrooms, and even plant pots!  We all need that simple and fresh look for the kitchen table, right?  What's better than a clear mason jar and some lovely flowers from the garden? (Or the neighbor's garden?)
Here, I have a way that you can add a little bit of Shabby Chic to your Mason Jar centerpiece.
Behold the basic technique of sand-paper distressing!


Here is a close up of a jar that was spray-painted with Chalky Finish spray paint in Morning Sky.
Gorgeous, isn't it?  It' s the perfect and elegant French blue tone for Spring!  Notice anything different about thatlittle distressed bit?  Right!  It has a tinge of penny-copper so that it looks like a distressed copper pot.  (Actually, it was Design Master spray paint in Rose Gold!)
Rose Gold and Copper just add that right amount of "antique" (antiquity?) to a craft piece.  It's both classic and modern with its pinkish metallic hue.   Here's a shot of the inside.

 
 All you need is a few spritzes!  It's best not to overdo it so that the paint doesn't all pool to the bottom.  The same goes for the outside of the mason jar.  After spraying the inside, turn the jar upside down and spray in light even coats.


Here are the two Spring-time Mason jars that I created using beautiful cool-toned pastel colors.
The one on the right is that perfect minty hue (Ubermatte's Mist), with its cover painted in rose gold once again.  As always, experiment, experiment.  Creativity stems from both inspiration and experimentation, so don't be afraid of those lovely mistakes.  It's trial and error!
Also, don't forget to have fun!

Erika @ PC

Thursday, April 20, 2017

Shaker Grad Pics!

Graduates!  It's time to send your grad photos to friends and family!
 Now, we are all familiar with the traditional black cal folder and the message 
written in white gold or silver pen.
IT'S TIME TO BREAK THE RULES.
Today, we have two awesome ways to deck out your senior portraits!
 

First way: Cardstock! There are so many colorful designs to choose from
in our stores!  All you have to do is choose a theme and pattern and, with just a few scrapbooking 
techniques, you can add some color to that plain black cal folder!  Add some ephemera embellishments and even some pop-up accents!
Here, I used a couple papers from Amy Tangerine's new On a Whim Collection.
Just as a heads up, Ben Franklin Crafts is selling Lauhala print Cal Folders!
This item is exclusively sold at our stores, so don't miss out!  They add a great "Island" touch,
which is great for sending photos out-of-state.  Paired with cute tropical-themed paper, it is ADORABLE.

Notice the glitter yet?  Yes, there are sequins and glitter on the photos!
I used the We-R-Memory Fuse Tool to make the graduates' photos into "shaker photos"!

                                                                                  
 It's a pretty simple process, really.  All you need is scrapbook sleeves, sequins, glitter and your graduate's photo!  Slip the photo into the sleeve and place it flush against the corner.  (That way, all you need to do is fuse two sides!)  Slide some sequins and glitter onto the photo and fuse the remaining two sides to seal them in.  Lastly, cut off the excess sleeve plastic! 

Back to the Lauhala print.  It can be a little tricky to work with for it can go in either the "tacky" direction or the "cute" direction depending on how you use it. 

                                                     
Just like working with textures in mixed media, mixing a fun and modern print consisting of simple shapes with the photo-realistic lauhala print can balance everything out.  And of course, Amy Tangerine will have that perfect, quirky and colorful, tropical paper!  Here, I used the other, more solid side of the tropical print paper to create a space for a short message.  The square could even be made into a pocket large enough for a graduation or grad party invitation!

 Here are the close-ups of the "shaker photos" .   I slid these photos into the decorated Cal-Folders and it really brought everything together.  It added that extra gold accent and "fun factor" to the portraits.   Wouldn't these be fun to get in the mail?  I was having a ball shaking them after they were fused! 😀

There are so many ways to customize your graduation photo to make it really represent who you are and what you're all about!  Have fun with it because this is your celebration, Graduate!

Congrats!
Erika @ PC

Tuesday, April 11, 2017

Graduation Centerpiece

If our stores' AWESOME displays haven't already given it away, Graduation Season has officially started!  It's time to start weaving and braiding those leis, to send out those Senior portraits to relatives you may not have been aware of until now, and to start ordering those graduation posters and banners!;)   Another thing that probably every parent has had on their  "HAVING A CHILD" To-Do List for the past 17 or 18 years is of course their graduate's GRADUATION PARTY!
 I've seen everyone from the last minute decorators to those who come in right after Valentine's Day, searching for ideas and inspiration (See what I did there?) on how to decorate for their child's grad party.  I'm talking banners, centerpieces, cake stands, table covers, favors and more.  
Well, today I have a centerpiece project that is really easy and quick to make!
All you need are a few items!


For the cap I used a 12x12" piece of black chipboard that I cut down to a 9x9 square, 12x12" black cardstock, embroidery floss for the tassel, and a black brad.   I made the base of the cap with the cardstock, cutting two 3 1/2 x 12" wide strips, with one of the strips having a triangular shape coming out at least one more inch.  This is for that front part of the cap that goes over the forehead.  I made a basic tassel by winding the floss around four of my fingers and tying it off at the center.  Then I secured the end of the tassel to the center of the grad cap with the brad.
 

On the bubble vase, I took some alcohol inks and then, me being a Pearl City graduate, dripped some purple, silver and cool pearl (lavender) straight onto the glass.  To give it a splattered look, I blew on some small drops that I squeezed onto the glass and let the ink sort of spread to create a "fuzzy" look.  Letting some of the ink dry in the dripping state also adds to the paint splatter look. 
After I let the alcohol inks completely dry, I wrote on top of the design using a white oil-based marker.  Oil-based paint markers are always going to be the best for glass when you want an opaque and permanent line.  Also, they won't scratch off like their acrylic counterparts!  I gave the letters a shadow detail using a thinner black oil-based marker and then filled the vase with a strand of the warm white firefly lights!  That is really what makes this centerpiece shine!
 
 
If you really want to make things fun (and take advantage of the lights), how about a cute face?  Yes!  This can be double-sided!  You could even cut your graduate's school logo out from vinyl and stick it onto the glass.  Coordinate the color of the lights to the school!  Red for Radford and Kaimuki, Blue for Moanalua or Waipahu?  Even the hat and tassel can be changed up! 
Have fun!
 
Erika @ PC

Saturday, March 4, 2017

Starfish Wishes!

Hey Crafters!
If you guys haven't been down to any of our stores recently,
you seriously need to make the trip.  ESPECIALLY if you are a wood crafter!
We have so many unfinished wood pieces for everyone to paint and decorate
that it's insane!  Never had we had this big of a variety in our stores.
And for you ocean-themed décor lovers out there, you will love all of the nautical
items we have been getting in as well!
Coral sprays, seaglass pieces, laser-cut mermaids and scientific octopus illustrations; 
If you can name it, we've got it.  Today, you can mark this post as "Starfish Spam" because it is just starfish-themed wood crafts galore!
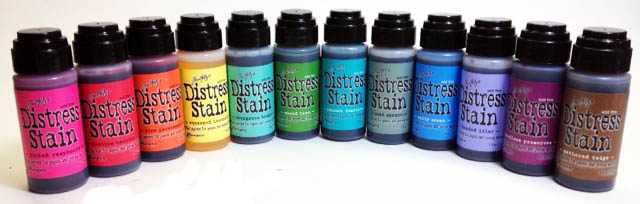
Another magical technique that I learned from our amazing Visual Merchandiser, JFlo, is the use of Tim Holtz' Distress Stains to give an interesting and colorful look to the wood pieces.  Because many of the woods are lighter in color, the stains will appear as a vibrant watercolor effect on the surface!
You can even stain the wood with multiple colors and distress it even more with acrylic paints for a vintage "shabby chic" look.
Below I have a small box distressed with light pink and cream-colored stains which was then distressed with a few streaks of Delta Americana acrylic paint in the color Chocolate. This particular paint color gives more of a gel stain feel with some fine golden glitter mixed in.  It looks SO GREAT with it and definitely adds that extra special something!

I then hot-glued a small white wooden starfish cutout, which were sold in a pack with a variety of sizes.  This one seemed perfect.  Don't think you can't distress this little starfish too, because it will look awesome with some stain and paint as well!  And the little white speckles around the starfish?
White Sakura Gelly Roll.  YEP!


This strand of beaded cord was too cute to pass up!  I needed to put it on something as a decorative and beach-y, ocean-y accent.  So, I took a small wooden easel sign, colored it with a few stains in cream and a few shades of green and blues and then distressed the edges with Ceramcoat paint in the color Wedgewood Blue.  I then hot-glued a small piece of the cord to the side!
This can make a cute table-number sign, menu board, a desk memo board or even just a cute frame for your precious memories.
Finally, just to appreciate the pure essence of a starfish, here we have... a starfish!
This is a pallet that I painted with Delta Americana's Waterfront, which is a bright and fun shade of turquoise!  I then distressed the edges with a brown stamp pad.  Yes, you read right!  Stamp pads are great for distressing because you've already got your ink on a felt pad and all you need to do is rub the edges of a project with it.  Perfect every time! 
I still felt like the blue needed to be toned down a bit more to achieve that vintage ocean-themed look I was going for, so I went with Tim Holtz' Distress stains in Burlap and Walnut.  These are both brown tones, with burlap being the lighter cream, yellow tone and walnut being a deep and rich brown.  I had to be careful with Walnut, so I just took a synthetic flat brush, tapped it onto the stain bottle's felt top and streaked the color onto the wood. Using a little water, I was able to spread the dark color on and make it look more like aged wood without it appearing too streaky.  To add a little extra something, I streaked a little Ceramcoat Metallic 14K Gold over the surface.  It also gave the surface more dimension.  Then, I hot-glued a pretty white starfish onto it!  Simple yet elegant. 
Not just aged, but Vintage and Chic!

Stop by to check out our selection of wood pieces today and I am guaranteed that you will find that perfect piece for your desk, coffee table, bedroom, anything!  You will be amazed.
Also, don't forget to stop by our scrapbooking and hard crafts departments for some Distress Stains and Acrylic Paints!
Have fun and see you next week!
Erika @ PC


Thursday, February 23, 2017

Sea Glass Windchime

So what if the groundhog saw his shadow again!
Six more weeks of Winter is not going to stop us from starting our
Spring crafting!  We have so much fun craft supplies coming in for the Spring and Summer seasons.  Nautical, Fairy Garden and Natural Woodland-themed items are making their way to our stores and filling our shelves this very moment.
There's also a very special product that we got in that has been requested MANY times by both our guests and employees. Haha!  That item is...Branch pieces!  We have both light-colored and dark colored branches in bundles available for you, so don't miss out.  Grab a bundle for all your Wooden frames, fairy garden, Bohemian and Nautical crafts!  Today, I have an easy and beautifully Boho craft for you.
 
 
This Seaglass windchime will be a great craft to display on your lanai or favorite tree in the backyard!  All you need are a few items.
 
 
Supplies
+ Two branches
+ Jute Cord
+ Hot Glue Gun or E6000
+ Sea glass pieces
+Scissors
 
First, cut about five to six pieces of jute in lengths ranging from 15 to 20 inches.  You want to have at least two inches to tie one end to the branch.
 
 
Second. knot one end of the jute to a branch.  Make sure there are no loose ends sticking up for a clean look.  You can secure them with a little hot glue.


 Next, glue your pieces of sea glass to the jute cords!  You can glue them on using any pattern you want.  And there you have it!  This is a great craft to display on your front porch over the summer and it could also make a great nautical wall hanging.
 
Have fun and see you next week!
 
Erika @ PC

Tuesday, January 24, 2017

Spring Gardening Fun!

If you are an avid gardener or someone who loves to collect cute succulents, then
Ben Franklin is definitely THE place to be right now!
We just got in a bunch of cute little plants and succulents that are great for
 Spring décor and require no watering at all. (Haha!)  They are so fun to look at, that
with all the different varieties we have, the selection isn't always the easiest. 
At the Pearl City store, we've dedicated a small area to our
Spring Gardening collection!
 
  
The area gives a real Gardener's Shed and home with stacks of terracotta pots
and hanging macramé planters.  It really feels like there are live plants growing everywhere; out of drawers, pots and even on the doors (We tied some air plants onto them!).
All these little details adds to the magic of the space!
You will find crates and pots overflowing with colorful succulents
along with a few chic pieces of vintage décor like distressed wooden doors
and glass floaters.  Natural textures like wood, stone, terracotta and rope all
make a great backdrop for the plants, which are the real stars here. 
 
 
These little beauties can be put together to make a beautiful bouquet,
flower arrangement or an eye-catching wreath perfect for Spring and Summer.
Here, we matched succulents in soft green and blue hues to create a refreshing
focal point on a natural grapevine wreath.  For a little extra something,
a copper strand of twinkling firefly lights were wound around it.  
 
The copper wire gives it that "industrial chic" look.
 
Another special feature that was added was
the Faux Brick Wall.  The warm colored brick texture is what created a more rustic atmosphere. It was also very simple to create!  All you needed to do was blend the right colors and
use a brick sponge that you can find at any convenience store to stamp the pattern. 
First, we used painter's tape to create a clean border.  Then, we painted the
pillar black to act as a dark grout against the arm-colored bricks.


We mixed rich terracotta reds and deep browns with an antique off-white and mossy green.
On a piece of palette paper, which is a convenient disposable palette, we blended all the colors.
No measurements or ratios! Just mix up the colors, press your damp sponge into the paint and then stamp it onto the wall. It's always best start a row with the brick "breaking the margin" so to say.
 
 
If you look at the finished pillar, what makes it look realistic is that the bricks don't follow a perfect grid pattern.  Each row starts and ends with maybe half a brick or so.  It's like laying down real bricks!  After the bricks are dry, we rounded off the corners of the bricks using some black mixed with antique white. This helped add more depth and dimension to the bricks so that they actually looked like they were sort of jutting out of the wall!


 If you are ever able to stop by our stores, peruse the Spring section!
We hope that you will find inspiration and think of some great ideas
for decorating your home this season!
 
Erika @ PC


Thursday, January 19, 2017

Double-Stick Tape Paper Crafts!

Birthday party but no favors?  
Cute gift but no cute gift box?  
Gift card but no gift-card sized envelope?
*insert photo of am angry person here*
These are problems that everyone has and can relate to.


The solution?  Craft it!  Look at these great ideas!
To be honest, it's not that hard.  With the right tools and handy dandy Meriken Double stick tape,
you can make some cute and easy favors, envelopes and boxes that are perfect for any occasion! 
For example, we used the We-R-Memory Envelope Punch Board to make small envelopes perfect
for gift cards or money envelopes for New Years.  The We-R-Memory Gift Box Punch Board was also really useful for making cubic boxes of different sizes for those too-small-to-wrap presents.  They could also be used to make wedding, birthday, baby shower or graduation favors.

Use double stick tape to make a custom "glitter tape"!
Just stick it on, pour your glitter, and Voila!


Also, don't forget to check out our Accu-cut machines!  Each store carries different dies shapes, templates and letters.  This is one of our favor/treat bags punched out of a textured brown cardstock!
We then embossed a honu onto it using NUVO's embossing powder in Gold Enchantment and added a natural accent using green and ivory raffia!  So simple, yet pretty to look at. :)
 
Double-stick tape is out Item of the Month for
January, so stock up before they're all gone!
These are going like hotcakes!
 
For more idea using amazing double-stick tape, visit us at the Pearl City store
 to see all of our great samples and Daily Demos.
 
See you next week!
Erika @ PC


Tuesday, December 13, 2016

Simple Nativity Scene

12 days 'till Christmas already?!   WHAAAAT?
Yup, that's right! I hope everyone's holiday season isn't too crazy!
How's that holiday shopping? It seems to get harder and harder every year.
For those of you looking for an easy-peasy piece of holiday décor that would also
be great as a gift for a church-goer or who likes the sacredness of the Christmas season,
I have a beautiful and elegant wooden nativity scene!
All you need are a few salvaged items from your basic crafts pantry.
 
 
Supplies Needed
Jumbo Popsicle Sticks
Wooden Figures
Raffia
Jute Cord
White Felt
Wooden Bead
Rolled Paper Floral Wire
Snowflake or Star
Shell (optional)
Brown Stamp Pad (optional)
 
First, distress your popsicle sticks with a brown stamp pad.  It's really up to your personal style.  I wanted to give this a primitive and antique feel, but you can leave it plain if you'd like.  Second, hot glue all your sticks into a triangle form.  I made sure to make one flat so that it could stand on its own when not on a Christmas tree.  Next, I cut out a semi-circle piece of white felt for Mary's veil, then hot-glued the curve to the crown of her head.  I then cut a piece of the rolled paper wire for Joseph's can and curved the top to create a small cane.   For Baby Jesus, I cut a small piece of felt and wrapped it around a small wooden bead.  I hot-glued the little bundle into a tiny shell.  
 
After the Mary and Joseph figures were hot-glued onto the floor of the stable, I hot-glued a couple pieces of raffia on either side of the couple and then placed Baby Jesus at the very center.  To finish it up, I glued a "North Star" (snowflake) at the apex of the stable roof and then glued a piece of jute rope onto the back for hanging on a tree.
 
There you have it!  A cute little nativity that although primitive,
makes a great and meaningful gift. 
 
See you next week!
Erika @ PC


Tuesday, November 29, 2016

Pinecone Christmas Tree

Oh Christmas Tree, Oh Christmas tree...
How lovely are thy branches...
A tree always kicks off the Christmas season for my family!  It really doesn't feel
like the holidays until we bring a nice 6 foot tree home and shake out it's branches, its
refreshingly sharp smell wafting through the house...
If you want to bring a little of that feeling Christmas cheer to work, I have one craft that is simple,
festive and downright ADORABLE.

 
Mini Pinecone Christmas tree! 
All you need are a few items.
 
1. Pinecone
2. Green Acrylic Paint
3. Pom Poms
4. Firefly lights
5. Mini Terracotta Pot
 
First, Paint your pinecone!  I chose a traditional Christmas green, but you can mix up the colors if you'd like.  You can even leave it as is for a nice neutral and rustic palette.  White pompoms or Snow Tex would be great for trimming it.  Or why not try a cutesy pastel palette?  Maybe an ice blue tree with iridescent twinkle flakes and pink pompoms? 
 
Second: Glue your mini pompoms onto your pinecone after it's fully dry.  Then, take your firefly lights and wrap them around you tree starting from the top.  Because I had chosen the 10 bulb firefly lights, I was able to hide its small battery pack inside the Terracotta pot, which I placed the pinecone "tree" onto for a base.  You can go ahead and paint the pot as well! 
 
And that's all she wrote!
This is a great activity for kids as well, so don't pass up the chance to make some great holiday memories.  Have fun!
Erika @ PC


Monday, November 21, 2016

NFL Ornaments

If your Thanksgiving traditions include some good ol' American Football,
then this the perfect project for you!  Because for the Super Fan, the
craze is year-round.  You collect every single piece of merchandise that sports
your team's logo.  Posters up in your room, multiple jerseys and maybe even a
few pairs of team pajamas.  Also, does your dog or cat have their own little jersey?
 If you are this person, or know someone who lives like this, then
this is the perfect craft for them!  Not to mention an AWESOME gift!
 
NFL ORNAMENTS!
 
 
You only need a few things...
 
Glitter-It
Glitter (Fine or Coarse)
Funnel (not pictured)
2 inch Ornament balls
Deco Color pens
Ribbon (optional)
 
 
Using the glue is very simple!  All you need to do is take the metal top off, squirt about a tablespoon of the glue into the ornament and swirl it around.  Make sure you get all those pesky dry spots so that the glitter covers the entire thing.  Don't forget the areas just around the opening!  If there is any excess, you can pour it into the next ornament or back into the bottle.
 
Next, pour your choice of glitter in.  If you want to do more than one color, you're going to pour the color you want on the bottom FIRST.  For example, I made a Denver Broncos ornament and used the royal blue glitter at the bottom and orange glitter on top.  Using a funnel, I poured about two tablespoons of glitter in.  It helps to pour LESS than what you think you'll need.  You can always add more.  Next, I added the orange.  Just slowly turn the ornament ball and let the glitter roll and spread. Don't roll it too fast, otherwise your glitter will clump. 
 
After your entire ornament has been glittered, return the metal top to its proper place and finish it off with a cute (matching) bow!  (Optional, of course, but it adds a nice touch.)  You can hand-letter your team's name onto your ornament using an oil-based marker like the DecoColor paint pen I used here.  You definitely want it to be oil-based because acrylic-based markers will just scratch off.  Ain't nobody got time fo' THAT.
 
And that's all she wrote!
I'm sure that football fan in your life will love this.  Hey, if they already
have a team Christmas tree planned this year, it would be nice to see something handmade
amongst all those licensed products, wouldn't it? 
Handmade things are made with love!
 
Have fun!
Erika @ PC


Tuesday, November 15, 2016

Magical Rose Decor

Can we talk about the new Beauty and the Beast trailer that just came out??
I am so excited.  Can't wait!  
For all you Beauty and the Beast fans and straight up "Disnerds" out there
looking for the perfect project to keep you busy during the long wait or just
to spruce up your home with a little magic, this is the one for you!
It's fun and it will definitely be a conversation starter and will definitely make
a perfect gift for the holidays.

 
Supplies Needed
Glass Dome
Silk Rose(s)
Floral Cutters
Suji Cord
Clear Tape
Glue Dots
Firefly Lights

First, cut the rose to the length you want.  Remember, it needs to be short enough to be suspended in the dome.  Make sure it is at least two inches shorter than the height of the dome.
Second, cut a short length of suji cord and attach to the larger petals toward the underside of the rose using a glue dot.  Pinch the glue dot and one end of the suji between two large petals.
Next, tape the other end of the cord to the top of the dome.  
If you have a few stray rose petals or another rose on hand, cut a couple of petals off of it and put it on the base.
After that, put the dome back onto its wooden base, curl some firefly 
lights around your rose and Voila! 
   
I hope everyone has a wonderful time making these!
We want to see how your magical roses turn out.  Post your photos
on Instagram and use the tag #bfcrafts!

Erika @ PC

Friday, October 28, 2016

Minimal Fall Garland

Well, it's almost the end of October, and it honestly makes me feel so sad!
The Autumn season is fleeting!  It's time to make the best of it.
We've got one more month to go, so it's never too late to put up some fall décor.
The project I have today is very minimalist and requires only a few supplies. 
Don't fret!  It's simple quality is what makes it ADORABLE.  Also, it's great for kids!
Although, because this requires basic sewing skills, close supervision might be needed for younger children under 7. 
Let's get started!
 
+ + + + + + + + + + + + + + + + + + + + + + + + +
 
 
Supplies Needed
Felt in Autumn Colors
Embroidery Floss in Autumn Colors
Embroidery needles
Scissors
Yarn or Jute Twine
Permanent Marker (optional)

+ + + + + + + + + + + + + + + + + + + + + + + + +
 
 
First, cut out leaf shapes from your pieces of felt!  I chose orange, olive green, golden yellow, maroon and brown.  The simpler your leaf shape, the better.  You can use a marker to draw your
leaves first as well.


Second, use the embroidery floss to sew on some veins.  I have a step-by-step-process pictured below.  Basically, you want to work your way up from the bottom of your lead and sew the veins from the sides to the middle.

After the veins, go ahead and cut out some letters if you'd like.  I cut out the word "FALL", but other words like "GIVE THANKS" or "AUTUMN" would be really cute as well!  You can use any color, but for this garland, I chose black so that the word stands out from the leaves.


After that, hot glue your leaves and letters onto some yarn or jute twine and hang it up! 
Now you can enjoy the beauty of autumn leaves in your home.  For us in Hawaii,
(who can only see the leaves change color on dying mango trees) this would be a great
garland to make and put up year after year.
 
Have fun!
Erika @ PC