Showing posts with label glossy accents. Show all posts

Friday, January 9, 2015

Crankin' Out Crafts ep403 - Communication Board Part 3: Marble Magnets

JFlo finishes up our Communication Board project by creating easy and unique marble magnets.


Supplies:
Scrapbook Paper
marbles
magnets
Glossy Accents
E6000
scissors
paintbrush


These magnets are not only a great way to customize and personalize your Communication Board, but can be used also on your fridge or any magnetic surface! Make some for your home and office space to post up reminders and notes.

Tuesday, March 11, 2014

Crankin' Out Crafts -ep345 Marble Magnets


JFlo shows you how to make your own magnets with glass marbles and Glossy Accents. Great for your fridge or the office!

Marble Magnets

Watch our how-to video here: Crankin' Out Crafts -ep345 Marble Magnets

Supplies:
Glass Marbles or Tiles
Glossy Accents
Magnets
E6000 Glue
scrapbook paper
scissors
Optional: 1" size circle punch
Optional: paintbrush

Friday, January 24, 2014

Crankin' Out Crafts Episode 332 - Handwritten Menu/Framed Love Letter


Create a personal menu for your romantic Valentine's Day dinner, or write a love letter in the shape of a heart to frame for your Valentine this year. You could frame decorative paper instead, and use Bistro Chalk markers on the glass for a reusable surface!

Dress up your Valentine's Day table or display!

View our latest segment: Crankin' Out Crafts Episode 332 - Handwritten Menu/Framed Love Letter

Supplies:
12x12 scrapbook paper(dark color)
Gelly Roll white
Glossy Accents
Mister Huey's Opaque White (optional)
12x12 frame(glass optional)
construction paper
scissors


Sunday, August 18, 2013

Fun Ways to Save for a Vacation

Aloha Crafters ~

Today's Idea & Inspiration  is Glass Blocks that will remind or provide a "bank" to save for a vacation. We have so much fun paper in our Make a Memory department, ideas for your specific goals will leap out at you.

The Vegas block above was backed with glitter scrapbook paper and than a black deco paint pen was used to paint the front.

 
The same process was used for our Disney Glass block above.

 
For our Surfing Vacation a retro map paper was used for the backing and than a complimentary paper was used for the front and then adhered to the block and covered with Glossy Accents.
 
Happy Crafting!
Robin @ Kahului
 

Sunday, August 11, 2013

Wishes for Baby ~ Quick & Easy Baby Shower Idea

Aloha Crafter ~

Today's Idea & Inspiration is a Baby Shower Idea. Our glass blocks were decorated as a receptacle for notes from shower participants for Baby. The glass blocks were backed with scrapbook paper, then letters were adhered and covered with Glossy Accents. This is a quick and easy idea for Baby Showers.

Happy Crafting!
Robin @ Kahului

Sunday, August 4, 2013

I'm Bored Ideas

Aloha Crafter ~

Today's Idea & Inspiration is an "I'm Bored" Ideas Glass Block. Little notes of creative, helpful or neighborly activities can be put inside and when your child tells you that they are bored, you can direct them to the Glass Block.

The "I'm Bored" Ideas Glass Block was made with decorative scrapbook paper and the letters were than covered with our Glossy Accents.

For more Glass Block Ideas, please refer to:

http://ideasandinspirationsfrombfchawaii.blogspot.com/2013/07/glass-blocks-for-collecter-part-2.html
http://ideasandinspirationsfrombfchawaii.blogspot.com/2013/07/glass-blocks-for-collector.html
http://ideasandinspirationsfrombfchawaii.blogspot.com/2013/07/burlap-lace-glass-block-with-fire-fly.html
http://ideasandinspirationsfrombfchawaii.blogspot.com/2013/06/cityscape-glass-block-with-fire-fly.html
http://ideasandinspirationsfrombfchawaii.blogspot.com/2013/06/patriotic-glass-blocks-with-fire-fly.html

Happy Crafting!
Robin @ Kahului

Sunday, July 21, 2013

Glass Blocks for the Collecter Part 2

Aloha Crafters ~

Today's Idea & Inspiration is Part 2 of our Collector's Glass Block Series. Good memories can be found at hand when a Glass Block is decorated and designated. Fortunes from fortune cookies could be saved in the above Glass Block. This block was backed with washi paper and a vinyl sticker was rubbed on the front.
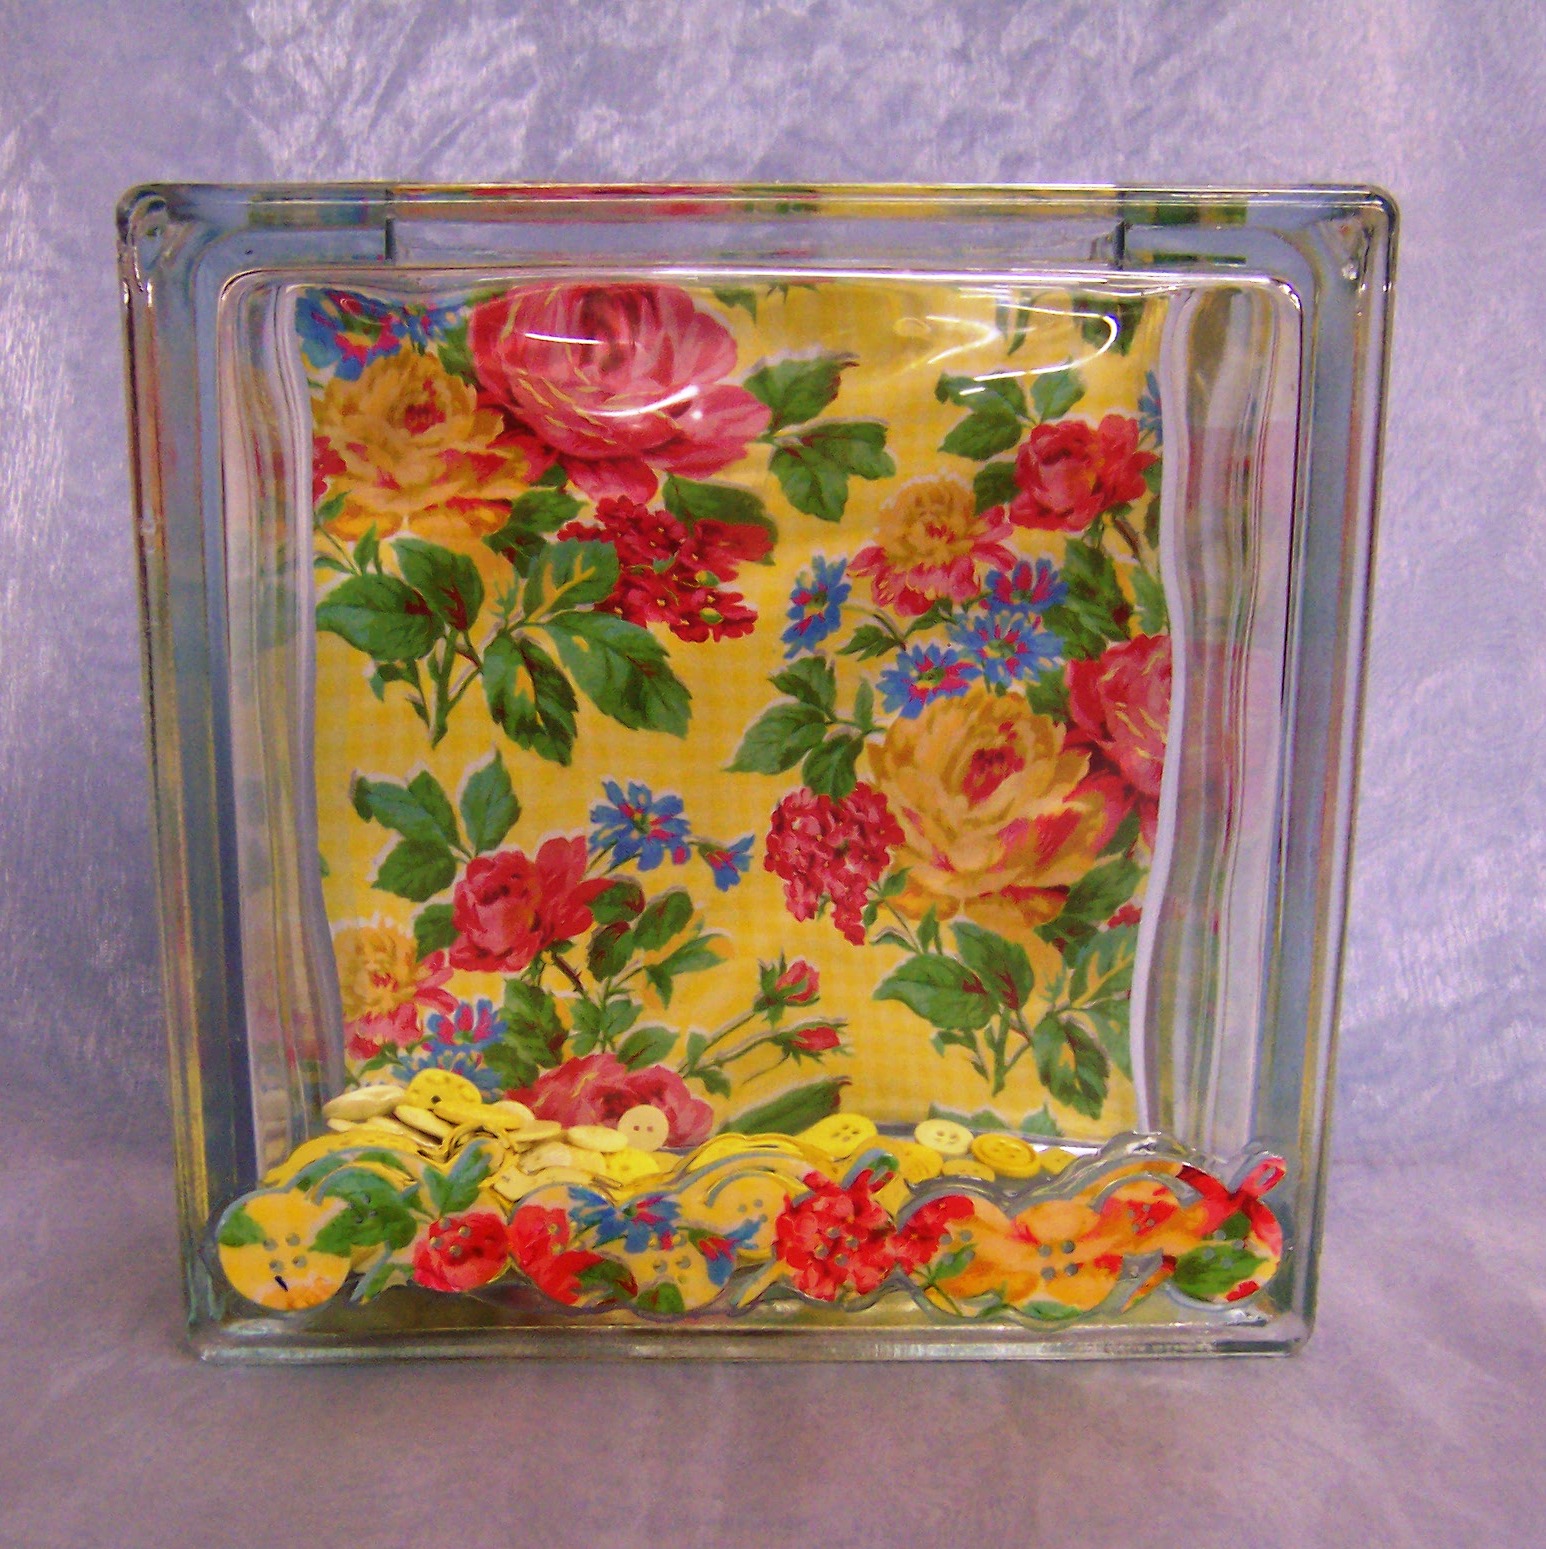
Above is a Glass Block designed to hold buttons, backed with scrapbook paper. The front is embellished with paper buttons punched with a button paper edger and sealed with Glossy Accents.
The above Glass Block theme was made using a black deco paint pen to outline the design, then alcohol inks were used for filling in.

Happy Crafting!
Robin @ Kahului

Sunday, July 14, 2013

Glass Blocks for the Collector

Aloha Crafters ~

Today's Idea & Inspiration is a Collector's Series of Glass Blocks. If you're like me, you enjoy saving tidbits from special occassions, but where to put them? Decorated Glass Blocks are a fun showcase for your memorable treasures. There are a plethora of ways to embellish your Glass Blocks here at Ben Franklin Crafts.

Above I used a piece of scrapbook paper, cut and adhered it to the back of a Glass Block. Then cut out letters from the same paper and added them to the front and used Glossy Accents on the top to seal.

Small faceted purple hearts and vintage look scrapbook paper adorn this glass block. I'm thinking of using it for broken bits of jewelry.

Following is an Encouragement Block, perfect for a Teacher Appreciation Gift. We all need to be reminded that we are appreciated and this is a fun idea for storing those precious little notes.

Scrapbook paper was again used to back the block, and a deco paint pen was used to free hand the front.
Tip: If you're uncertain about your lettering or drawing ability, any design can be traced through the glass, and our deco paint pens come in a variety of colors and sizes.

Happy Crafting!
Robin @ Kahului

Monday, March 5, 2012

Crankin' Out Crafts Episode 70 - Marble Magnet with Punches

Welcome back to a new week of Crankin' Out Crafts. This week's theme is "Puna's Punches", where Puna punches out…some great crafts! (What did you think we were going to say?) Today's episode will show you how to use a punch to make a beautiful magnet.

Another twist on our old favorite, the marble magnet.

View the episode on our youtube channel: Crankin' Out Crafts Episode 70 - Marble Magnet with Punches

Supplies:
Scrapbooking Paper
Paper Punch
Glass Tile
Magnet
Glossy Accents
E-6000

Magnets make great gifts, especially pretty ones like these. If you have a graduation party to plan, you might want to think about cute magnet sets as favors. Everyone can use a magnet!

Monday, February 27, 2012

Must-do Magnets


If you read last week Monday's post, you know that I made these magnets to compliment my tin sheet note holders. Now, as promised, I'm gonna tell you how you can make magnets to match your note holder. It's so easy...


For the simplest magnets, all you need is some really cute scrapbooking paper. This cupcake will make the perfect magnet to go on my menu board (yes, I schedule cupcakes as meals). So, all I do is put a dime sized dollop of glossy accents on the flat side of my glass tile and stick the tile to the cupcake design on the paper.


When the glossy accents has dried, this takes about half an hour, just cut your paper neatly around the edge of the tile. Did I mention that you can use photographs to make magnets too? Next, flip the magnet over and use E-6000 to glue the magnet to the back of the tile. Easily done right? Read on for yet another idea.


This is my new favorite pretty thing to make. For magnets like this, the process is only slightly more complicated.


Instead of using printed scrapbooking paper for these magnets, I used solid paper and paper punches. You could also use a pre-cut border and just cut one motif from the border.


Now, put the glossy accents to the paper piece and place the flat side of the glass tile to the paper. The glossy accents should still smoosh out around the edges.


Flip the tile over again and cover the entire back of the tile with a nice, smooth coat of glossy accents. Sometimes I go a little overboard and I have to use a piece of paper to sort of squeegee the glossy accents into a more orderly blob.


After the glossy accents has dried completely (it should be glass clear and hard and usually takes less than an hour) use E-6000 again to adhere the magnet to the tile. I try to find super strong and really tiny magnets to use on these small designs. Now you have coordinated magnets and note holders to stick them on. Isn't that cool?

As always, if you want to see any of these projects eye-to-eye (so to speak), just drop on by our store to check them out.

Happy magnet making!
Puna @ Enchanted Lake

Hey! There was another post earlier today. If you check out the earlier post, you can watch me make a lantern on Crankin' Out Crafts. Please check it out.

Thursday, August 11, 2011

Glass Tile Pendants


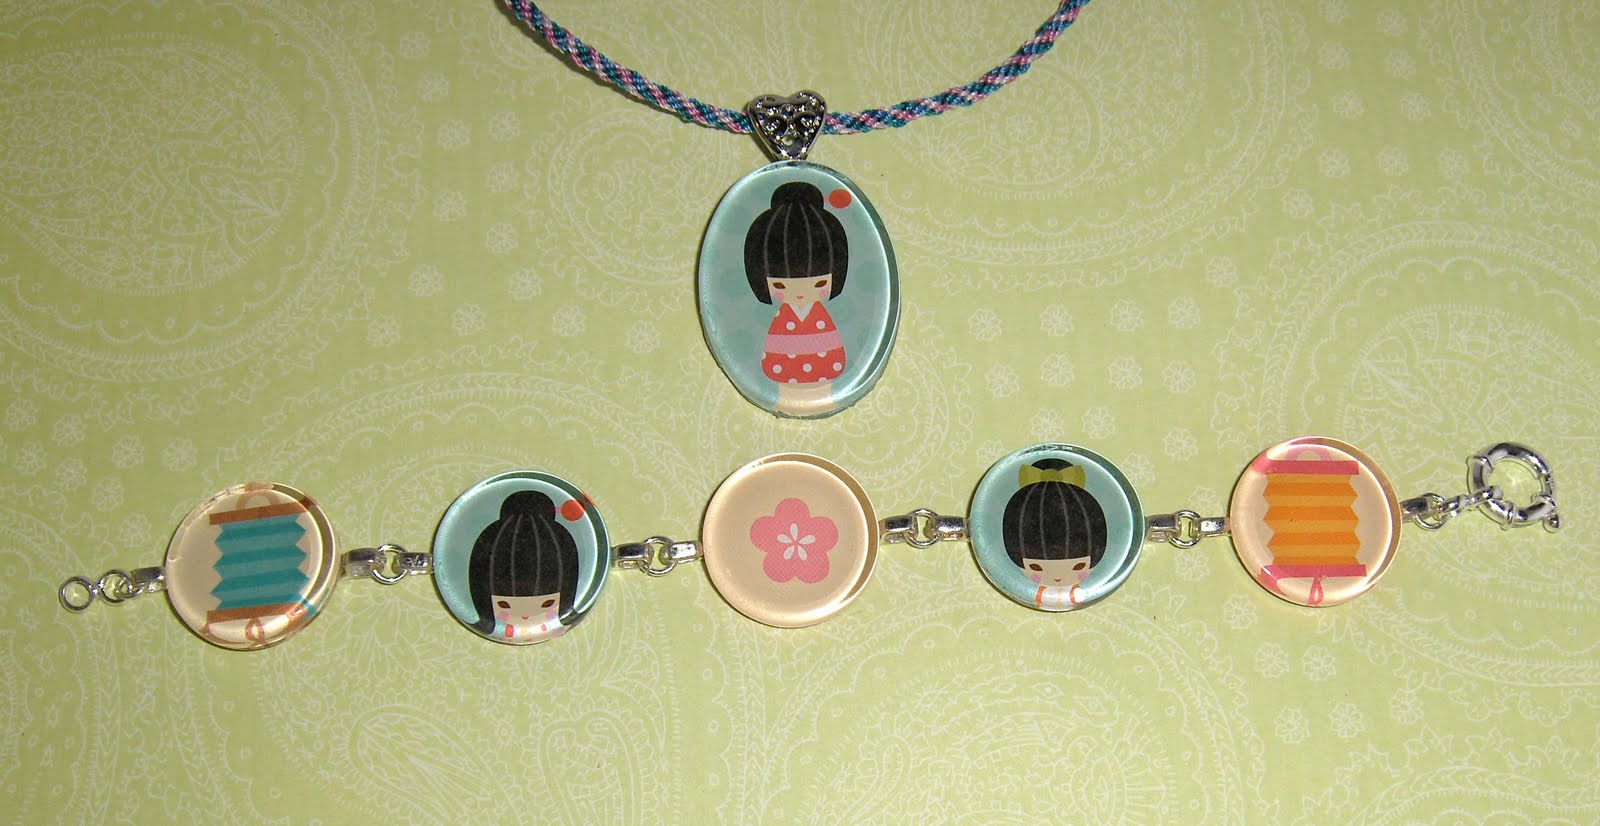
Glass tile pendants are very popular right now and we've started selling them in a variety of shapes and sizes. It's a fun way to make personalized jewelry and being that I'm able to use some of the cute paper that I bought, I'm one happy camper!
I used Glossy Accents to adhere the paper to the back of the tiles and then trimmed down the paper edges so that they didn't protrude beyond the edges of the tiles. I did another thicker layer of Glossy Accents behind that and once that was dry, I used Devcon 5 Minute Epoxy to attach glue on bales. By attaching glue on bales to both sides of each glass tile, I was able to make a bracelet by connecting the pieces with jump rings. For my pendant I used my Kumihimo disk to make a neck cord with S-lon nylon thread.
We've got glue on bales and glue on stretchy rings at all of our Ben Franklin Craft store with expanded Bead Shops (Mapunapuna, Maui, and Hilo)! I think these glass tiles would also be cute as a purse charm!
Don't forget that our Kumihimo disks are on sale until Friday August 12 so if you want to make a Kumihimo cord for your pendant, now would be a great time to pick one up and we can easily show you how to Kumihimo!

Thanks for stopping by and I'll catch ya later!

Lynn @ Mapunapuna Bead Shop