Wednesday, February 29, 2012

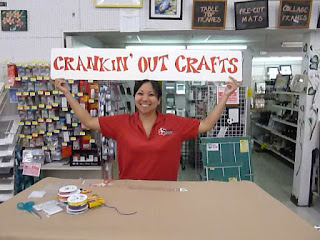
Crankin' Out Crafts Episode 68 - Cherry Blossom Lantern

Ready for another illuminating craft? JFlo is here today to show you how to make beautiful cherry blossom inspired lanterns.

Create an elegant design using the Alcohol Ink applicator & inks!


View the episode here: Crankin' Out Crafts: Episode 68 - Cherry Blossom Lantern


You can cut different shapes out of the applicator felt and stamp anything onto your lantern, or follow our design and make a lantern for Girl's Day or a special girl's birthday party. They're even elegant enough to use for weddings!

Tuesday, February 28, 2012

HK Celebrates Girl's Day at Pearl City BFC!

Girl's Day is coming up this week! Celebrate with us at Pearl City BFC on Saturday, March 3rd from 1:30-3:30pm. We'll have Make 'n Takes and a Beading Demo - all featuring your favorite Kitty!

Craft with us on Girl's Day on Saturday, March 3rd at Pearl City BFC!
Fees vary per project. Limited quantity of make 'n take projects, so come in early! See store for more info. See you there!

Monday, February 27, 2012

Must-do Magnets


If you read last week Monday's post, you know that I made these magnets to compliment my tin sheet note holders. Now, as promised, I'm gonna tell you how you can make magnets to match your note holder. It's so easy...


For the simplest magnets, all you need is some really cute scrapbooking paper. This cupcake will make the perfect magnet to go on my menu board (yes, I schedule cupcakes as meals). So, all I do is put a dime sized dollop of glossy accents on the flat side of my glass tile and stick the tile to the cupcake design on the paper.


When the glossy accents has dried, this takes about half an hour, just cut your paper neatly around the edge of the tile. Did I mention that you can use photographs to make magnets too? Next, flip the magnet over and use E-6000 to glue the magnet to the back of the tile. Easily done right? Read on for yet another idea.


This is my new favorite pretty thing to make. For magnets like this, the process is only slightly more complicated.


Instead of using printed scrapbooking paper for these magnets, I used solid paper and paper punches. You could also use a pre-cut border and just cut one motif from the border.


Now, put the glossy accents to the paper piece and place the flat side of the glass tile to the paper. The glossy accents should still smoosh out around the edges.


Flip the tile over again and cover the entire back of the tile with a nice, smooth coat of glossy accents. Sometimes I go a little overboard and I have to use a piece of paper to sort of squeegee the glossy accents into a more orderly blob.


After the glossy accents has dried completely (it should be glass clear and hard and usually takes less than an hour) use E-6000 again to adhere the magnet to the tile. I try to find super strong and really tiny magnets to use on these small designs. Now you have coordinated magnets and note holders to stick them on. Isn't that cool?

As always, if you want to see any of these projects eye-to-eye (so to speak), just drop on by our store to check them out.

Happy magnet making!
Puna @ Enchanted Lake

Hey! There was another post earlier today. If you check out the earlier post, you can watch me make a lantern on Crankin' Out Crafts. Please check it out.

Crankin' Out Crafts Episode 67 - Butterfly Lantern

It's time to shed a little light on the subject of paper lanterns. Get it? Shed a little light? Anyway, welcome to Lantern Week on Crankin' Out Crafts. Today, Puna will show you how to dress up your lantern with some butterflies.


We want to let you know that no butterflies were harmed in the making of this craft.


Supplies:
Paper Lantern
Butterflies
Hot Glue
Glue Gun
Wire Cutter

These lanterns are even more beautiful when you put a light in them and are great to make for parties or just to decorate your porch or even your bedroom.

Saturday, February 25, 2012

Girl's Day Out!

Today was our Girl's Day Out Paper Party at Hilo Ben Franklin! We had a great turn out and everyone had an awesome time! There were lots of Make N Takes and giveaways along with fun and laughs.

Mags had two very different Make N Takes for customers. The first one was in the morning and was the Bead Soup earrings where customers got to choose beads from our colorful bead soup and make a pretty pair of earrings. The second one, which was in the afternoon, (and pictured above) was a cute little recycled notebook.

Customers waited patiently for seats at Linda's table where she was teaching how to make a gift card holder. As soon as one group was done, another was right there waiting! And Linda was ready for them with a smile!

Sandy's table was also busy busy busy! She had two pretty card Make N Takes to show and we had to keep adding chairs to her table to make more room for people! The first card was an adorable dress card and the second was a bright and colorful card themed "Let's Hang Out!" Everytime I looked over at her table, there were people crowded around it, hard at work on their cards. Lots of fun and lots of awesome cards to show! I wish I had been able to take pictures of some of them!


In the morning, Linda had demonstrated how to make a pretty cupcake wrapper using the Eclips. I'm sure a lot of people now have the machine on their wish lists!

There were also lots of giveaways and other Make N Takes and activities that I wasn't able to take pictures of. Ramona had cupcake decorating and I manned the body art table. Oh man, was there a lot of glitter all over the place! We had some very sparkly kids running around the store!

All in all it was an awesome Paper Party! Thanks and Great Job to Ramona, Linda, and Sandy for all their hard work putting it all together! Now that this one is over, we'll soon start planning our next one. Since this one was themed Girl's Day Out, what do you think the next one might me. Could it be...Boy's Day Out? You never know!

See you soon!

~Jen at Hilo Ben Franklin

Friday, February 24, 2012

Crankin' Out Crafts Episode 66 - Crayon Teacher Gift

Need a gift for your teacher? Watch as we create a beautiful piece of art by gluing crayons to canvas!
B-Dizzle shows you how to make a great gift for your teacher!


Supplies:
Canvas
Crayons
Scissors or X-Acto knife
Hot Glue Gun & glue sticks
Letter Stickers or Adhesive Foam Letters

We had a blast sharing our colorful ideas with you and hope that you will incorporate crayons on your next project. See you next time!

Thursday, February 23, 2012

New Items - Beanie Ballz!

Beanie Ballz by Ty have just arrived at our stores. They come in assorted animal characters like a panda, turtle, ladybug, and even Spongebob Squarepants! When the Beanie Ballz are thrown, rolled or bounced, they land on their feet.

Choose from regular, large, extra large and keyclips.
Here's Lu from Mapunapuna holding the large & extra-large sizes.
A close-up of the extra-large Beanie Ballz. Too cute!
Beanie Ballz are great gifts for kids. Stop by today and check out our selection. Get your favorites or collect them all!

*Don't forget to read today's earlier post from Lynn at Mapunapuna Bead Shoppe on the Girl's Day Kanzashi Hair Accessory.

Girl's Day Kanzashi

When I was growing up I would spend many evenings glued in front of the TV watching Japanese television shows like Abarenbo Shogun and I was fascinated with the elaborate costumes of the women.  My all time favorites were the beautiful hair sticks that had little flowers dangling down that swayed with movement.  While looking through the various beads we sell at Ben Franklin Crafts, I was inspired to make one because surely I wasn't the only one that admired this style of hair accessory, luckily I found everything I needed to do just that!


Here are the supplies I used:


Craft wire in 20 and 22 gauge, a 10 petal flower filigree by Kiwa, 8/0 seed beads, a 2 inch barrette, 4 head pins, small plastic flowers, 6mm plastic round beads, and mini leaf sequins.


I also picked out a really blingy bead from one of these packs as my focal bead.

I decided to use a barrette because not everyone has long hair but you could easily substitute a hair stick instead, we carry them in 5 or 7 inch length in our bead shop.  The barrette has one end where you pinch to open up the backing, the opposite end is where you will want to attach the ornamental portion to make it more user friendly.  Starting from that end of the barrette, I used Fabri-tac to glue on the mini leaf sequins.  The sequins have a hole at the base of each leaf so I aligned that hole with the hole on the end of the barrette at my starting point because later I will wire wrap my ornament there.  I had my sequins slightly overlapping as I worked across the barrette to fully cover the metal and to get a good saturation of color.  I set this on the side to dry as I worked on the ornament portion of the piece.

For each chain of flowers, I started with a head pin and strung on a 8/0 seed bead, a 6mm round, and a small flower.  I trimmed the end of the pin so that I would have slightly less then 1/2 inch of wire and then used my round nose pliers to make a simple loop, of course you can wire wrap the end if you prefer.
I used 22 gauge wire for the rest of the links, each link consisting of a 6mm round and a small flower.  I did simple loops with this just to keep it easy, wire wrap if you prefer but keep in mind that it will increase the overall length in your end result. I used 4 links per chain but you can adjust the amount of links depending on how long or short you want the end result to be.  I made a total of 5 chains in this way and attached 4 at various points along the perimeter of the filigree flower.  For the 5th chain I used 20 gauge wire to attach to the end with a simple loop, strung on a 6mm round, a small flower, another 6mm round, went up through the center of the filigree, strung on my focal bead and then another 6mm round.  From here I wire wrapped it to the end of the barrette.

These beads come in a pretty good selection of colors so you could easily change up the palette for your favorite girl to give her on Girl's Day!  This would also be a good project for Obon Season!

I'll be doing a demonstration on this on Saturday February 25 at 2:00 in our Mapunapuna Bead shop so come by if you want to check it out!

Thanks for stopping by and I'll see you at the store!

Lynn H.
Mapunapuna Bead Shop

Wednesday, February 22, 2012

Crankin' Out Crafts Episode 65 - Crayon Drip Art

We're back today with another great crayon project for you. Lisa gets creative adding color to a plain white canvas by melting crayons!

Create your own artwork with crayons!


Supplies:
Canvas
Crayons
Hot glue gun & glue sticks
Heat tool

With just a few supplies, you can create a unique piece of art that is sure to brighten up any space. Hang in your kids playroom, living room, or even your classroom. Check back with us on the blog again for another colorful crayon project!

Monday, February 20, 2012

Crankin' Out Crafts Episode 64 - Crayon Lei

Welcome to Crayon Week on Crankin' Out Crafts! No, you won't be coloring - instead we'll demonstrate how crayons can be used to create some neat and fun craft projects. Today, Lisa will show you variation of the popular Candy Lei - the Crayon Lei!

Can’t think of simple and “safe” gifts for your kid’s class?
Lisa shows you what she did for her son – Crayon Leis! 

Watch the episode on our youtube channel: Crankin' Out Crafts: Episode 64 - Crayon Lei

Supplies:
Crayons
Poly-tubing (color of your choice)
Ribbon
Scissors

This is so easy to make, and you don't have to worry about any allergies! It's also perfect for a Preschool Graduation, Birthday Party, or even for your kids who just love to color. Poly-tubing is available at all of our Ben Franklin Crafts stores in assorted colors. For those of you not in Hawaii, you can purchase poly-tubing as well as other lei making supplies online on the Crafting is Fun Website.

*Don't forget to check out today's previous post from Puna on how to make your own Magnetic Note Holders.

Magnetic Note Holders

Here's a quick and easy idea for home decor that comes in handy for household communication. Make a magnetic note board for your home to liven up a space and pass along reminders or important messages.


All you need to do is cover up a tin sheet with some cute scrapbooking paper and throw it into a 12x12 frame for a table or desk top note holder. The especially cute borders on these pieces were made using EK Success and Martha Stewart edge punches.


I even made one to hang up. Instead of inserting the tin sheet into a frame, I punched a couple of holes at the top (using the Cropadile) and then strung ribbons through them to use as a hanger. Did I forget to mention that these tin sheets are on sale at our Hawaii Ben Franklin stores until February 24th?


To complete the fancy look, make some coordinating magnets to go along with your note holder. These magnets were made using glass tiles and scrapbooking paper. I think I'll save the magnet making step-by-step for next week's blog, so don't forget to check back.

Thanks for reading!
Puna @ Enchanted Lake

Friday, February 17, 2012

Crankin' Out Crafts Episode 63 - Scribbles (Puffy Paint)

We're finishing T-shirt week with another technique for adding designs to clothing. Spice up your old t-shirts using 3D fabric paint, like Scribbles.

Brandon teaches you how to draw some fun & crazy designs with Scribbles.

To watch the episode, click on this link: Crankin' Out Crafts: Episode 63 - Scribbles (Puffy Paint)

Supplies:
T-shirt
Scribbles (Puffy Paint in your choice of color/colors)

Scribbles come in a wide assortment of colors to match your projects. It's great for outlining and detailing designs. Feel free to share your projects on our Facebook page - we'd love to see what you create!

Wednesday, February 15, 2012

Crankin' Out Crafts Episode 62 - Freezer Paper Stenciling

T-shirt week continues on Crankin' Out Crafts with stenciling using freezer paper. Create custom and stylin' designs to update your wardrobe. 

Using Freezer Paper, you can make your own T-shirt stencils!


Supplies:
Freezer Paper
Scissors
X-acto Knife
Design
Fabric paint (or acrylic paint mixed with Textile Medium)
Brush 
Iron

All our Ben Franklin Crafts Stores carry Freezer Paper. Who knew that it could also be used for craft projects? Hope you have fun making your own t-shirts. Check back with us again Friday for another great way to decorate clothing. 

Monday, February 13, 2012

Crankin' Out Crafts Episode 61 - Simple Screening

Welcome to T-Shirt week on Crankin' Out Crafts! We'll be teaching you new ways to make and decorate your own T-shirts. Today, Brandon demonstrates how to create designs using the Simple Screening stencil and fabric paints.


Watch as Brandon shows you 3 different ways to use this perfect silk screening stencil. 


They come in many different designs that can be re-used over & over! 
View the episode on our youtube channel: Crankin' Out Crafts: Episode 61 - Simple Screening

Supplies:
Simple Screening Stencil (includes squeegee)
Simple Screening Fabric Paint
Brush
Simple Screening Glitter

This is just one example of an easy way to decorate T-shirts and clothing. Join us again this week for other ideas to help you create unique and fun designs.

*Don't forget to read our previous post today on hair accessories by Puna from Enchanted Lake BFC.

Hair Appeal

For today's blog entry I decided to focus on a section of our store that, I think, often gets overlooked. You may not have known this but we have a wonderful selection of hair accessories that can make great gifts or even wonderful children's craft projects. The reason why you may not have noticed these incredibly cute accessories is that they are located in our jewelry section.


With just a little decorating, these barrettes and clips can become amazing, fast, hair accessories.


For all of the pieces on the blog today I used one of these two different types of clips. The silver one is an alligator clip and the the gold is a bobby-pin like barrette.

Now that you have your clips it's time to decorate them. Look around your house for simple ideas to just add on to your clips. You can start off easy with a simple bow like this one. I hot-glued this bow together and then onto an alligator clip.


Small rhinestones also make great additions to your clip collection. This shamrock shaped rhinestone is a seasonal item we brought in for St. Patrick's Day. To glue this piece together, you might want to use a glue specifically made for rhinestones, like Aleene's Jewel-It or Beacon's Gem-Tac. Other glues may give your rhinestones a cloudy look to them.


If you've done any scrapbooking lately, you know that buttons are no longer just for clothing. Now we can also add buttons to our list of great hair accessories. I used a button shank remover to take the shank off of these glittery slipper buttons and then glued them to an alligator clip with some ribbon on it.


Last, but not least, you can always make your own great decorations like I did with this felt shamrock. I think this will be my piece of green so I don't get pinched by anyone on St. Patrick's Day.


Remember, you can always drop in at our Enchanted Lake store to see these samples or for other great projects.

Puna @ Enchanted Lake

Saturday, February 11, 2012

Lots of Fun This Week at Hilo Ben Franklin!

We have a lot of fun stuff in the works this week at Hilo Ben Franklin! There are tons of demos for you to come see and don't forget, we're still gearing up for our Paper Party on February 25!
Here are some of the great demos for you to come join in:

This is the Card of the Month! There's going to be a demo on this on Sunday, February 12 from 12 - 1230p.m. It's an adorable card that can be used for many different occasions and uses!

Just in time for Valentine's Day we have demos on making these beautiful Flower Rose Kisses on Monday and Tuesday. They're from 12 - 1230p.m. on both days.

This cute bracelet is perfect to give a little girl for Girl's Day! The demo for this is on Wednesday from 12 - 1230p.m. (Have you noticed a trend with the time yet? ^.^)

The final demo I want to mention is a Nylon Flower demo on Friday from 12 - 1230p.m. These pretty flowers can be made in all different colors and designs.

We have one Make & Take for all you beaders and jewelry makers out there. Beading With Mags will take place in our Bead Shoppe on Saturday from 10a.m. - 2p.m. The project is apparently top secret for now, but stop by and see what Mags has planned!

Have a great week and don't forget to come by to see our demos!

See you soon!

~Jen @ Hilo Ben Franklin

Friday, February 10, 2012

Crankin' Out Crafts Episode 60 - Hearty Clay Valentine Pin & Special Edition Episode - Glitter Heart Card

We're finishing up Hearty Clay Valentine Week with another craft you can make for Valentine's Day. Brandon shows you how to make a pretty pin using Hearty Clay and various molds.


Use various lollipop, soap, & chocolate candy molds to create cute pins out of Hearty Clay.

Supplies:
Hearty Clay
Mold (for lollipop, soap, or chocolate candy)
Baby Powder
Acrylic Paint
Hot Glue Gun & glue sticks
Pinback

Who knew that you could use those molds to create pins with clay, too? Stay tuned after this episode, because we have a Special Edition Crankin' Out Crafts Episode - the Glitter Heart Card, featuring JFlo on-location in Texas with her niece and nephew. 

Today marks our 60th episode! Thank you all for watching, we'll be back next week with another set of projects for you. Don't forget, Valentine's Day is on Tuesday, February 14th!

Wednesday, February 8, 2012

Crankin' Out Crafts Episode 59 - Hearty Clay Valentine Rose

We're back again with another craft you can make for Valentine's Day! In this episode, learn how to make a rose made out of Hearty Clay.

Watch as Brandon smashes clay in his hand to create a beautiful rose.
Perfect for gift-giving on Valentine's Day!

View our episode here: Crankin' Out Crafts: Episode 59 - Hearty Clay Valentine Rose

Supplies:
Hearty Clay
Wire
Flower Tape
Silk Leaves

Create a single rose or even a bouquet of roses that will last longer than fresh flowers! Experiment with different colors and shapes, too. Join us again Friday, for another fun Hearty Clay project.

Monday, February 6, 2012

Crankin' Out Crafts Episode 58 - Hearty Clay Valentine Embellishments

Valentine's Day is about a week away on Tuesday, February 14th! This week we will show you how to make Valentine-themed items out of Hearty Clay. Hearty Clay is an easy-to-use, air-dry clay and comes in different colors. Brandon demonstrates how to use cut-outs from Hearty Clay to create easy embellishments for Valentine's Day cards and scrapbooking.

Create your own embellishments for cards and scrapbook pages!


Supplies:
Hearty Clay
Roller
Fondant or Clay Letter Cutters
Triple Thick Gloss
Brush

Check back again this week for more ideas using Hearty Clay for Valentine's Day!

Sunday, February 5, 2012

Hilo Ben Paper Party Sneak Peek #2

I'm back with more sneak peeks for the upcoming Hilo Ben Franklin Crafts Paper Party on Saturday, February 25, 2012 from 10a.m. - 3p.m.!

We do have a minor change to announce first, though. Unfortunately, we won't be doing the purse card I showed in my last post. There was some feedback on it and it was decided that we would not be doing the purse. But there will be some other adorable projects for you to do!


This is a dress card that is completely the cutest thing! I know a little girl who would love a dress like this and I think she'd be bowled over by the card too!


And, of course, what's a Hilo Ben Paper Party without cupcakes, right? This time around, though, we'll be dressing them up a little by making little cupcake holders/liners using the Eclips. So if you've always wanted to see what this machine can do, make sure you mark the date of the Paper Party on your calendar!

Needless to say, I haven't shown you ALL the different projects we're going to have available for you to do. There have to be SOME secrets and surprises, right? It's going to be a lot of fun with projects for all ages. The theme is Girls' Day Out so many of the projects are going to be cute and girly. (But that doesn't mean boys can't do them too!) So make sure to come by our store and join us for the Paper Party on Saturday, February 25!

See you there!!

~Jen @ Hilo Ben Franklin

Friday, February 3, 2012

Crankin' Out Crafts Episode 57 - All About Paint

Welcome back to another episode of Crankin' Out Crafts! We're wrapping up this week with information about artist paints. Join Brandon for a very informative stroll through our painting aisle.

Learn more about paint! Brandon recommends the best paint for your canvas or craft.


It's been a great week here on Crankin' Out Crafts and we hope you have learned a lot. We'll be back next week with more projects and ideas. Happy Aloha Friday!

Thursday, February 2, 2012

Crankin' Out Crafts Episode 56 - All About Candy & Frosting

Have you ever wanted to make your own sweet treats, but didn't know where to start or what to buy? Today, Brandon tells you all the possibilities! Walk through the baking and candymaking aisle with him, as he shows you what's best for certain confections.

Ben Franklin Crafts carries lots of baking and candymaking supplies.


Valentine's Day is coming up on Tuesday, February 14th. Why not make something delicious and sweet for your loved ones? Visit our stores for supplies and more ideas. Thanks for watching and stay tuned for our last Informational Crankin' Out Crafts episode coming soon!