Happy Tuesday again, everyone! This week I was scrolling through our older blogs and I re-stumbled on Hilo's felt flower tutorial, and I thought that the idea was just sooo cute! Then I recalled my older post on the new Tutera line of wedding dies, and I though, why not recreate something like that.. but with FELT? So kudos to the two of them for this blog post today, I hope everyone can enjoy. :) It's really very simple- no die or Sizzix required today, just some good 'ol fashioned crafting.
Materials:
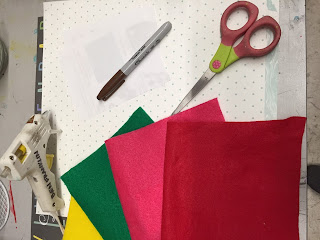
- Felt Squares (Colors of your choice)
- Scratch Paper (To make your stencil)
- Cardstock (If you are planning to re-use your stencils, cardstock is a much safer option)
- Scissors
- Sharpie Pen (Dark-Colored)
- Hot Glue Gun & Gluesticks
Instructions
- Starting with your scratch paper or cardstock, trace or draw out your desired petal shape, then cut them out, these are now your stencils!
- Select the color of felt you'd like to use for your petals. I picked this bright pink color! Then, trace out the petals. This particular flower will have 5 petals. Then cut out all the petals you've traced.
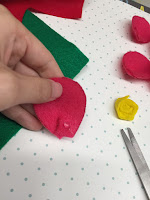
- Once all your petals have been cut out, cut a half-inch incision up from the base on each petal. Next, put a dot of hot glue on one flap, then cross the other flap over to secure it down. Repeat this on all petals.
- Once you have done this, you are ready to glue your petals together- I usually do this by putting a small dollop of glue on the right side of the petal base and attaching the next petal in the same fashion, repeating this until your flower is closed and complete.
- For the pistil(center) of the flower, take a thin 1/4 inch strip of yellow or very light green felt and roll it up so that it creates a tight, messy spiral. *TIP* You can also twist the strip as you roll it to create an interesting look, as shown here.
- When you have rolled it all the way to the end, glue the end down, then glue the spiral down to the center of the flower. You are now done with your blossom!
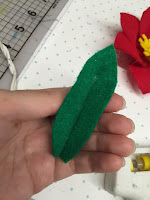
- Now, if you wish to add leaves, simply cut out a leaf-shape out of green felt, and put down a thin line of hot glue down the center.
- Fold the leaf along the line of hot glue, using generous pressure when creasing.
- Now, open the leaf up and flatten if desired. Voila! You have a lovely leaf.
- I created a second flower with a pointier stencil and used red felt this time around- for this pistil, I simply cut a thicker yellow strip and just cut perpendicularly straight down about halfway, then roll it up and glue it down! This gives the flower a different look.


-Helen C.-
Craft Coordinator
Kahului Ben Franklin Crafts


No comments:
Post a Comment