Showing posts with label photo. Show all posts

Tuesday, November 3, 2015

Chunky Letter Photo Holder

Hey, everyone!
I hope you guys had an awesome Halloween last weekend. 
So, it's November and it's almost time for Thanksgiving!
Time to count your blessings and be grateful for what you have. 
Family, friends, pets... I know we all have a small photo of them somewhere
on our work desk or in our planners.  So today I will be showing you a fun way
to display a special photo using our brand new mini paper mache letters!
 
~~~~~~~~~~~~~~~~~~~~~~~~~~~~~~~~~~~~~~~~~~~~~
 
Supplies Needed
Mini Paper Mache Letter
Chalky Finish
Acrylic Paint
Foam Brush
Natural Bristle Brush
Small Paint Bowl
Thick Floral Wire
Montana Marker (not pictured)
Pliers (not pictured)
Needle


~~~~~~~~~~~~~~~~~~~~~~~~~~~~~~~~~~~~~~~~~~~~~
 
Let's get started!
 
First, use the foam brush to paint the letter with the chalk finish in the
color of your choice.  I decided to go with a teal
tone with a white distressed accent.


Second, after letting your base color dry, I used a dry natural bristle brush
to distress the letter with white acrylic paint.  Lightly dip the tip of the
flat brush in the paint, wipe the excess off on a paper towel or scratch paper,
and use light strokes to apply the paint.  The light strokes create the light and streaky
look.  Only apply a heavier amount of paint on the angles so it appears scuffed.


Next, color the bent floral wire.  The Montana paint marker provides
a smooth matte finish and it also dries pretty quickly, so I went with that instead
of spray paint or regular acrylic.  I had actually bent the wire with a pair of long nose pliers to form this curled shape. It's pretty easy.  Just start by bending where you want the base of the curl and go upwards from there.  I recommend leaving about
3 inches for your "stem".  This curl is where you will stick your photo on.
 
 
After that, poke a hole into the top of your letter with the needle.  Be sure not
to make the hole too big.  You want it to be tight around the stem so that your photo
stands up straight.


Lastly, stick the wire in and you're finished!


These are great for gifts, favors and place markers for parties! 
Embellish with glitter, stickers and rhinestones or tie on some beads.
Glue on some shells or pom poms.
Mod podge some scrapbook paper on each side!
Whatever you do, have fun!
 
Erika @ PC


Wednesday, October 14, 2015

Custom Planner Insert

Hello, Crafters!
As you all know, the planner craze is ragingly popular right now and it finally reached the islands with Mambi's Happy Planner! I love how easy they are to customize.  
All you need is washi tape, stickers, photos, scrapbook paper, and a bit of creativity and imagination.  This week, I have a project that will add a more personal and fun touch to your planner.

Let's get started!

~~~~~~~~~~~~~~~~~~~~~~~~~~~~~~~~~~~~~~~~~~~~~~~~~~~~~~~~~~~~~~~~~

 Here's what you'll need:


We R Memory Fuse Tool Kit
Scissors
Paper Cutter
12x12 Scrapbook Sleeve
Photos and/or Cardstock Scraps 
Sequins (optional)
Standard Hole Punch
Sharpie (Not Pictured)


First, lay out your cardstock pieces and photos and figure out how you want them to look once fused together.  The striped paper on the side is where I plan on punching the holes for the planner binding.


Start with the piece of cardstock that would take up the bottom corner of the photo sleeve. 
For my layout, I started with the white and gold striped paper on the far left.  Make sure that the paper is flush against the side of the sleeve so that it stays straight in the planner.  Fuse the top of the piece, then the side using the Fuse ruler.


 I then slipped the bottom photo in and fused it down before fusing its side.  The "lovely day" piece needed sequins so I fused the side first, slipped the sequins in, then fused the top.  I fused the top photo and cardstock piece after that and cut the excess plastic off the sides with the sliding cutter.
I then used one of the pages of my planner to mark where I want to punch the holes with a Sharpie, making sure they were about 1/4th of an inch from the side. 

Then, I cut tiny slits on the side so that the insert would "snap" right onto the Happy Planner's bindings.


And there you have it!  This is great for adding memories of special holidays and events to your binder, or if you just happen to catch the scrapbooking bug.  Highly customizable, cute and simple, it's a great way to add that personal touch to your planner.  

Have fun!
Erika @ PC


Monday, April 28, 2014

Mother's Day Photo Taking Event at HouseMart BFC Mapunapuna - Saturday, May 3 from 10am-2pm


Create a special gift for Mom! Bring your Keiki in on Saturday, May 3rd from 10am to 2pm to our Mapunapuna store to take 3 photos (child will hold a letter in each photo spelling M-O-M). Fee $49.99 includes photo session, (3 photos), printing, matting, and framing. Pick-up finished frame the next day on Sunday, May 4th. Craft Club discount can be applied to this special promotion. See store for more details.
Create a special gift for Mom! Photo Taking Event for Mother's Day on 5/4 10am-2pm

Extra Special Deal! Gift Wrapping available at a discounted price for only $6 (reg. price $12) next door at Celebrations! (Receipt must be shown at the time of purchase.)

Tuesday, October 15, 2013

Resin Working with Shells

Check out these AWESOME Shells created using UV Resin, Photos and some embellishments!!


Supplies:
Photos (Printed on Computer Paper)
Sea Shells
UV Resin
UV Lamp
Mod Podge
Small Brush
Embellishments (Rhinestones, Glitter, Small metal embellishments and tiny pearls)
Sand (Tan Color)


How To:

Use Mod Podge to adhere the photo to the inside of the shell by brushing a coat onto the shell itself and also brushing a coat onto the back of the photo. Carefully rub out any air bubbles with your fingers. Once the Mod Podge dries, Pour some UV Resin onto the edges of the shells and dip them into Sand, place under the UV Light for a few minutes and take out. Coat the photo and the inside of the shell with Resin and place back under the UV light for a few minutes to harden. Use Rhinestones and small embellishments by coating the embellishments with Resin on the shells and placing under the UV Light to harden.

Use these shells as a way to display your trips and memorabilia. They would look great scattered in a bowl or even on a magnet! Glue a ribbon on them as a Christmas Ornament!

Thanks For Looking and CRAFT ON!!!!!! ~ Deborah @ Market City


Monday, September 2, 2013

Memory Jar

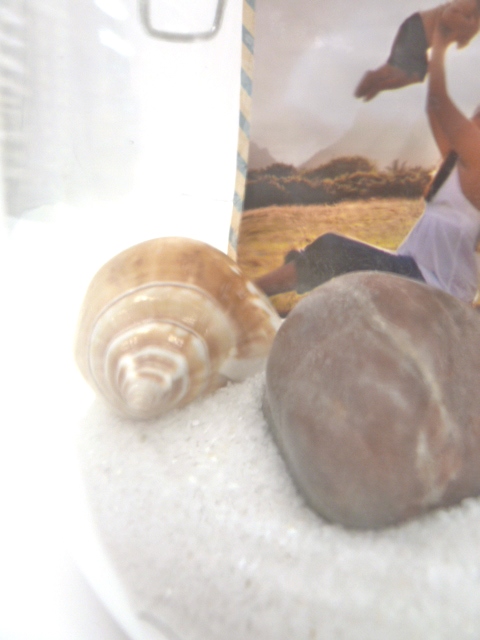
I promised more jar and container ideas, didn't I? I'm really having fun putting all kinds of stuff into our cute jars. Today, I decided to make a memory jar. This is an original way to display small keepsakes from vacations or special days.


You don't need a lot for one of these jars; essentially, all you need to have is a jar and some sand or filler for the bottom. Everything else that you insert is going to be your own small souvenirs or photos. One note on this particular jar, I used an American Crafts Slick Writer to write my date on the glass. It works really well, and won't wash off unless you use alcohol.


You can include small shells or rocks or other natural items which you picked up on that special occasion. 


Feathers add a pretty, soft touch. I also made a small fence out of craft sticks and wire to add to the scenery.


Jars like this make great displays that allow you to share those special times with others without having to force them to sit through a slideshow or flip through a photo album.

I hope this inspires you to get container creative.
Puna @ Enchanted Lake

Thursday, June 6, 2013

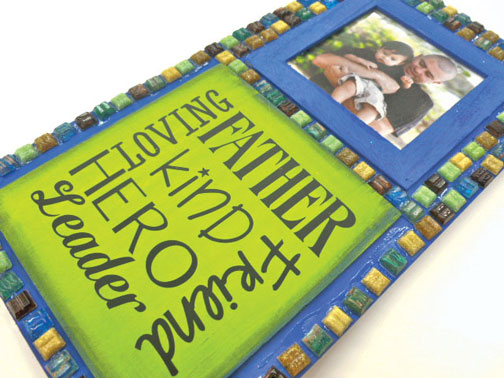
Crankin' Out Crafts Episode 257 - Mosaic Picture Frame


Create a unique design with Mosaic tile and give a gift that will last for a lifetime. Mosaics can make your project dimensional and add a splash of color and texture.

See how JFlo creates a one of a kind Frame.

Here's another easy project to make with our new mosaic tiles: Crankin' Out Crafts: Episode 257 - Mosaic Picture Frame

Supplies:
Ready-to-Decorate Wood Frame with plaque
Ceramcoat acrylic paint (we used blue bayou & gecko)
paintbrush
e6000 glue or craft glue
mosaic tiles
vinyl word stickers

This project is great to make for Father's Day on Sunday, June 16th! Come and check out the different color packs of mosaic tiles and ready-to-decorate wood surfaces at our stores.

Friday, May 17, 2013

Crankin' Out Crafts Episode 249 - Glitter Frame


Showcase your favorite photo in a sparkly frame. Transform a plain, inexpensive frame into a shining beacon. 

Glam-up a frame or canvas with glitter!

Watch our latest segment here: Crankin' Out Crafts: Episode 249 - Glitter Frame

Supplies:
craft tray
frame
glitter (we used Wow Ultrafine Glitter by American Crafts)
Mod Podge or glue
paintbrush
Master Shine Sealer (Triple Thick Gloss)

You can transform the look of almost any craft project with glitter! Thanks for joining us this week and stay tuned for more on Crankin' Out Crafts.

Monday, March 18, 2013

Crankin' Out Crafts Episode 228 - Lighted Portrait Graduation Sign


Create your own sign board for that special graduate in your life! Watch how Puna incorporates battery operated lights.

Add battery-operated lights to your sign!


Supplies:
Foam Core Board
White Felt with sticky-back
double-stick tape
Battery-operated rice lights with 3AA batteries
Duct Tape or Packing Tape
Photo Mat or design
AccuCut machine to cut out letters (use for free at Hawaii BFC stores with purchase of paper or materials)
awl

Stop by Ben Franklin Crafts today for all your graduation needs! Stay tuned this week for more projects on Sign-board making.

Monday, February 18, 2013

Crankin' Out Crafts Episode 216 - Decoupage Frame


Get framed this week with some new Crankin’ Out Crafts episodes. Our week starts with JFlo and an easy decoupage project.

Save your paper scraps to decorate a wooden frame!


Supplies:
Square wooden frame
Scrapbooking paper
Decoupage
Stamp pad
Sandpaper or Xacto knife
Paint brush or sponge brush
Wooden accent shape, optional

Frames can make great gifts for every occasion and with simple tricks like today’s project you can make a frame to coordinate with any décor.


Friday, February 15, 2013

Crankin' Out Crafts Episode 215 - Letters Frame


Personalize your frame with your painted initial. Use our new ready-to-decorate chipboard letters!

Personalize a frame with an initial!


Supplies for Frame:
MDF Ready-To-Decorate Frame
Chipboard letters
scrapbook paper
double-sided tape
scissors
ink pad (for distressing edges)
paint & paintbrush
decoupage glue (gloss finish)
burlap sheet
gluegun & gluesticks

Supplies for Pennant:
scrapbook paper
baker's twin or yarn
hole punch

These frames are so easy to make! Decorate some to give out as gifts to family and friends.

Friday, December 28, 2012

Crankin' Out Crafts Episode 195 - New Year’s Photo Booth


Brandon is here to show you a quick and easy photo booth for your New Year’s celebrations.


Supplies:
Foam core
Xacto knife
Black, gold, and silver cardstock
Wooden dowels
Black paint
Scissors
Hot glue gun and glue sticks

Don’t forget to make some props to go along with your photo booth. For our glitzy and glamorous theme we made props like a top hat, a mustache, and a monocle.

Friday, August 10, 2012

Crankin' Out Crafts Episode 137- Picture Wreath (Wall Art)

Have you ever wondered what to do with all of those great pictures you took the last time you went on vacation? Well, Lisa is back with us today with the perfect answer to that question; you hang them up, of course!

A fun way to use your photos!

A close-up of the project


Supplies:
Pictures (we used 3”x3” photos)
Chipboard
Scrapbooking paper
Hot glue gun and glue sticks
Stretcher bars (we used 16” and 18” bars)
Ribbon

Now you don’t have to put those photos in an album where no one will see them, you can hang them on the wall for everyone to enjoy. We hope you enjoyed our week of wall hangings, join us again next week for the next cool craft we can crank!

*Don't forget to scroll down and read today's earlier post from Kahului!


Monday, August 6, 2012

Crankin' Out Crafts Episode 135 - Popsicle Stick Frame (Wall Art)


Welcome to our Wall Art Week on Crankin’ Out Crafts. Lisa is back again today to show you how to create a simple yet graphic piece to add to your home décor.

Today's project: the Popsicle Stick Frame

Lisa is back for Wall Art Week on Crankin' Out Crafts!


Supplies:
Popsicle sticks
Acrylic paint
Brush
Water
5x7 frame
Hot glue
Glue sticks
Scissors

Watering down the acrylic paints before using them on the Popsicle sticks makes the paint look more like stain on the wood. Don’t forget to use a color combination that goes along particularly with your home.

Friday, May 25, 2012

Black & White Heightens Dramatic Effect

Aloha Crafters ~

Today's Idea & Inspiration is to use Black & White elements for dramatic effect. Whether it be decor, attire or art, black and white highlights shape and design.

Pictured:
  • 12x12 black picture frames with unmatted black & white photos
  • 11x14 black picture frame with white mat  for black & white illustration
  • Black & white fabric purse
  • Black sketch book
  • White frame highlighting "B" monogram
  • Black & white pillow
  • Various black & white bracelets
  • 12x12 black scrapbook frame converted to earring holder, with earrings
  • Black & white "retro record player" pinata
  • Zebra design paper products
  • Black scrapbook album

Happy Crafting!