Showing posts with label beachy. Show all posts

Monday, January 1, 2018

Sea Glass & Starfish Light Catcher

Happy Monday!
Let's have fun this week with some tropical sea glass mobiles! After all, Kailua is a beach town! I was inspired by the ombre sea glass colors available at HouseMart Ben Franklin and thought this mobile would be great for a baby's room or even outside the front door to greet guests as they enter the house!
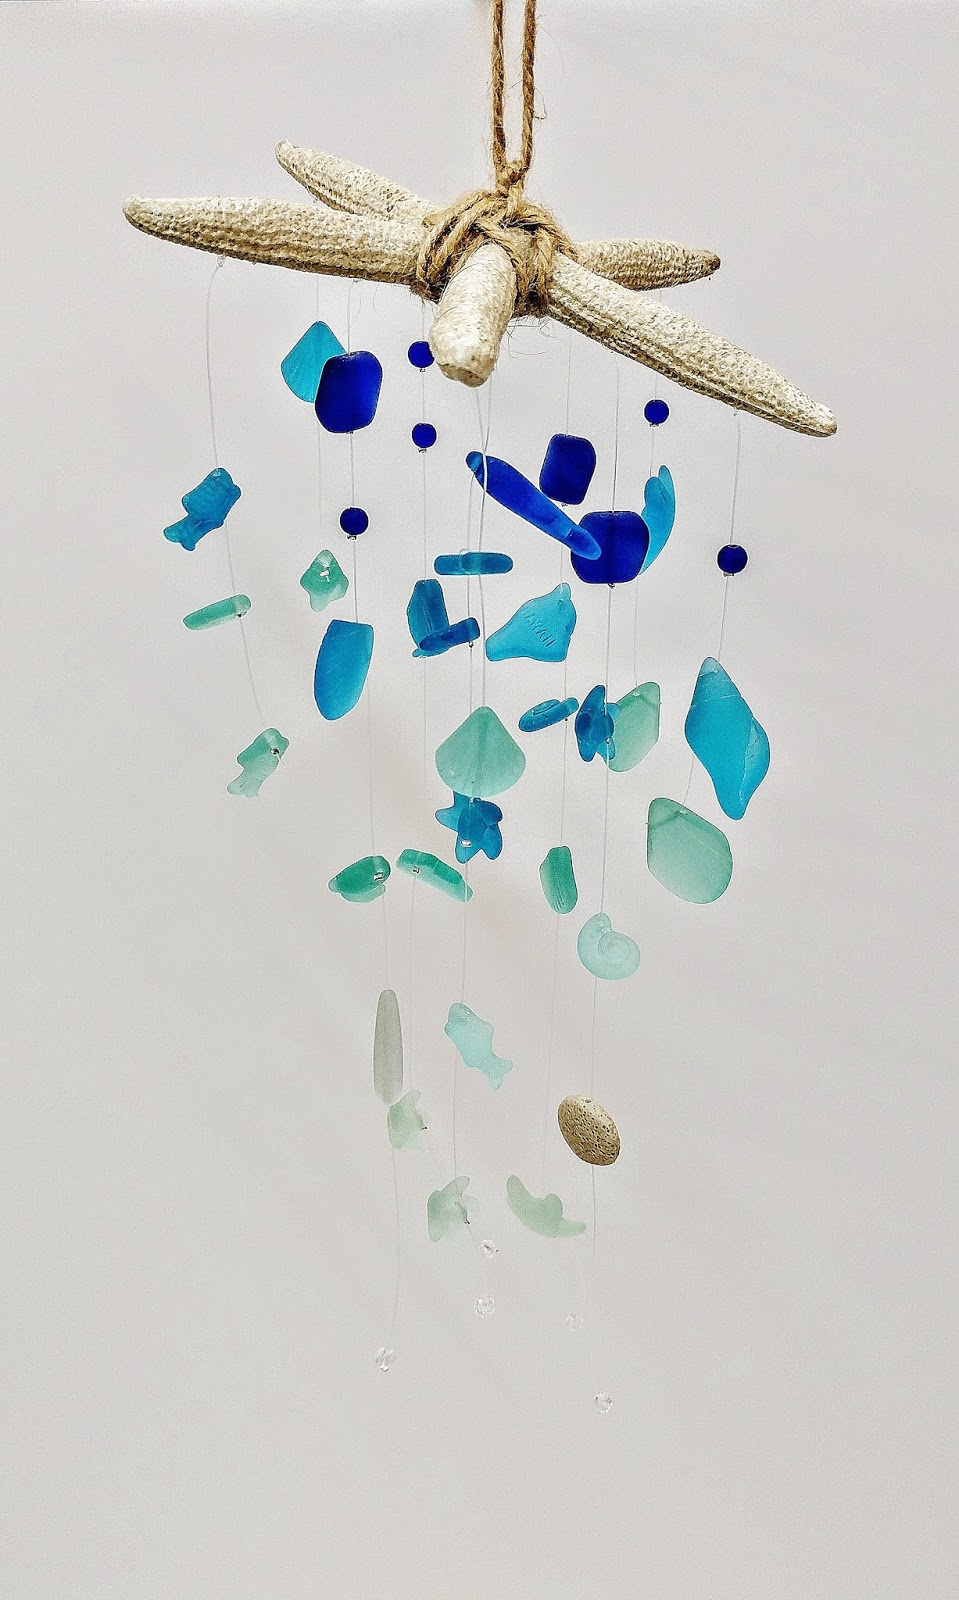


Supplies:
Resin starfish (a real one would break)
clear beading plastic string or fishing line
scissors
small silver crimp beads
hand held crimper
assorted bags of sea glass
jute

First I tied 2 strings to each starfish leg that were 2 feet long. Then I started with the darkest blue of sea glass and put the bead through on to the string, and finished each bead off by placing a crimp bead, and using my hand held crimping pliers, flattened out said crimp bead so that the sea glass couldn't slide down the string! I kept stringing and crimping, going from dark to light. I put more beads on the center strings, and as I went down, I spaced out the beads further and further from each other. 

One of the sea glass strands came with a sand textured bead as well as small clear sparkling faceted beads, which I incorporated into the ends of the mobile so that they looked like water crystals. This was really fun to make, and using those crimp beads made a world of difference!

When I finished, I trimmed all the excess strings off the ends, and secured the center of the starfish with jute so that it could hang from the middle.

Have fun making your mobiles! Feel free to make different kinds using different beads, or even get crazy with it and use felt flowers! Have a great week!

Bethany @ Enchanted Lake


Monday, September 4, 2017

Mason Jar Mixed Media Decor

Happy Monday creative crafters! I've been having so much fun getting inspired to decorate mason jars, I thought I would share with you a few different techniques you can use to spruce up any jar or even vase or glass bowl! Today's project is mixed media! And all the supplies used can be found at any local House Mart Ben Franklin craft store!


Supplies:
vinyl
scissors
Montana Spray Paint in 2 different shades of pink
black oil based marker
black puffy paint / black BoBunny Perler pen

First, I cut out an oval from the vinyl sheet (contact paper) and placed it on the glass. Then I spray painted the whole thing in both colors of pink using the Montana brand.
Once the paint was dry, I peeled off the vinyl, outlined the oval with the black oil based marker, and squeezed out little dots around it using the puffy paint / BoBunny Perler pen!


Supplies:
crepe paper
matte Mod Podge
brush
holiday ribbon / red burlap ribbon
hot glue gun / hot glue sticks
Snow Tex textured paste
Holiday themed wood slice 

First coat entire surface with Mod Podge using your brush and wrap your crepe paper all the way around. I added an extra coat of Mod Podge on the outer surface to seal the paper and make it more translucent. Once dry (maybe 2 hours) hot glue your choice of holiday ribbon around the outside and hot glue your wood slice as your finishing touch (I used it to hide the ribbon ends.) Then I used a brush and Snow Tex paste to add more texture around the top of the jar. I even applied a little to the top of the wood slice and the top edges of the ribbons! This will take several hours to dry but it is oh so cute!


Supplies:
dark spray paint (I used dark purple)
Ceramcoat acrylic paint in the color lavender  
brush
Ceramcoat Crackle clear gel 

First paint the entire outer surface with the dark spray paint. Allow to fully dry, and then using your brush, apply the crackle gel to the entire outer surface with a generous coat and set aside to dry until tacky for 10-15 minutes. Then with a clean brush, "lay" strokes of lavender acrylic paint over the clear gel layer. As the paint dries, it will start to crackle! The thicker the paint strokes the wider the cracks! Be sure to only paint in one direction so your cracks will match each other.

Supplies:
sand colored stone spray
vinyl alphabet stickers
Design Master or Montana blue spray paint 

This process is very similar to the first process! Place your stickers on the glass, and then spray with first blue, and then your sandy stone spray! Because I sprayed the stone spray really really thickly, it had to dry for a few hours before I could remove the stickers without ripping or smudging. But how cool right? What a cute place to put your found seashells!


Supplies:
BoBunny Perler Pens in multiple colors 

This process uses minimal supplies, but definitely takes the most focus and patience! I started at the very top with dots, and then every third dot made a teardrop. Then every other teardrop I made a half circle. Use your shapes as a guide as well as a design! Keep building and adding detail. This process also takes about 1-2 hours to fully dry. 


So those are just a few mason jar ideas you can play and experiment with. Have fun and happy crafting!!

Bethany @EnchantedLake

Monday, February 20, 2017

Nautical Sea Door Hanger


Hello everyone! Are you ready for more beachy home decor? I'm ready for the sunshine and the waves. Check out this cute Sea door hanger you can make using paper mache letters! I love them! They're such a great size and can be used in so many different ways.


Supplies:

paper mache letters S E A
acrylic paint in dark brown, mint green, ivory, and dark blue
one nylon brush
one thick haired bristle brush
matte mod podge
assorted ocean themed card stock sheets
E6000 clear glue

Optional:
net
starfish
Glossy Accents dimensional clear glaze


++++++++++++++++++++++++++++++++++++++++++++++++++++++++++++++++++++++++++


Luckily the wood panel already comes stained and with a rope attached, so all we have to do is decorate the letters! 

First I picked out a few ocean themed sheets of card stock paper I liked, and used my brush and Mod Podge to apply an even layer to the front surface of the letters S and A. Then, I let the paper dry on the letters. 

Using an X-acto blade to cut out around your letter will be a much easier method, rather than trying to trace the image and try to align the paper beforehand.


With your nylon brush, paint the sides of your letter with acrylic paint. Paint the last letter with acrylic paint, and let sit to dry for 10-20 minutes. When all of the paint is completely dry to the touch, you can glue on the accents like starfish or netting. Glue your letters with E6000 down to the wooden board. This glue will need one whole day to completely cure but to the touch will be solid within a few hours.


 Dimensional glaze on specific areas will give a really nice glossy appearance. This gel will squeeze out like a tube of puffy paint but will need to dry over several hours.


For the beach-worn look on the E I painted the letter mint green, allowed the paint to dry, and then lightly brushed on ivory paint.


For the A I used patterned card stock paper and Mod Podge to adhere it to the front.

So cute right? So charming. I can't wait to make more tropical and nautical crafts! Check out next Monday's blog for "Mermaid in a Jar"!

Bethany @Enchanted Lake 


Thursday, February 19, 2015

Mason Jars Part 2 - Beachy Table Decor

Hello again! This is Part 2 of my 3 part blog on how to decorate our new PURPLE mason jars.  Last week I showed you how to turn your jar into a beautiful candle holder.  Today I will show you how to dress up your jar to use as table decor for a wedding or any other type of party.


You will need the following supplies:
- Pint size mason jar
- 1 2.5" burlap roll
- 1 spool 7/8" satin ribbon in your color of choice
- 1 bag seashells
- 1 roll 1/4" double sided tape
- E6000 glue or a hot glue gun


First take your burlap roll and wrap around your jar to measure how much you need.  It should overlap about 1/4".

Apply double sided tape to your strip of burlap.  I put one strip on the top and one on the bottom.  Remove the tape backing and place burlap on jar.  Try to line it up so the ends meet in the middle of one side of the jar.


Next, do the same to your satin ribbon.  It should only need one strip of double sided tape. Place the satin ribbon over the burlap. Make sure the ends meet at the same place as the burlap.


Finally, turn your jar so that the side where the ribbon ends overlap is in the back.  Pick out your favorite shell and use either E6000 or a hot glue gun to adhere the shell in the center of your ribbons.


Voila, you're done! This project is great because you can customize it to your own color scheme and it is very fast and easy to make.  You can place it on your table as is or use it for flowers, utensils, or anything else you can think of! Enjoy and come back next Thursday to see Mason Jars Part 3 - Doily Vase.