Showing posts with label button. Show all posts

Monday, June 1, 2015

Graduation Gift Box (unfinished wood box)

Today you'll learn how to create a cute graduation gift box using an unfinished wood.  It's great to give as a gift or you can use it as a center piece.  Let's get started.


Supplies:
Unfinished wood with a removable cover
Acrylic paint - black
Acrylic paint - color of your choice
Paint brush
Hot Glue Gun
12mm Rhinestone (clear/crystal)
DecoColor - Gold (fine tip)

Optional Supplies:
Buttons
DMC Floss


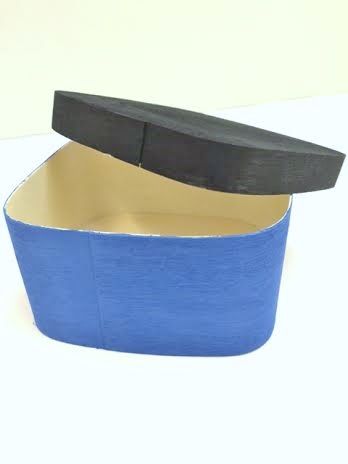
First gather your paint and unfinished wood box.  Paint the bottom of the box with the school color or any color you choose and paint the top (cover) black.


Take your top cover (black) and get your rhinestones.  With a hot glue gun add a dot of hot glue onto the lower part of the cover and add your rhinestone.  Continue this step until you cover the bottom rim of the cover.


Once that is complete, with your gold paint pen draw/write Class of 2015 on the top of the cover.


At this point you can hot glue on a button with a tassel in the middle of the box cover (optional).

And your done!
Hope you enjoyed this quick graduation gift box!


Have a Craftastic Day!
Julie @ Enchanted Lake

Monday, August 19, 2013

For the record...

Today's blog topic focuses on something that a lot of younger people may not get the chance to see very often. If you don't know what these earrings are supposed to be then you're missing out on a piece of musical history! I made these vinyl record earrings because last week Monday was Vinyl Record day.


They were pretty easy to make too. All I did was take a couple of big black buttons and add small pieces of red paper to them to cover up the button holes and to be the record label. Then, with a white ultra-fine Deco Color pen, I made the highlights on the sides of the record. To add the ear hooks, all I did was punch a hole at the top of the button with the Crop-a-dile and add a jump ring.


Here's a picture of my coworker, Asia, modeling the earrings for me. I tried to use the biggest buttons I could find. If you don't have the buttons, you could also easily make the records out of clay.

Let's bring vinyl back in style! Well, for your ears anyway.

Puna @ Enchanted Lake

Monday, August 13, 2012

Beautiful Burlap

I'm so very excited because we just got burlap ribbon into the stores! I've seen so many elegant and beautiful projects using burlap that I just had to try it out for myself.


Right now we have spools of 3" and 1.5" wide, wired burlap, so I decided to start by trying to make a burlap rose. Didn't it come out great? I'm already in love with it. I made the rose the same way we used to make the ribbon roses and hot glued it together to help it keep its shape.


I made one more rose and another flower and attached them all to a grape vine wreath. Something like this could be a pretty fast way to add some decor to your home.


One other really quick thing that I made was this centerpiece. The burlap was a little hard to tie, but the wire really helps it to keep its shape once you're done. After I tied the bow, all I did was throw a few smooth stones and a candle into it. Seriously easy elegance, right?

Anyway, I'm sure we'll be doing a lot more stuff with burlap so keep an eye out for more great projects.

Puna @ Enchanted Lake

P.S. If you scroll to our previous post, you'll see another great Crankin' Out Crafts episode.