Showing posts with label christmas gifts. Show all posts

Tuesday, December 3, 2013

Christmas Gift Pails

Wouldn't it be great to receive one of these Cute and fun Christmas Pails for the Holidays?! We have a variety of sizes and styles to choose from. Fill them with all sorts of goodies like a Hot Cocoa Kit including a mug, hot cocoa, marshmallows and a peppermint stick! Teachers Gift including dry erase markers, pens, post its, stickers and even some apple cider mix. Movie Night Kit with a DVD, popcorn and candy! Or you could even go simple and just pack it full of cookies, candies, mochi, brownies.... etc!


Supplies:
Scrapbook paper (Christmas themed)
Hot Glue Gun and Hot Glue
Ribbons (Satin, grosgrain, holiday, Twine)
Pompoms
Glitter glue (Stickles, Glitter Glue pens)
Stickers (Christmas Theme)
Memento ink pads (Reds, greens, browns)
Eclips Machine or Sizzix Big Shot with Christmas theme dies


Use the Scrapbook Paper to cover the midsection of the clear pails. Use the Eclips machine to cut out the words on the front of the pail and any other designs you want (we used it to cut out the snowflake and lettering)! Glitter glue can be applied ANYWHERE and I encourage you to put it EVERYWHERE on these awesome pails!! Use the Hot Glue Gun to wrap the twine and ribbon around the pails. Ink the edges of the paper cutouts with an inkpad to give it more dimension.


Thanks for looking and CRAFT ON!!!! ~ Deborah @ Market City

Monday, September 23, 2013

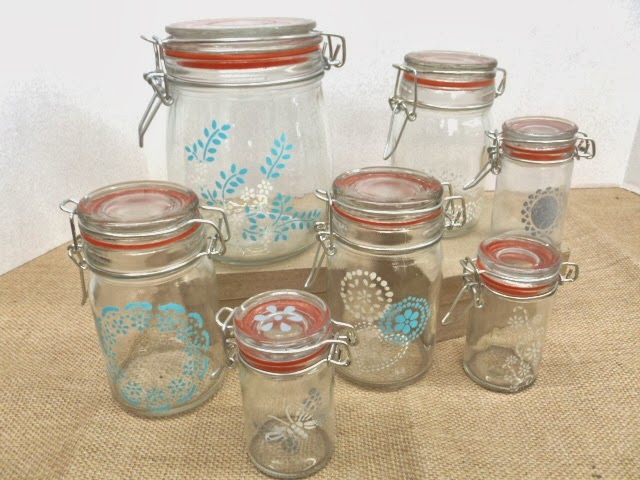
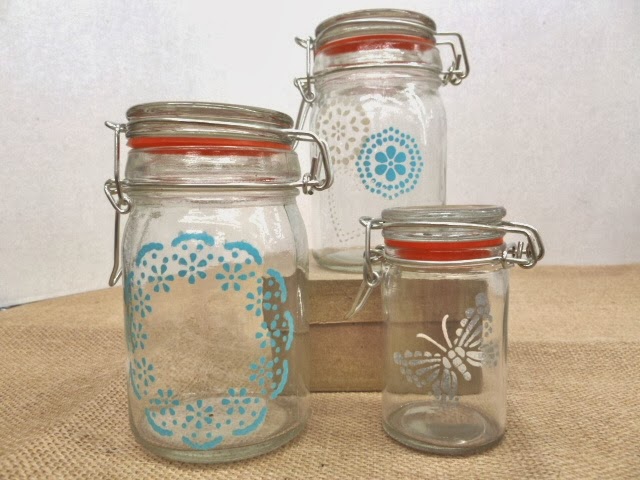
Simply Pretty Gift Jars


So, I know that I've featured these food-safe jars on our blog previously, but they're so cute that I keep wanting to make more and more things with them. Since they're food-safe, they would make great containers for all those Christmas cookies and party mix that you're planning on making for gifts, with, of course, some added decoration.


Enter the Martha Stewart Crafts adhesive stencils in the "Fair Isle Dots" design. The stencils are perfect for use on things like these jars because they are slightly sticky on one side, helping the stencil to stick to curved surfaces and making it even easier for you get a mess-free image. When you're done stenciling, simply wash with warm, soapy water; the stencil will remain sticky even after washing.


Because I was stenciling on glass, I used the Americana Multi-Surface paints for this project. They can be air-dried or oven-baked for permanence.

Some of you may think that it's a little early to be focusing on Christmas, but guess what, as of today there are only 92 days left til our favorite holiday. It's definitely time to be starting on all those gift giving crafts.

See you next week!
Puna @ Enchanted Lake

Monday, December 10, 2012

Tis the Season for Homemade Gifts


It's getting down to crunch time! Is everyone ready for Christmas? Well if you're anything at all like me, you've probably got a few gifts left to make. Here's a simple and yet elegant looking wall hanging that has a dual purpose as a holder for small things that you pick up along your daily adventures but never know what to do with. Things like ticket stubs, business cards, and change all fit perfectly in these tiny pockets. All you need to complete this project is some ribbon and baking twine, a few mini wooden clothespins, some paint, stencil brushes, and stencils. The stencils I used are called "Four Seasons" and are from our Martha Stewart Crafts line. You might even want to go a step further and make this gift extra special by stenciling a family name on the hanging.

Well, I've got to get back to my gift making! Thanks for stopping in.

Puna @ Enchanted Lake

P.S. There's also a post from earlier today from our Crankin' out Crafts video series. You have to scroll down to see it though.

Tuesday, November 27, 2012

Glitter-It Cupcake Ornament

This sweet ornaments a piece of cake.. cute as pie and won't heat up the house!


Materials:

- Round, clear, glass or plastic ornament (mini or regular)
- Foil cupcake liners (mini or regular)
- Glitter-It Glue and your choice of fine glitter
- Red cherry..I used a berry off of a holiday spray/pick
- E600 (to glue liner to ornament)
- Crystal accents..multi colored would add a candy sprinkle affect
- Ribbon
- Low temp glue gun and sticks (for the cherry)
- Funnel

How to:

- Take of top of ornament and set aside
- Coat inside of ornament evenly with Glitter-It Glue without shaking and pour out excess.  
- Using funnel pour 1 Tbsp of glitter and evenly distribute it and dump out excess.
- Using E600, glue the bottom of the ornament into the foil liner.
- Replace the top of the ornament and tie ribbon on to create a hanging loop..pay attention to how the ornament will fall for the next step.
- Hot glue cherry to the silver lid of the ornament.
- Accent with sticky gems or crystal accents.


This is a great and easy gift or favor idea for your friends...why not wrap it in a treat/cupcake box with bow...so easy and super cute and decadent!


Monday, December 19, 2011

Ack! It's Christmas!

Well, the Holidays have finally caught up to me!  They were so sneaky this year that I didn't even see them coming. Anyway, for everyone in the same situation, here are a couple of last minute gift ideas.


The first is the Calendar in a Can. These cute little cards have a small calendar on each and are perfect to sit on a desk in the office or on a side table at home.


It doesn't take much to make the mini calendars, just some 3"x4" solid card stock, the mini calendar stickers, and some scrapbooking extras. This is a great project to use up those odds and ends like scraps of paper and unused ribbon and embellishments. (So, in a way, the project gets you and your recipient ready for the new year - they get a handy calendar and you get to make room for a new year's worth of scrapbooking stuff.) On the back of each card I also added a small at-a-glance sheet for important dates .Drop these mini months into a pail or can and you've got a great home-made gift.


For a second similar project, I used the calendar stickers and the same scrapbooking papers and embellishments to make up some cards. For a gift, you can make up a box of 12 cards and envelopes (each card only took me a couple of minutes to make) for a "card of the month" set. If you wanted to, you could "theme" each card around the holidays for the month or even for the seasons.

See you next week (as long as the holidays don't get the better of me) for another blog entry.

Puna @ Enchanted Lake

P.S. Don't forget to look at our previous post for today about gift wrapping on Crankin' Out Crafts.