Showing posts with label paint. Show all posts

Monday, February 26, 2018

Mini Pallet Night Sky Painting

This week I wanted to show you "mini painting" ideas!

This project will also be taught as a class on April 14th from 5-7p at our HouseMart Ben Franklin Enchanted Lake location! The fee is $35 with all supplies included!


Supplies: 
at least 20 popsicle sticks
2 longer sticks
acrylic paint in white, black, assorted blues, purples, teals and pinks
1" wide rectangle nylon paintbrush
cup of water
hot glue / hot glue gun
black ribbon
silver Minc foil
Zig 2 way glue pen


First, hot glue your popsicle sticks to two longer sticks. I used 16, but feel free to experiment with different lengths and sizes! 


Next, paint your mini pallet with your assorted colors, starting from black and working down to purple, blue, and teal and pink.


Next, after your background is completely dry, sprinkle some watered down white paint using your paintbrush over the surface to create stars!

Then once your stars are dry, you can use your Zig glue pen, and Minc foil to make a few of the stars extra shiny!


 Then all you need to do is paint a silhouette of palm trees using black paint! 

Hot glue a bow and a ribbon to the top, and ta da!
A super cute night scene!

Have fun!

Bethany @Enchanted Lake


Monday, August 7, 2017

Crackle Apothecary Bottles!

Hi everyone!
I hope you guys have been having a great summer! I know it feels so soon, but I've already been getting into the swing of fall! It will be here before we know it! Plus I love fall crafts, so I'm actually pretty excited about this change of pace. Today's craft is apothecary jars! Ben Franklin just got in some more really cute bottles and jars, and I wanted to really transform them into aged and crackled ingredient bottles!


Supplies: 
3 glass bottles of assorted sizes
spray paint in black, and gold
crackle gel
paint brush
acrylic paints in gray, charcoal, and gecko green
jute
black cardstock
white pen
hole punch
scissors
optional: gloss sealer spray (to keep them from chipping)


First, you'll need to wipe down your bottles. Then spray one by one with your black and gold. Let sit to dry for 15-30 mins.

Once they are dry to the touch, using your brush, apply a generous coat of the clear crackle gel to the entire visible surface of your bottle. (There's no real need to do the bottom.)


Next, wait about 5 minutes for the gel to dry enough to feel "tacky" instead of "wet". 
Then will a clean brush, one color at a time, lay strokes of paint over the gel. Be careful to not mix the gel and top layer of paint. The key is to lay the paint right on top. The thicker your paint, the thicker the cracks will become. The thinner the paint, the smaller and finer the cracks will become. It's perfectly fine to have a mixture of thicknesses! I think it adds more dimension and variety to the crackle. After all, when things age, they don't age and wear down in exactly the same way in all places!

The direction of your strokes also really matters. You want to stay consistent and brush in all the same angles:
-all up and down
-all side to side
This technique will create an organized look about your piece. Like wood grain. 


 You can really tell in the paint stroke direction in this picture! The green bottle I went up and down, and the gray one I went side to side. Also the gray one had thicker paint strokes, so you can really see the cracks more visibly!

For the tags, I cut out squares from black card stock, hole punched the tops, and hand wrote the creepy crawly ingredients! I also drew a white border around the edges of the paper, and then I tied them on with Jute!

Have fun with your crackle paint!
It's available at any local House Mart Ben Franklin.
Happy crafting!

Bethany @Enchanted Lake

Tuesday, April 25, 2017

Distressed Mason Jars

Mason jars!
The number of uses of this beloved jar has grown so much since its uni-tasking canning days.
(Bringing a little bit of Good Eats reference into this..😄)
Now it can be used as storage for small craft items or random doodads, soap dispensers for those
Urban or Industrial Chic bathrooms, and even plant pots!  We all need that simple and fresh look for the kitchen table, right?  What's better than a clear mason jar and some lovely flowers from the garden? (Or the neighbor's garden?)
Here, I have a way that you can add a little bit of Shabby Chic to your Mason Jar centerpiece.
Behold the basic technique of sand-paper distressing!


Here is a close up of a jar that was spray-painted with Chalky Finish spray paint in Morning Sky.
Gorgeous, isn't it?  It' s the perfect and elegant French blue tone for Spring!  Notice anything different about thatlittle distressed bit?  Right!  It has a tinge of penny-copper so that it looks like a distressed copper pot.  (Actually, it was Design Master spray paint in Rose Gold!)
Rose Gold and Copper just add that right amount of "antique" (antiquity?) to a craft piece.  It's both classic and modern with its pinkish metallic hue.   Here's a shot of the inside.

 
 All you need is a few spritzes!  It's best not to overdo it so that the paint doesn't all pool to the bottom.  The same goes for the outside of the mason jar.  After spraying the inside, turn the jar upside down and spray in light even coats.


Here are the two Spring-time Mason jars that I created using beautiful cool-toned pastel colors.
The one on the right is that perfect minty hue (Ubermatte's Mist), with its cover painted in rose gold once again.  As always, experiment, experiment.  Creativity stems from both inspiration and experimentation, so don't be afraid of those lovely mistakes.  It's trial and error!
Also, don't forget to have fun!

Erika @ PC

Saturday, March 4, 2017

Starfish Wishes!

Hey Crafters!
If you guys haven't been down to any of our stores recently,
you seriously need to make the trip.  ESPECIALLY if you are a wood crafter!
We have so many unfinished wood pieces for everyone to paint and decorate
that it's insane!  Never had we had this big of a variety in our stores.
And for you ocean-themed décor lovers out there, you will love all of the nautical
items we have been getting in as well!
Coral sprays, seaglass pieces, laser-cut mermaids and scientific octopus illustrations; 
If you can name it, we've got it.  Today, you can mark this post as "Starfish Spam" because it is just starfish-themed wood crafts galore!
Another magical technique that I learned from our amazing Visual Merchandiser, JFlo, is the use of Tim Holtz' Distress Stains to give an interesting and colorful look to the wood pieces.  Because many of the woods are lighter in color, the stains will appear as a vibrant watercolor effect on the surface!
You can even stain the wood with multiple colors and distress it even more with acrylic paints for a vintage "shabby chic" look.
Below I have a small box distressed with light pink and cream-colored stains which was then distressed with a few streaks of Delta Americana acrylic paint in the color Chocolate. This particular paint color gives more of a gel stain feel with some fine golden glitter mixed in.  It looks SO GREAT with it and definitely adds that extra special something!

I then hot-glued a small white wooden starfish cutout, which were sold in a pack with a variety of sizes.  This one seemed perfect.  Don't think you can't distress this little starfish too, because it will look awesome with some stain and paint as well!  And the little white speckles around the starfish?
White Sakura Gelly Roll.  YEP!


This strand of beaded cord was too cute to pass up!  I needed to put it on something as a decorative and beach-y, ocean-y accent.  So, I took a small wooden easel sign, colored it with a few stains in cream and a few shades of green and blues and then distressed the edges with Ceramcoat paint in the color Wedgewood Blue.  I then hot-glued a small piece of the cord to the side!
This can make a cute table-number sign, menu board, a desk memo board or even just a cute frame for your precious memories.
Finally, just to appreciate the pure essence of a starfish, here we have... a starfish!
This is a pallet that I painted with Delta Americana's Waterfront, which is a bright and fun shade of turquoise!  I then distressed the edges with a brown stamp pad.  Yes, you read right!  Stamp pads are great for distressing because you've already got your ink on a felt pad and all you need to do is rub the edges of a project with it.  Perfect every time! 
I still felt like the blue needed to be toned down a bit more to achieve that vintage ocean-themed look I was going for, so I went with Tim Holtz' Distress stains in Burlap and Walnut.  These are both brown tones, with burlap being the lighter cream, yellow tone and walnut being a deep and rich brown.  I had to be careful with Walnut, so I just took a synthetic flat brush, tapped it onto the stain bottle's felt top and streaked the color onto the wood. Using a little water, I was able to spread the dark color on and make it look more like aged wood without it appearing too streaky.  To add a little extra something, I streaked a little Ceramcoat Metallic 14K Gold over the surface.  It also gave the surface more dimension.  Then, I hot-glued a pretty white starfish onto it!  Simple yet elegant. 
Not just aged, but Vintage and Chic!

Stop by to check out our selection of wood pieces today and I am guaranteed that you will find that perfect piece for your desk, coffee table, bedroom, anything!  You will be amazed.
Also, don't forget to stop by our scrapbooking and hard crafts departments for some Distress Stains and Acrylic Paints!
Have fun and see you next week!
Erika @ PC


Monday, November 28, 2016

Wooden Tree Shadow Box! Hello Christmas!

Hey Everyone, today's project is so adorable! I really had fun putting it together, and it's such a great way to customize a holiday stacking display box to the theme of your home this year!


 Supplies:

4 sheets of card stock with patterns and solids that all match each other in style (I used a solid olive green, a red pinstripe, a red holiday text, a Christmas tree print, and a green and white polka dot print) the plus side is that a lot of patterned card stock is double sided, so one sheet can act as two!

scissors
hot glue gun/glue sticks
matte Mod Podge
E6000 clear glue
1/2" nylon brush
small round nylon brush for fine details
cup of water
acrylic paint in the colors black, white, lime sorbet, dark cherry
3 teir raw wood tree shapes (sold as a set)
wood car
package of tiny wreaths
small trimmings of faux pine branches
one tiny cardinal
package of tiny glitter light bulbs
8 in of string or baker's twine
2 eye screws
dimensional pop-up dots
white fine tip paint pen


First take your 1" nylon brush, Mod Podge, and selected card stock paper, and apply a generous but even coating on the side of the wood. Then smooth out card stock over the side. Wait 5 minutes to dry a bit, then carefully cut off the excess paper around the edges. Repeat for all sides of the top middle and bottom tier. ( I didn't do the back or the underneath.)


After cleaning your brush in the cup of water, paint the insides of the tree.
I used white for the inside back panel of all the tiers. 

For the middle tier, I mixed black and white to make grey, and used that for the side panels on the inside. I used the dark cherry for the front facing rim. 

For the bottom tier I painted all the side panels olive green, while leaving the back panel empty, and painting the front facing rim white.


Then after letting everything sit to dry separately for 5-10 minutes, I began working on painting the car. I used lime sorbet for the sides, black for the tires, grey for the front, and white for the roof. Now the best part about the fine white lines on this car is that I used a paint pen! So much faster and easier than using a brush. I just drew lines around the windows, on the hood, and on the tires! And then for the finishing touch, I used E6000 glue to adhere the wreath on the front of the car!

For the inside of the bottom tier, I used the Mod Podge again to glue the pretty tree card stock to the back panel.


After the paint is completely dry in the middle tier, take your optional patterned card stock and layer pop-up dots on the back. This will make the square look like it's floating out and fill up some of the space. It will act as a back drop for your ornaments.


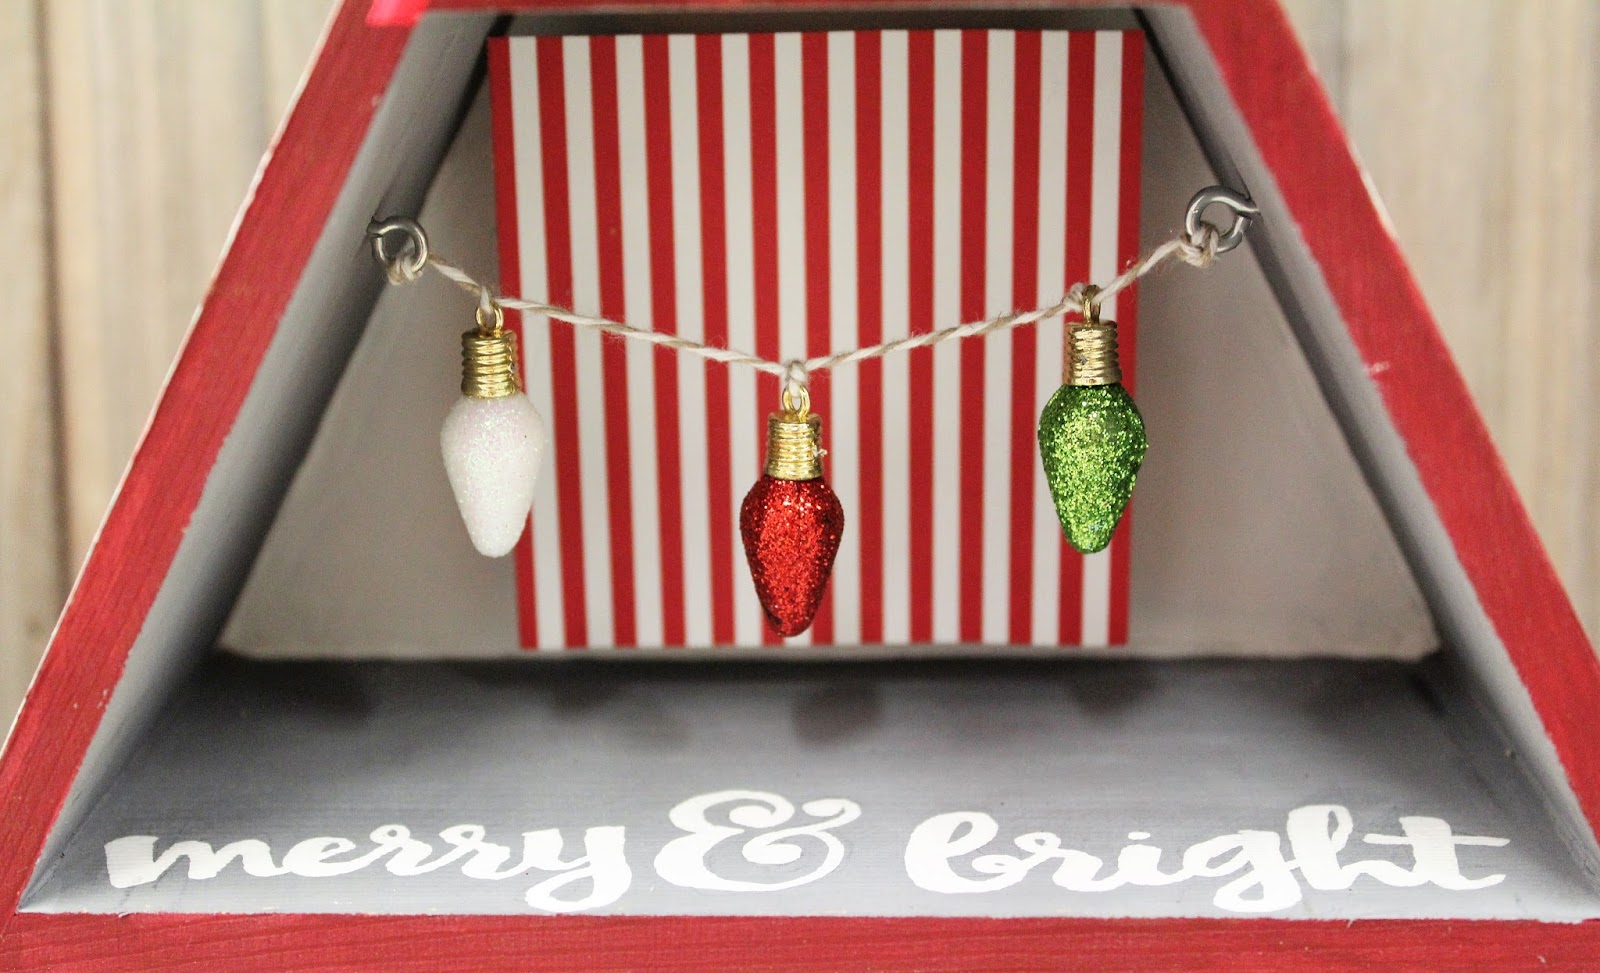
I used 3 ornaments and tied a knot in my string about 1 inch apart from one another so that they don't move around. Then I used the 2 eye screws, put them in the sides of the middle tier, and tied the string to them!


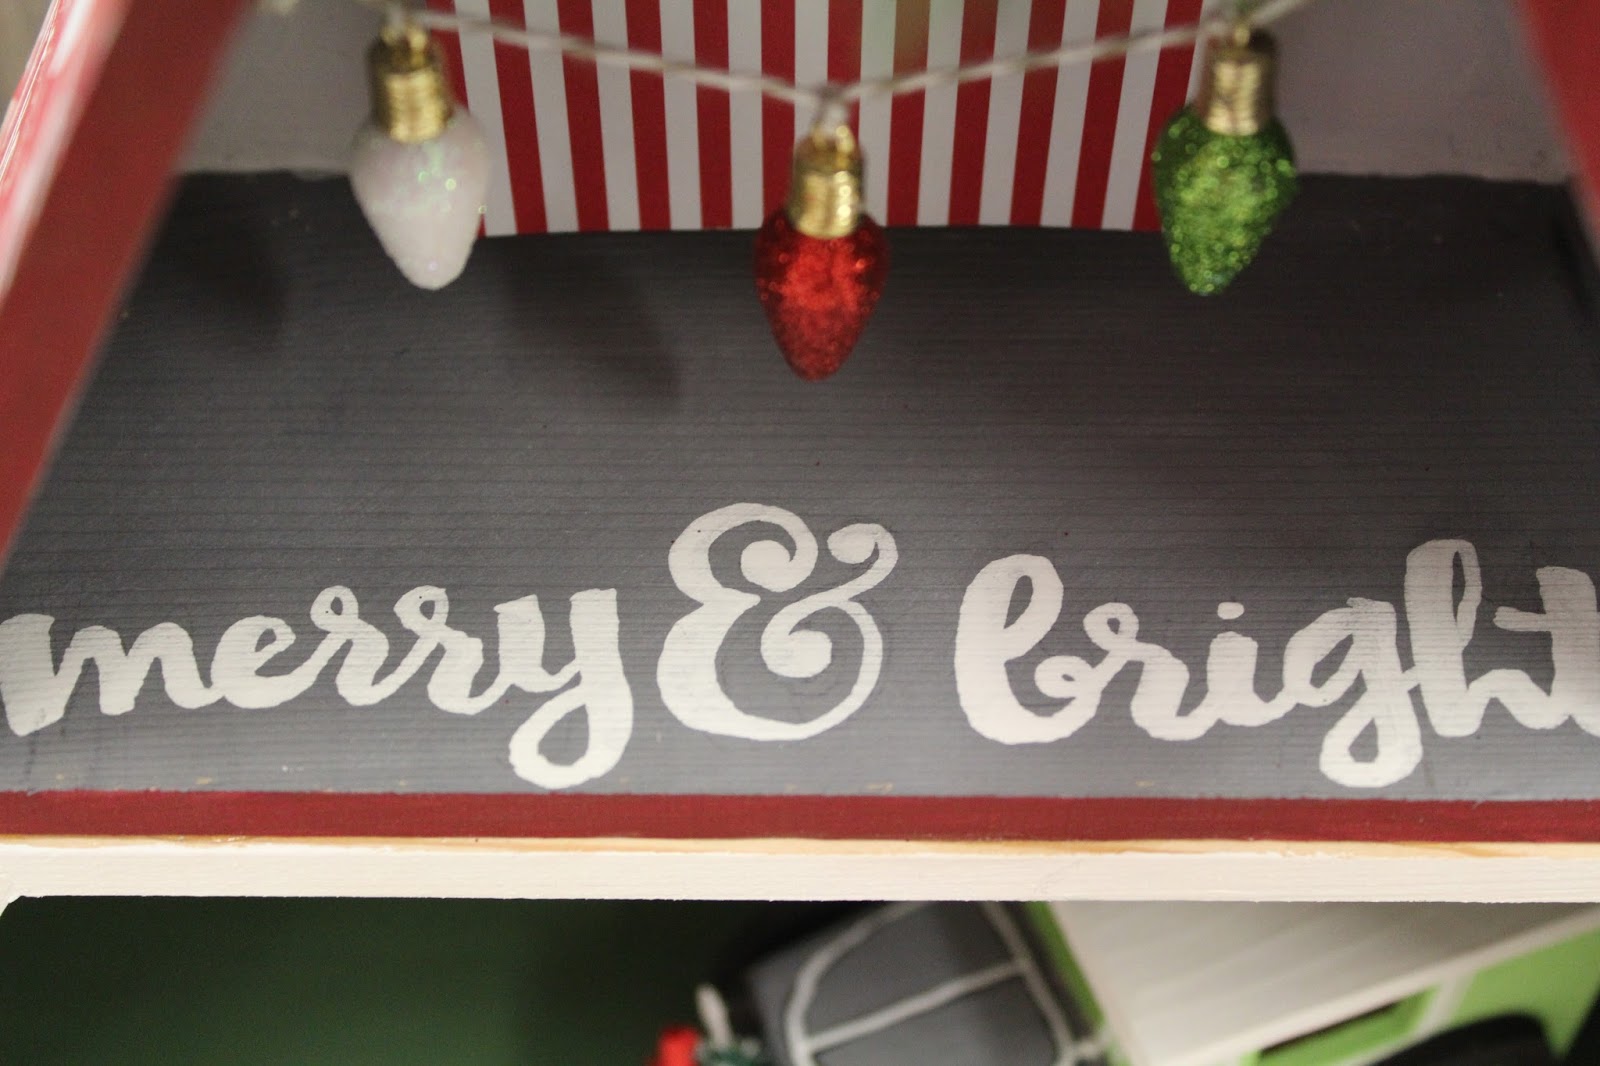
 On the bottom of the middle section I also used that same fancy paint pen to write out merry and bright! It's optional, but I thought the empty space was big enough to be able to fit some kind of word or saying.


The top tier was the easiest! After the white paint was completely dry, I glued my sprigs of greenery in there with the hot glue gun. Then I simply glued the red cardinal to one of the branches, and ta da! So darn adorable!


Happy Crafting and have a great holiday season!

Bethany @ Enchanted Lake  

Tuesday, July 5, 2016

Frosted Turquoise Hawaii Sign

You know those days where you are just itching to get out of the house to search for inspiration?
That's me every single time I have a day off!  Hop into the car and head out to the mall, the library,
the park...  Anywhere that will get your creative juices flowing!
I visited a little shop with some very beachy vibes last week and found a Hawaii sign that I loved the look of and tried to recreate it today.

~ Here's what you'll need! ~


 1. 8-inch wooden letters
2. Ceramcoat or Delta Americana Acrylic Paint
3. Gel Wood Stain
4. Mod Podge
5. Crystal Glitter

- - - - - - - - - - - - - - - - - - - - - - - - - - - - - - - - - - - - - - - - - - - - - - - - - - - - - - - -
 Let's get started!


The first thing to do is take your base color and brush it on! 
I mixed up a nice light turquoise color using Delta Americana's Coastal Waters and Ceramcoat's white.  Let this coat dry completely.


Next, I used the Delta Gel Wood Stain in the color Walnut.  It's a nice dark brown that will bring a nice contrast to the turquoise. 


 Then brush on a thin coat of Mod Podge and sprinkle on that magical crystal glitter!  


 After the Mod Podge is dry and you have that nice layer of shiny crystal dust on it, feel free to embellish it!  Want a beach theme?  Add some shells, starfish or a rope border!  Something a little more elegant?  Maybe a few rhinestones or flowers.  As for me, I took a few frosted rocks from a 
vase filler pack and hammered them to get smaller pieces.  I then hot glued them on for a "dew" look. 
That's all she wrote!  It's a really simple rainy-day project that's great for a cool
piece of home decor.  (Plus, the kids would LOVE painting their monograms...)
I hope everyone has an awesome week!

Erika @ PC

Wednesday, June 22, 2016

Summer Keiki Craft Camp 2016 - Mixed Media Projects

Summer Sun and Crafty Fun all rolled into one;
THAT is what Keiki Crafts is all about during this sunshine season!
We spent the second day doing Mixed Media art and making them into greeting cards
and envelopes.  It was a BIG HIT with the kids!  Colorful bubbles were everywhere!
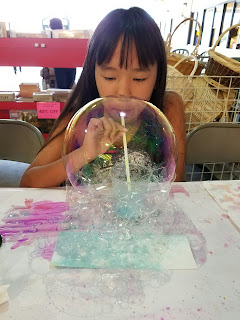
We mixed watercolors and alcohol inks into Miracle Bubble Soap to blow colorful bubbles onto our papers.   The bubbles fizzed, popped, foamed and overflowed onto the papers to create beautiful and whimsical shapes and designs in pretty pastel colors!  Remember when you used to mix that chocolate syrup into a cool glass of milk and then blew into your straw to make it bubble up to the rim of your glass?  We used this technique with the alcohol ink colored soap and let the bubbles overflow into our papers!

Mix alcohol ink and soap, then blow some fizzy bubbles!

Blowing rainbow bubbles creates a splash of pastel color!

Such a gigantic mountain of pink bubbles!
Big bubbles are a surprise!
Let the bubbles fall onto the paper!
 We also used crayons to draw and sketch on our watercolor and brushed on some watercolors to create a resist effect.  Wax and Water don't get along, so the result is a cool resist design!
Check out everyone's awesome watercolor art!

Here's everyone's masterpieces!
 If you're interested in learning about this amazing Keiki Crafts Camp, come into any of our stores
and we'll be happy to give you more info about it!  Sign up your keiki today!

Erika @ PC        

Tuesday, April 12, 2016

Anchor Wood Panel Art

Afternoon, Crafters!
Today I have a "Pin-spired" nautical-themed piece of art that can be re-created with just three items! Seriously!  It's an easy and fast gift for that ocean-loving friend or for yourself to use as some
really cool beach décor.
 
 
The only things you will need to make this is paint, a 9x12 inch wood panel and some jute rope.
You're going to need two or three colors of paint to create that ombre effect on your wood panel.  Darkest blue will go at the bottom, then you keep mixing in more and more white to tint that color as you move toward the top of the panel. 
Next, paint on an anchor in pure white, being sure to leave a little space at the top and bottom of it.  Hot glue a few strips of our new Studio G jute rope on to the top and bottom for some accenting texture and there you have it!
 
This is, again, a very fast and minimalistic piece of nautical art that can be "spruced up" and personalized quite easily.  Write a friend's or loved one's name on it.  Mod Podge some sequins onto the anchor.  Glue some shells or starfish on it. 
Create your own masterpiece!
 
 
Have fun!
Erika @ PC
Wednesday, March 30, 2016

Mermaid Shell Top

Hi, Everyone!
This week we are going to be doing a really fun mermaid-themed project!
A Mermaid Shell Top!
How cool is this?  It's a really easy and cheap idea for fast mermaid costume or just for a quirky beach shirt for this summer.  Who doesn't want to feel like a mermaid once in a while?


What I used to make this mermaid top was a regular white t-shirt, GP Purple Ceramcoat Acrylic paint, Iridescent Purple Scribbles, and Textile Medium.  I also had some parchment paper to help stop the paint from bleeding onto the back of the shirt as well as an iron to cure the paint.


First, try on your shirt to see where you will want your shells to be.  Make marks with a washable fabric marker.  (I chose to just wing it.)
Next, you're going to mix the paint and the textile medium with a ratio of 2:1.  Two parts acrylic paint to one part textile medium.  What this medium does is it makes any craft grade acrylic paint permanent and flexible on fabric.  This means that it won't wash or flake off even if the fabric wrinkles.  


Make sure you put a piece of parchment paper underneath the front layer of your shirt so that the paint doesn't get onto the back.  The textile medium will make the two side stick together if you don't!   Then, start painting your shells!  I chose the basic clam shell shape like a certain red-haired mermaid.  

After letting that dry, heat set it with either an iron or a heat tool.  You're going to want to heat each area for at least thirty seconds to cure the medium.  


Lastly, draw the outlines of the shells with the puffy scribbles paint for some dimension!


As always, feel free to mix it up!  Add some embellishments like rhinestones or even use glitter paint for more texture and sparkle.  How about writing a mermaid-themed quote underneath in a funky script?  You could even paint some iridescent scales for that real siren look.

Have fun!
Erika @ PC

Wednesday, March 16, 2016

Distress Stain Postcard

Hi, Everyone!
 
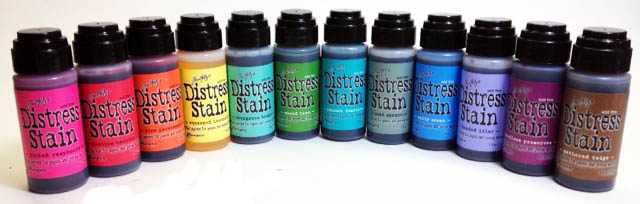
Today, I'm going to show you how to do a really simple technique that involves the elusive Distress Stain inks that we have in our scrapbooking sections.  They're a product that something that kind gets looked over often and I wanted to start bringing them back into the "Crafter's Spotlight". 
I'll start off small.  5 x 7 inch to be exact.
 
I chose stains in Frayed Burlap, Stormy Sky and Weathered Wool.  I also have a .08 tip Micron pen for some hand-lettering. 
 
 
 I taped down a 5 x 7" watercolor postcard to my table with masking tape to keep the paper from bowing too much.  I put a wash down just to get the paper wet.  This is just so that the distress stains, which are water-based and can therefore be handled like watercolors, will flow freely without forming a harsh edge when dry.  Just make sure that your brush is sopping wet before doing so.  I then brushed on a little bit of Frayed Burlap. 
 
 
What I wanted to achieve was a somewhat tie-died look.  Soft edges and colorful patches that sort of "bloom" on your paper.  So, use a lot, but not too much water.  You'll see amazing colors flow out of each ink and they will just get more amazing as they dry like this little patch of Stormy Sky. So cool!


After the paper was completely dry, I added a little saying in Micron pen at the bottom right hand corner.  And that's all she wrote!  This is a very versatile technique that's great mixed media scrapbookers and watercolor artists.  It's a beginner technique that is great for making quick postcards to send to family overseas.  And as always, a quirky saying will make it 100 times more personal and cute.

 
Have fun!
Erika @ PC

Thursday, March 3, 2016

Key Hanger

Hi, Everyone!
    So this year we got in these intricate wooden frames.  Really beautiful to look at but hard to decide what to do with them! Because they're pretty light and flat, they can be used as wither borders or can even be used as a table number holder for a wedding centerpiece like Bethany from Enchanted Lake showed us in the previous post!  Today, I decided to use the two designs we have available to create a decorative hook for your foyer or room.  These are really convenient for keeping track of your keys, dog leashes and totes as well.
 
 
For this project, I decided to use bright warm colors.  Poppy orange, teal, gold and yellow. 
The main plaque was painted a vibrant orange and distressed with Ceramcoat's Metallic 14k gold paint.  This gold is the most true to color that I have ever seen in an acrylic paint.  Try it, and you won't be disappointed! The frames were painted yellow and teal.  I spray-painted a couple of command hooks with gold shimmer paint and distressed them with the deep black cherry tone. 
After everything was painted, I put everything together with E6000.  Of course, you could add some rhinestones or other kind of embellishments as well, but I decided to keep it simple and let the colors speak for themselves.
 
After everything is dry, you can hang it up in your craft area or foyer, prop it on your work desk or even in your home office.  It's really convenient for keeping your belongings accessible and out in the open for you to grab and go.  And it looks great too.lol
 
Have fun!
Erika @ P