Showing posts with label stripes. Show all posts

Monday, September 25, 2017

Spook-tacular Skull Wreath

Hi creative crafters! I'm so pumped for this autumn season and wanted to share with you guys a few spooky ideas to spruce up the house for Halloween! HouseMart Ben Franklin just got in a great selection of really cute and spooky Halloween items. Today's project is a skull wreath!


Supplies: 
1 roll of 1" wide black ribbon
1 roll of 1" wide white ribbon
12"-14" Styrofoam wreath 
hot glue / hot glue gun
bag of skulls 
1 black feather boa 

 First, wrap simultaneously the black and white ribbon around your Styrofoam wreath. Use hot glue to secure the beginning and the ending. You will wrap ribbon around 1/2 of the wreath.

 Next, wrap the feather boa around the other 1/2 of the wreath, hot gluing the two ends of the boa to the ribbon to secure it.

 Finally, hot glue your skulls in place! I placed mine off to the side for an asymmetrical feel to break up the symmetry of the stripes. I even used some of the net bag as a netting accent! And simple as that, it's ready for the front door! Have a spooky good time playing with Halloween Decor! 

Bethany @Enchanted Lake 

Monday, December 26, 2016

Bow-Making Made Easy!


Hi guys! I hope everyone had a great Christmas and that Santa brought you everything on your list! For those of us procrastinators who are doing our gift exchange a bit later, here's a great bow making solution that will save you so much time, while keeping your gift wrapping skills impressive. 

All I did was use the Bow-Dabara and some wired holiday ribbon about an inch wide!


First thing you'll want to do is cut a thin ribbon that will be what you use to tie your bow together. I used 8 inches of very thin white satin ribbon. Insert this piece in-between the two plastic panels that stand up from the Bow-Dabara board.


For this next part, I'll leave my decorative wired ribbon of choice still attached to the spool as I weave it back and forth. The length you weave on each side will determine how big your bow will be. The bigger the loop, the bigger the bow!


When you begin to weave your ribbon, make sure you twist it once before pushing it down to the board. So the motion will look like: out, in, twist, push down. Repeat this technique back and forth on each side of the Bow-Dabara as if you're making infinity symbols. When you have about four or five loops on each side, you're all done!


At this point pull up the skinny ribbon from the board and tie a knot tightly around the mid section of your bow.


So good! All you need to do is fluff the loops and cut the tail! The Bow-Dabara is great in a pinch. A perfect bow every time!

Bethany @Enchanted Lake

Have a Happy New Year everyone! 

Monday, December 19, 2016

Holiday Wood Designs

 
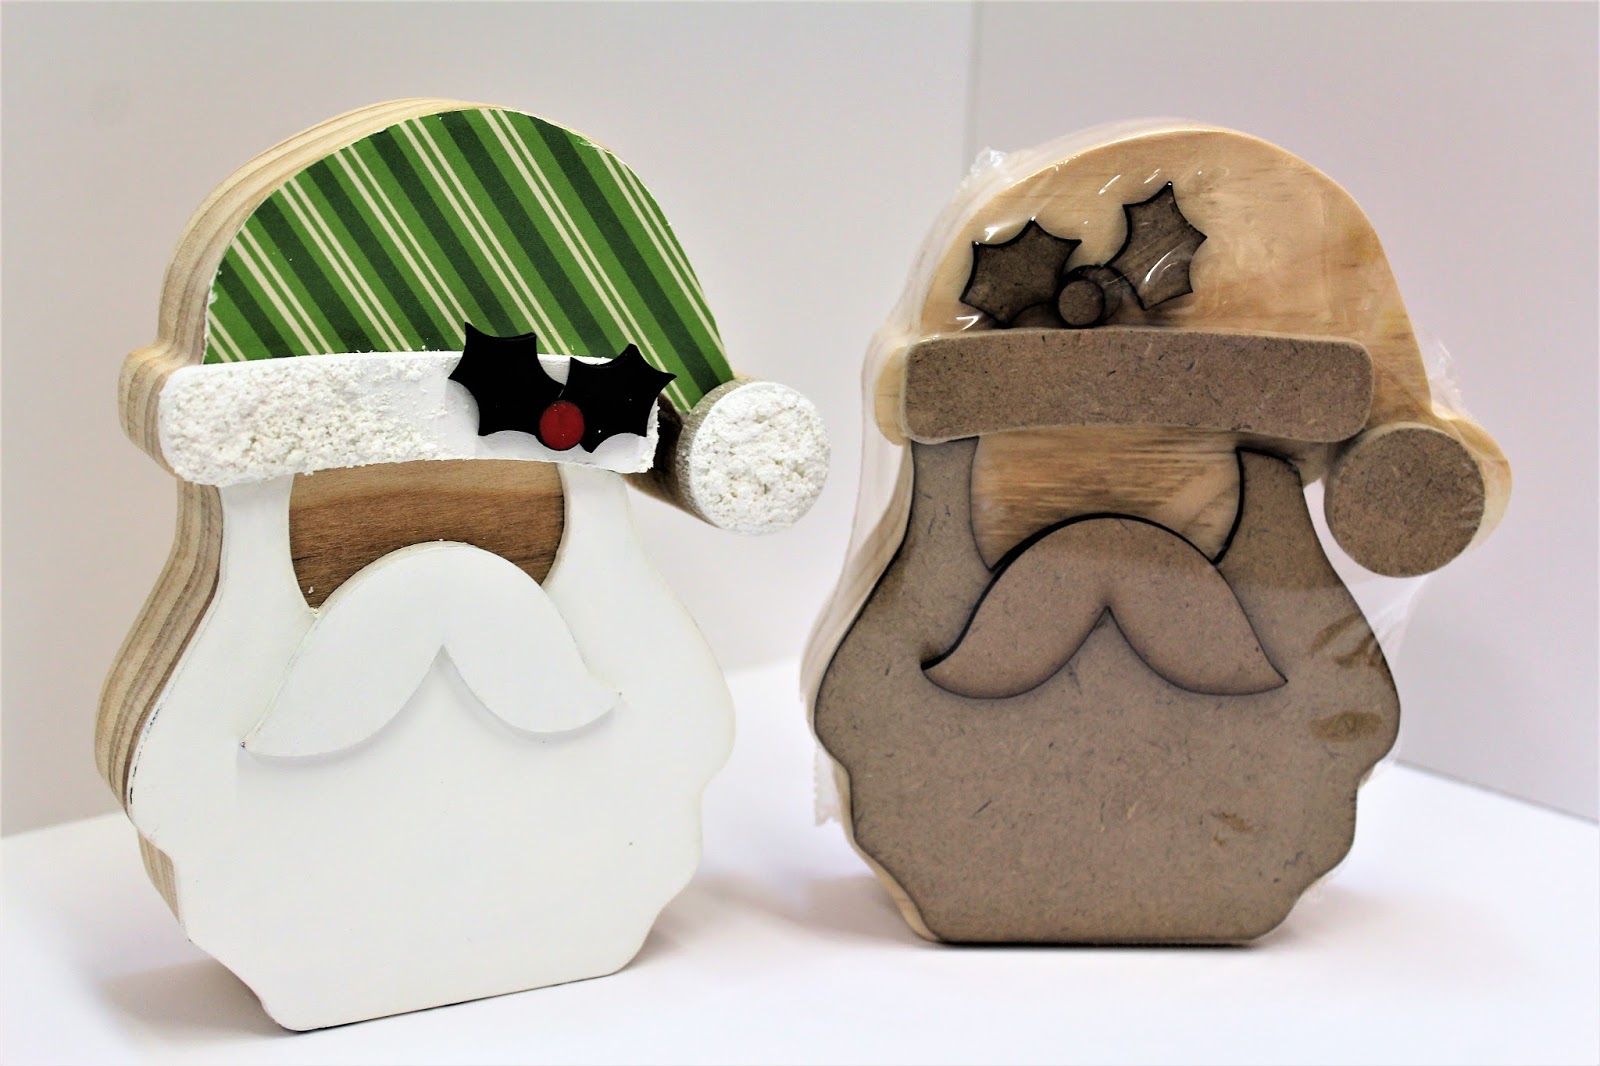
Happy Holidays! I hope everyone out there is having fun getting their Christmas craft on! I'm really enjoying painting fresh new home decor and digging into card making and cookie baking. So many favorite things. Here are a few samples of some pretty wood decor pieces I decorated. My favorite thing about these is that the shapes are cute, pre-cut, and that the wood surface allows you to do almost anything to it! So many possibilities!


Supplies:
wooden word or Santa or ornament shape
acrylic paint (dark green, green, dark burgundy, red, ivory, white, tan
bristle brush
1/2 inch wide nylon brush w/flat end
jute/twine
hot glue gun/glue sticks
buttons 


First, paint the front of every other letter with a very dark green. Use a brush that will give you even and smooth coverage. This will be your base coat for the distressed and rustic look. Let the letters dry for 20 minutes, and paint diagonal stripes on your remaining letters using your 1/2 flat tipped nylon brush and Ivory acrylic paint. I like to use this brush for stripes because if I hold it at an angle, it is exactly the direction and width of the stripes I want to make. Wait about 10 minutes for the stripes to dry before painting the red stripes. After this next layer is dry to the touch, take your bristle brush, light red and lighter green, and "feather" light strokes over the painted areas. The idea is to keep your back and forth strokes in a horizontal movement and to not coat too thickly so that you can see the layer underneath peeking through.


Hot glue jute and buttons on to your letters as textural elements! They just add to that rustic charm.
 
 
Ben Franklin is carrying a few other cute holiday sets as well, including the word "Home" and a Santa face and ornament shaped photo stand. 
 

 You can use Mod Podge and sheets of patterned card stock paper to  cover larger flat areas, and then cut out with an X-acto blade. Even layer some textured/gritty Snow Tex on there to create realistic looking snow. Dry time would be about an hour or so depending on how thickly the Snow Tex was applied. E6000 glue can be used to put all the Santa pieces together. Ta Da!


Cute home decor!
 
Bethany @Enchanted Lake
Happy Crafting!

Friday, June 22, 2012

Patriotic Tee Shirt

Aloha Crafters ~

Today's Idea & Inspiration is a Patriotic Tee Shirt.

Supplies:
  • Tee Shirt  (30103138)
  • Fabric-Tac (1369347)
  • Dritz Fray Check (77651521)
  • Navy Polka Dot Ribbon (30117980)
  • Red Stripe Ribbon (30129219)
  • Navy Thread - 12 inches
Instructions:
  1. Cut 2 pieces Red Stripe Ribbon 5 inches long.
  2. Use Fray Check on each end of the red ribbons.
  3. Overlay the top red stipe of one ribbon & bottom red stripe of the other (see picture). Glue together with Fabric-Tac.
  4. Cut 1 piece Navy Polka Dot Ribbon 7 1/2 inches long.
  5. Use Fabric-Tac and glue ends together to form an oval.
  6. Pinch middle of polka dot ribbon oval together and wind thread around middle to secure bow form.
  7. Take remaining Navy Polka Dot Ribbon, fold lengthwise into thirds and secure with Fabric-Tac
  8. Wrap folded Navy Polka Dot Ribbon around bow form, secure with Fabric-Tac and cut off extra length.
  9. Using Fabric-Tac glue Navy Polka Dot Ribbon to Red Ribbon Stripes (see picture).
  10. Using Fabric-Tac glue "Flag" to Tee Shirt.

Happy Crafting!

-Kahului BFC