Showing posts with label wood. Show all posts

Thursday, May 4, 2017

Pineapple Quote!

Pineapples!
Just can't get enough of this fun tropical fruit!
We've been getting in TONS of pineapple-themed goods at our stores including bags, ceramics and wooden serving platters.  This is the perfect time to stock up for summer entertaining, so it's time to come on down and get crafty!
Today, I have a great painting project that would be great for kids as well as adults for those artsy get-togethers.  It's time to bring the fun of the boozy painting classes home!  All you need are basic pineapple colors like yellows, oranges, greens, oranges and some tans, as well as a cool tropical blue and white for the contrasting background.  You will also need a tan Stabilo marker, a black fine tip acrylic Montana or DecoColor marker, as well as a White Gelly Roll. 
Here, I painted on a natural slice of wood for a rustic feel, but feel free to paint on a canvas or wooden pallet.  Whatever floats your boat!
 
 
I first laid down a coat of white and then, while it was still wet, blended in some Delta Americana AcrylicTropical Blue for a lighter toned turquoise blue.  Once that background layer was dry, I used Ceramcoat Acrylic in Butter Yellow to paint the top three quarters of an oblong shape for the pineapple.  This took two coats for good coverage. 

 
After this was dry, I went ahead and painted the leaves.  Using upstrokes, I started at the top of the pineapple and tapered the tops of the leaves by slowly turning my brush sideways. (As a note, I used a 1 inch synthetic flat brush.)  I mixed a different shades of green such as Ceramcoat Spring Green and Delta Americana Chartreuse just to add more depth and dimension.  Just don't add too much!  You will be writing over the pineapple afterwards, so don't put too much effort into making it too detailed! 

 
I then used the Stabilo pen to lightly sketch the "eyes" of the pineapple.  This is where I brought a bit more detail into the painting, but feel free to use a paint marker or regular acrylic paint.  You can add a little more detail in this area, depending on how long of a quote you use.  After this was dry, I wrote the quote "You are the pineapple of my eye." in black Montana marker straight over the pineapple.
 
 
Afterwards, I used the white Gelly Roll gel pen to add some 3D effects to the letters!  I love the sketchy look, so I went over my lines multiple times.
 
 
Once everything was dry, I sprayed the painting with a light and even coat of Acrylic Sealer.  This is to prevent the water-based pens like the Stabilo and the Gelly Roll from smudging in the future.
 
 
And there you have it! 
Again, you can always experiment and make it your own.  The steps I used only took me about an hour.  Having a blow dryer or heat gun on hand would help in speeding up the process.  (Waiting for paint to dry can be a real drag.)  If you want to have a more detailed pineapple, go for it!  Want to use a different quote?  Fantastic!  If you're having a painting party, everyone can put their own spin on their painting.  Seeing everyone's unique style is always the best part!  Plus, what better party favor to go home with than a piece of summery décor and some renewed artistic confidence?
 
Cheers!
Erika


Saturday, March 4, 2017

Starfish Wishes!

Hey Crafters!
If you guys haven't been down to any of our stores recently,
you seriously need to make the trip.  ESPECIALLY if you are a wood crafter!
We have so many unfinished wood pieces for everyone to paint and decorate
that it's insane!  Never had we had this big of a variety in our stores.
And for you ocean-themed décor lovers out there, you will love all of the nautical
items we have been getting in as well!
Coral sprays, seaglass pieces, laser-cut mermaids and scientific octopus illustrations; 
If you can name it, we've got it.  Today, you can mark this post as "Starfish Spam" because it is just starfish-themed wood crafts galore!
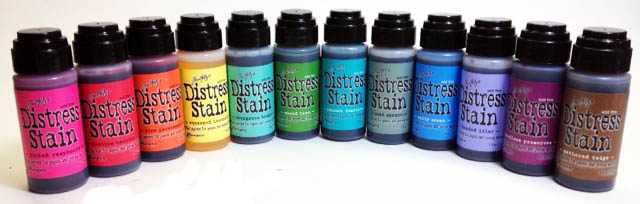
Another magical technique that I learned from our amazing Visual Merchandiser, JFlo, is the use of Tim Holtz' Distress Stains to give an interesting and colorful look to the wood pieces.  Because many of the woods are lighter in color, the stains will appear as a vibrant watercolor effect on the surface!
You can even stain the wood with multiple colors and distress it even more with acrylic paints for a vintage "shabby chic" look.
Below I have a small box distressed with light pink and cream-colored stains which was then distressed with a few streaks of Delta Americana acrylic paint in the color Chocolate. This particular paint color gives more of a gel stain feel with some fine golden glitter mixed in.  It looks SO GREAT with it and definitely adds that extra special something!

I then hot-glued a small white wooden starfish cutout, which were sold in a pack with a variety of sizes.  This one seemed perfect.  Don't think you can't distress this little starfish too, because it will look awesome with some stain and paint as well!  And the little white speckles around the starfish?
White Sakura Gelly Roll.  YEP!


This strand of beaded cord was too cute to pass up!  I needed to put it on something as a decorative and beach-y, ocean-y accent.  So, I took a small wooden easel sign, colored it with a few stains in cream and a few shades of green and blues and then distressed the edges with Ceramcoat paint in the color Wedgewood Blue.  I then hot-glued a small piece of the cord to the side!
This can make a cute table-number sign, menu board, a desk memo board or even just a cute frame for your precious memories.
Finally, just to appreciate the pure essence of a starfish, here we have... a starfish!
This is a pallet that I painted with Delta Americana's Waterfront, which is a bright and fun shade of turquoise!  I then distressed the edges with a brown stamp pad.  Yes, you read right!  Stamp pads are great for distressing because you've already got your ink on a felt pad and all you need to do is rub the edges of a project with it.  Perfect every time! 
I still felt like the blue needed to be toned down a bit more to achieve that vintage ocean-themed look I was going for, so I went with Tim Holtz' Distress stains in Burlap and Walnut.  These are both brown tones, with burlap being the lighter cream, yellow tone and walnut being a deep and rich brown.  I had to be careful with Walnut, so I just took a synthetic flat brush, tapped it onto the stain bottle's felt top and streaked the color onto the wood. Using a little water, I was able to spread the dark color on and make it look more like aged wood without it appearing too streaky.  To add a little extra something, I streaked a little Ceramcoat Metallic 14K Gold over the surface.  It also gave the surface more dimension.  Then, I hot-glued a pretty white starfish onto it!  Simple yet elegant. 
Not just aged, but Vintage and Chic!

Stop by to check out our selection of wood pieces today and I am guaranteed that you will find that perfect piece for your desk, coffee table, bedroom, anything!  You will be amazed.
Also, don't forget to stop by our scrapbooking and hard crafts departments for some Distress Stains and Acrylic Paints!
Have fun and see you next week!
Erika @ PC


Monday, December 19, 2016

Holiday Wood Designs

 
Happy Holidays! I hope everyone out there is having fun getting their Christmas craft on! I'm really enjoying painting fresh new home decor and digging into card making and cookie baking. So many favorite things. Here are a few samples of some pretty wood decor pieces I decorated. My favorite thing about these is that the shapes are cute, pre-cut, and that the wood surface allows you to do almost anything to it! So many possibilities!


Supplies:
wooden word or Santa or ornament shape
acrylic paint (dark green, green, dark burgundy, red, ivory, white, tan
bristle brush
1/2 inch wide nylon brush w/flat end
jute/twine
hot glue gun/glue sticks
buttons 


First, paint the front of every other letter with a very dark green. Use a brush that will give you even and smooth coverage. This will be your base coat for the distressed and rustic look. Let the letters dry for 20 minutes, and paint diagonal stripes on your remaining letters using your 1/2 flat tipped nylon brush and Ivory acrylic paint. I like to use this brush for stripes because if I hold it at an angle, it is exactly the direction and width of the stripes I want to make. Wait about 10 minutes for the stripes to dry before painting the red stripes. After this next layer is dry to the touch, take your bristle brush, light red and lighter green, and "feather" light strokes over the painted areas. The idea is to keep your back and forth strokes in a horizontal movement and to not coat too thickly so that you can see the layer underneath peeking through.


Hot glue jute and buttons on to your letters as textural elements! They just add to that rustic charm.
 
 
Ben Franklin is carrying a few other cute holiday sets as well, including the word "Home" and a Santa face and ornament shaped photo stand. 
 

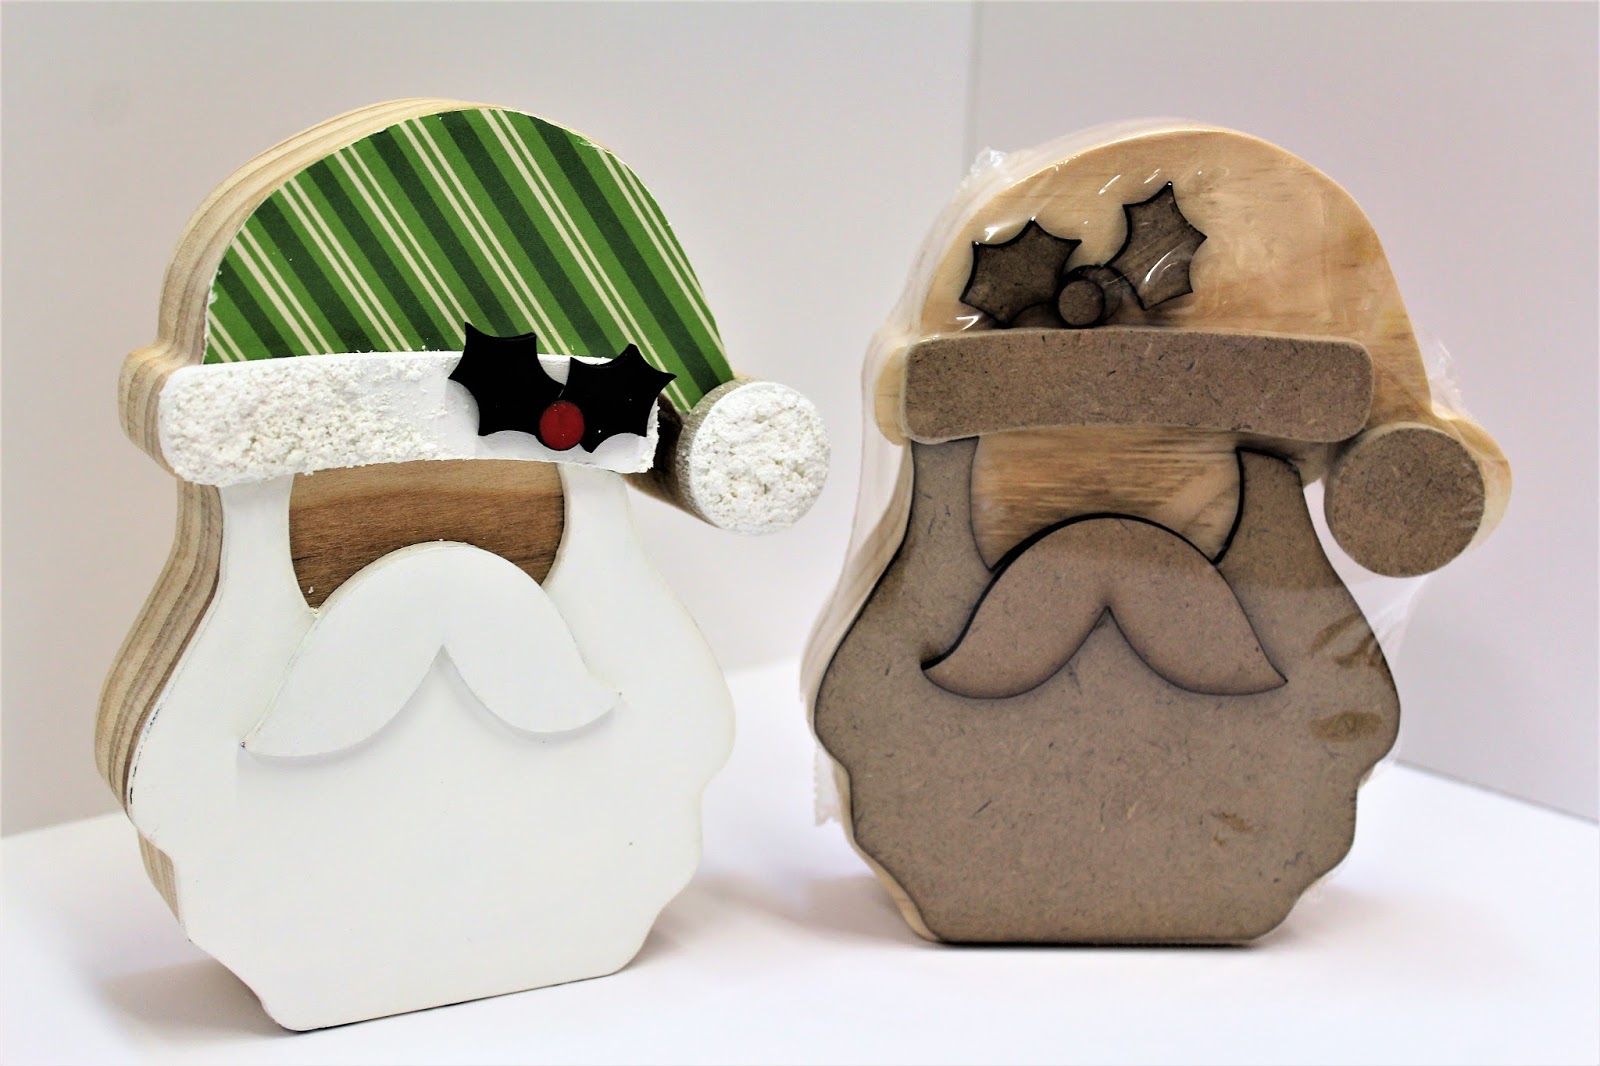
 You can use Mod Podge and sheets of patterned card stock paper to  cover larger flat areas, and then cut out with an X-acto blade. Even layer some textured/gritty Snow Tex on there to create realistic looking snow. Dry time would be about an hour or so depending on how thickly the Snow Tex was applied. E6000 glue can be used to put all the Santa pieces together. Ta Da!


Cute home decor!
 
Bethany @Enchanted Lake
Happy Crafting!

Tuesday, December 13, 2016

Simple Nativity Scene

12 days 'till Christmas already?!   WHAAAAT?
Yup, that's right! I hope everyone's holiday season isn't too crazy!
How's that holiday shopping? It seems to get harder and harder every year.
For those of you looking for an easy-peasy piece of holiday décor that would also
be great as a gift for a church-goer or who likes the sacredness of the Christmas season,
I have a beautiful and elegant wooden nativity scene!
All you need are a few salvaged items from your basic crafts pantry.
 
 
Supplies Needed
Jumbo Popsicle Sticks
Wooden Figures
Raffia
Jute Cord
White Felt
Wooden Bead
Rolled Paper Floral Wire
Snowflake or Star
Shell (optional)
Brown Stamp Pad (optional)
 
First, distress your popsicle sticks with a brown stamp pad.  It's really up to your personal style.  I wanted to give this a primitive and antique feel, but you can leave it plain if you'd like.  Second, hot glue all your sticks into a triangle form.  I made sure to make one flat so that it could stand on its own when not on a Christmas tree.  Next, I cut out a semi-circle piece of white felt for Mary's veil, then hot-glued the curve to the crown of her head.  I then cut a piece of the rolled paper wire for Joseph's can and curved the top to create a small cane.   For Baby Jesus, I cut a small piece of felt and wrapped it around a small wooden bead.  I hot-glued the little bundle into a tiny shell.  
 
After the Mary and Joseph figures were hot-glued onto the floor of the stable, I hot-glued a couple pieces of raffia on either side of the couple and then placed Baby Jesus at the very center.  To finish it up, I glued a "North Star" (snowflake) at the apex of the stable roof and then glued a piece of jute rope onto the back for hanging on a tree.
 
There you have it!  A cute little nativity that although primitive,
makes a great and meaningful gift. 
 
See you next week!
Erika @ PC


Tuesday, July 5, 2016

Frosted Turquoise Hawaii Sign

You know those days where you are just itching to get out of the house to search for inspiration?
That's me every single time I have a day off!  Hop into the car and head out to the mall, the library,
the park...  Anywhere that will get your creative juices flowing!
I visited a little shop with some very beachy vibes last week and found a Hawaii sign that I loved the look of and tried to recreate it today.

~ Here's what you'll need! ~


 1. 8-inch wooden letters
2. Ceramcoat or Delta Americana Acrylic Paint
3. Gel Wood Stain
4. Mod Podge
5. Crystal Glitter

- - - - - - - - - - - - - - - - - - - - - - - - - - - - - - - - - - - - - - - - - - - - - - - - - - - - - - - -
 Let's get started!


The first thing to do is take your base color and brush it on! 
I mixed up a nice light turquoise color using Delta Americana's Coastal Waters and Ceramcoat's white.  Let this coat dry completely.


Next, I used the Delta Gel Wood Stain in the color Walnut.  It's a nice dark brown that will bring a nice contrast to the turquoise. 


 Then brush on a thin coat of Mod Podge and sprinkle on that magical crystal glitter!  


 After the Mod Podge is dry and you have that nice layer of shiny crystal dust on it, feel free to embellish it!  Want a beach theme?  Add some shells, starfish or a rope border!  Something a little more elegant?  Maybe a few rhinestones or flowers.  As for me, I took a few frosted rocks from a 
vase filler pack and hammered them to get smaller pieces.  I then hot glued them on for a "dew" look. 
That's all she wrote!  It's a really simple rainy-day project that's great for a cool
piece of home decor.  (Plus, the kids would LOVE painting their monograms...)
I hope everyone has an awesome week!

Erika @ PC

Tuesday, April 12, 2016

Anchor Wood Panel Art

Afternoon, Crafters!
Today I have a "Pin-spired" nautical-themed piece of art that can be re-created with just three items! Seriously!  It's an easy and fast gift for that ocean-loving friend or for yourself to use as some
really cool beach décor.
 
 
The only things you will need to make this is paint, a 9x12 inch wood panel and some jute rope.
You're going to need two or three colors of paint to create that ombre effect on your wood panel.  Darkest blue will go at the bottom, then you keep mixing in more and more white to tint that color as you move toward the top of the panel. 
Next, paint on an anchor in pure white, being sure to leave a little space at the top and bottom of it.  Hot glue a few strips of our new Studio G jute rope on to the top and bottom for some accenting texture and there you have it!
 
This is, again, a very fast and minimalistic piece of nautical art that can be "spruced up" and personalized quite easily.  Write a friend's or loved one's name on it.  Mod Podge some sequins onto the anchor.  Glue some shells or starfish on it. 
Create your own masterpiece!
 
 
Have fun!
Erika @ PC

Thursday, March 17, 2016

St. Patrick's Coloring Book Box

Happy St. Patrick's day, Crafters!

In the spirit of the holiday, I have a very celtic-flavor project for you. With St. Patrick's day fast approaching and our first Adult Coloring Techniques class around the corner here at Mapunapuna, I was super excited to see these Celtic Spirit coloring books come in. I snapped one up as soon as they hit the shelf and thanked my lucky stars -- and the leprechauns -- for giving me the excuse to color my little heart out. I immediately fell in love with this Wind Rose image and decided to start there.

The best part about coloring something like this is that you can use just about any tool you like. In this case, I used Prismacolor colored pencils as my primary and accented it with everything from Zig brush-tip markers and Montana paint pens to sparkly Gelly Roll pens.
Once I had finished coloring, all I could think was how pretty it would be if I turned it in to a little treasure chest. I took up my trusty Exacto knife and cut all of the little bits of white out of the center of the image and around the edges.

It just so happens we carry a glass-topped box that is the perfect size to display this gorgeous knot. A bit of Uber Matte spray paint, some distressing with a stamp pad and I had a finished box! All that was left was to sandwich my picture between the glass that came with the box and a piece of acrylic and as easily as that I've created a custom piece of functional art from a coloring book page!

Interested in learning tips and tricks for creating your own beautiful pieces of art? Join us for our coloring technique workshops, held twice monthly. Just let your cashier know at the checkout that you'd like to sign up for the workshop the next time you pop in!


-Chelsea @Mapunapuna

Thursday, March 10, 2016

Royal Tray in Purple and Glitter


Hey, Everyone! 
 
Today’s project was inspired by three things; LBell’s glittery layered resin key chains, crowns and my obsession with trays. My home is filled with trays that I rotate in and out depending on what I’m working on. It’s a great way to stay organized and keep the mess to a dull roar! I have trays for current projects, trays for snacking, tray for  makeup…but I digress. 

I had come across these gorgeous vintage black and white crown images just two days before I had the opportunity to sit down for one of LBell’s make and take workshops. I wasn’t sure what I wanted to do with them though until that moment. I grabbed one of our unfinished trays and got to work!

The finished product incorporates a couple of different mediums. My first step was to paint the whole thing with Americana in Lavender Fields. While that was drying, I used a technique called ‘selective embossing’ to add color and dimension to the crown prints, the two small images and the quote, then glued them down with mod podge. I placed my feather where I was going to want it, then arranged self adhesive rhinestones in a couple of colors around all of it. With all of my big decor placed, I was ready to pour my first layer of resin. I used our envirotex resin and poured a thin layer, making sure to smooth and remove any bubbles. 

While the resin was still tacky, I added various glitter to highlight the color variation, incorporating silver, gold, purple and blue. Another layer of resin and glitter to give it the layered effect, and a final layer of resin to seal everything in finished off the main portion of the tray. 
All that was left was to add some interest to the outside. I used Americana’s Yellow Gold, mod podge and glitter to make it as pretty as the rest of the tray, touched up the handle cut outs with the lavender paint and sealed it with Triple Thick Gloss Glaze. 

I jumped in to this project full speed ahead and had so much fun coming up with different things to add in. I’m so pleased with how it turned out. It’s really a multimedia piece of functional art! It was so much fun in fact that I’m thinking I’ll offer a workshop for anyone who would like to make their own custom tray, so keep an eye on our craft calendar! 


Speaking of classes, I just have to go a little off topic and mention an Easter special class that we have coming up. The talented Eileen Tokita is going to be teaching students how to cut and decorate a real duck egg to make an easter keepsake panorama with an adorable bunny on Saturday, the 19th at 1:00 pm. Did I mention that her $35 fee covers all of the supplies? Decadence without the price tag, anyone? To sign up drop in and let the cashier know you’re interested.

- Chelsea @ Mapunapuna

Thursday, March 3, 2016

Elegant Jewelry Box part 2


                                  Hey Crafters,

Today I have part 2 of the elegant jewelry box project from last week for you and I am so excited to unveil the final result. If you’re just tuning in and want to see part one, you can find it a few posts down from this one :).
When I signed off last week, I had a gorgeous jewelry box that could have stayed just as it was, but it just seemed to be begging for more, and who am I to say no? The photos on the left are where we left off; all ready to be embellished!

I began by creating my backing. We have a huge selection of printed card stocks, but for this particular project I wanted something one-of-a-kind. That being the case, I started with a blank cream card stock and added my own print. After measuring the spaces I intended to cover, I used one of LBell’s large script stamps and the distress ink in walnut to cover the background with a pretty script. Over this I used a variety of stamps from bo bunny and Lbell to apply embossing powder in gold for that 3D effect you see. With my background made, all I needed to do was cut and glue my squares in place with mod podge.

In last week’s sneak peak, you may have noticed a print of a pretty corner embellishment. I found this free-use vintage french scroll online and just had to use it for this project. I printed it to the size I needed then cut it and a piece of graphite paper down, and taped them in place so I could easily transfer the outline of the image to the panels of my box. A burnishing tool is perfect for doing this. Once the image was transferred I used my versa tool to burn the outline and a bit of shading in to the wood.

At this point all of my major changes were complete; all that was left are a few minor touches. I decided the hardware could use some extra flare, so I pulled the clasp that came with the box off and added these cute tassels I made, (another super easy project, although we do have a boat load of awesome pre-made tassels if you prefer,) then added a few 'super magnets' to the inside of the box to help keep the doors closed nicely. A sheet of white adhesive felt to line the drawers rounded it out.

Finally, I finished it all off by adding a very light coat of Americana’s gold paint to the scroll work and sealed it all with a glossy coat of mod podge. Voila! One gorgeous, custom made jewelry box that would feel right at home on any dresser or vanity and adds a touch of old world elegance

This project was so much fun and I think it turned out just beautiful. Have questions about this project or want some help getting started on it or something else? Don’t hesitate to drop in and ask for me.

Chelsea @Mapunapuna

Key Hanger

Hi, Everyone!
    So this year we got in these intricate wooden frames.  Really beautiful to look at but hard to decide what to do with them! Because they're pretty light and flat, they can be used as wither borders or can even be used as a table number holder for a wedding centerpiece like Bethany from Enchanted Lake showed us in the previous post!  Today, I decided to use the two designs we have available to create a decorative hook for your foyer or room.  These are really convenient for keeping track of your keys, dog leashes and totes as well.
 
 
For this project, I decided to use bright warm colors.  Poppy orange, teal, gold and yellow. 
The main plaque was painted a vibrant orange and distressed with Ceramcoat's Metallic 14k gold paint.  This gold is the most true to color that I have ever seen in an acrylic paint.  Try it, and you won't be disappointed! The frames were painted yellow and teal.  I spray-painted a couple of command hooks with gold shimmer paint and distressed them with the deep black cherry tone. 
After everything was painted, I put everything together with E6000.  Of course, you could add some rhinestones or other kind of embellishments as well, but I decided to keep it simple and let the colors speak for themselves.
 
After everything is dry, you can hang it up in your craft area or foyer, prop it on your work desk or even in your home office.  It's really convenient for keeping your belongings accessible and out in the open for you to grab and go.  And it looks great too.lol
 
Have fun!
Erika @ P

Friday, February 26, 2016

Hand-Painted Signs

Hey, everyone!  
.So, the weekend is here and if you're still trying to satisfy that craft craving you've been having there is still an awesome selection of wooden signs in all shapes and sizes waiting for you at all of our Ben Franklin Crafts locations!  This past week, we've been cranking out some samples for you guys to check out.  I chose a few wooden signs because I've just had a hankering for painting this past week.  Being surrounded by all these unfinished wood products just does this to you I guess.lol  


All I had to do was let the creative juices flow.  These palettes were only $3.99!  I couldn't pass up the opportunity because there's just so many ways to go with these.  Landscapes, Quirky signs, Sassy Alpaca in sunglasses, pineapples...  The possibilities are endless.
All you needed was a variety of brushes, a few Delta Ceramcoat and Satin Americana acrylic paint colors and some decorative ribbon!  Below, I even made a Spring/Easter-themed piece using one of the mini signs.  These are $1.99 each, and they already come with the hooks attached so that you could hang them up.  Not to mention there is a variety of shapes to choose from: scalloped rectangles, arrows and ovals like this little guy here.

 This small sign can be adorable as a little Easter gift or just as seasonal decor for your home. 
 This is also a great activity to do with kids.   
Three colors, and a pom pom.  How simple is that?

As always, have fun!
Erika @PC