Showing posts with label benfranklin. Show all posts

Monday, September 25, 2017

Spook-tacular Skull Wreath

Hi creative crafters! I'm so pumped for this autumn season and wanted to share with you guys a few spooky ideas to spruce up the house for Halloween! HouseMart Ben Franklin just got in a great selection of really cute and spooky Halloween items. Today's project is a skull wreath!


Supplies: 
1 roll of 1" wide black ribbon
1 roll of 1" wide white ribbon
12"-14" Styrofoam wreath 
hot glue / hot glue gun
bag of skulls 
1 black feather boa 

 First, wrap simultaneously the black and white ribbon around your Styrofoam wreath. Use hot glue to secure the beginning and the ending. You will wrap ribbon around 1/2 of the wreath.

 Next, wrap the feather boa around the other 1/2 of the wreath, hot gluing the two ends of the boa to the ribbon to secure it.

 Finally, hot glue your skulls in place! I placed mine off to the side for an asymmetrical feel to break up the symmetry of the stripes. I even used some of the net bag as a netting accent! And simple as that, it's ready for the front door! Have a spooky good time playing with Halloween Decor! 

Bethany @Enchanted Lake 

Monday, August 7, 2017

Crackle Apothecary Bottles!

Hi everyone!
I hope you guys have been having a great summer! I know it feels so soon, but I've already been getting into the swing of fall! It will be here before we know it! Plus I love fall crafts, so I'm actually pretty excited about this change of pace. Today's craft is apothecary jars! Ben Franklin just got in some more really cute bottles and jars, and I wanted to really transform them into aged and crackled ingredient bottles!


Supplies: 
3 glass bottles of assorted sizes
spray paint in black, and gold
crackle gel
paint brush
acrylic paints in gray, charcoal, and gecko green
jute
black cardstock
white pen
hole punch
scissors
optional: gloss sealer spray (to keep them from chipping)


First, you'll need to wipe down your bottles. Then spray one by one with your black and gold. Let sit to dry for 15-30 mins.

Once they are dry to the touch, using your brush, apply a generous coat of the clear crackle gel to the entire visible surface of your bottle. (There's no real need to do the bottom.)


Next, wait about 5 minutes for the gel to dry enough to feel "tacky" instead of "wet". 
Then will a clean brush, one color at a time, lay strokes of paint over the gel. Be careful to not mix the gel and top layer of paint. The key is to lay the paint right on top. The thicker your paint, the thicker the cracks will become. The thinner the paint, the smaller and finer the cracks will become. It's perfectly fine to have a mixture of thicknesses! I think it adds more dimension and variety to the crackle. After all, when things age, they don't age and wear down in exactly the same way in all places!

The direction of your strokes also really matters. You want to stay consistent and brush in all the same angles:
-all up and down
-all side to side
This technique will create an organized look about your piece. Like wood grain. 


 You can really tell in the paint stroke direction in this picture! The green bottle I went up and down, and the gray one I went side to side. Also the gray one had thicker paint strokes, so you can really see the cracks more visibly!

For the tags, I cut out squares from black card stock, hole punched the tops, and hand wrote the creepy crawly ingredients! I also drew a white border around the edges of the paper, and then I tied them on with Jute!

Have fun with your crackle paint!
It's available at any local House Mart Ben Franklin.
Happy crafting!

Bethany @Enchanted Lake

Tuesday, April 25, 2017

Distressed Mason Jars

Mason jars!
The number of uses of this beloved jar has grown so much since its uni-tasking canning days.
(Bringing a little bit of Good Eats reference into this..😄)
Now it can be used as storage for small craft items or random doodads, soap dispensers for those
Urban or Industrial Chic bathrooms, and even plant pots!  We all need that simple and fresh look for the kitchen table, right?  What's better than a clear mason jar and some lovely flowers from the garden? (Or the neighbor's garden?)
Here, I have a way that you can add a little bit of Shabby Chic to your Mason Jar centerpiece.
Behold the basic technique of sand-paper distressing!


Here is a close up of a jar that was spray-painted with Chalky Finish spray paint in Morning Sky.
Gorgeous, isn't it?  It' s the perfect and elegant French blue tone for Spring!  Notice anything different about thatlittle distressed bit?  Right!  It has a tinge of penny-copper so that it looks like a distressed copper pot.  (Actually, it was Design Master spray paint in Rose Gold!)
Rose Gold and Copper just add that right amount of "antique" (antiquity?) to a craft piece.  It's both classic and modern with its pinkish metallic hue.   Here's a shot of the inside.

 
 All you need is a few spritzes!  It's best not to overdo it so that the paint doesn't all pool to the bottom.  The same goes for the outside of the mason jar.  After spraying the inside, turn the jar upside down and spray in light even coats.


Here are the two Spring-time Mason jars that I created using beautiful cool-toned pastel colors.
The one on the right is that perfect minty hue (Ubermatte's Mist), with its cover painted in rose gold once again.  As always, experiment, experiment.  Creativity stems from both inspiration and experimentation, so don't be afraid of those lovely mistakes.  It's trial and error!
Also, don't forget to have fun!

Erika @ PC

Thursday, April 6, 2017

Spring Keiki Crafts Camp 2017

Hey Crafters!
I hope everyone had an awesome Spring Break!
At our stores, we had a very successful Keiki Craft Camp making
fun and adorable crafts with the kids.  Let me just say, there were A LOT of kids this Spring, which was AMAZING.  No surprise, because the projects included classics like Perler Beads and Shrink Art!
Sara at Market City with a full class!  We're ready for today's craft, Teach!

What was especially impressive was the number of kids who showed up during the second day of camp.  Why you ask?  SLIME, of course!  Yes, that craze that's been sweeping the nation and causing Elmer's Glue to just fly off the shelf!  In fact, slime even caused a nationwide shortage of Elmer's Glue.  Crazy, right?  We loved how all of the kids' slime turned out different, representing each child's preferences and color choices.  "More glitter,  More Borax"!  "Not too much foam beads!" The measurements had to be just right!  We had so many fun and interesting ways to customize the slime.  Not just by look, but by texture as well!   This glob had some colored foam beads that seriously made it look like ice cream.  I mean, come on!  Look at it!
One of the most rewarding things was watching them play with the slime and to see them have fun with it. 


Just the right amount of lotion produces a satisfyingly stretchy slime.


Much stretch.  So wow!

So goopy and messy, but that's half the fun!
Just in case anyone is interested in the slime recipes that we used, each store did have their own special concoction. So, feel free to check out each one for different recipes and have fun experimenting at home!  Also, don't forget that our stores have started expanding on the Slime supplies, so specialty items like Borax, foam beads and clear glue are starting to hit our shelves.
Stay tuned to see what else we have in store!

Look at the mixed media scrapbooking going on here!  These kids even include photos in their wood craft project.  What a great way to record and make memories over the break.  The keiki got to create their very own piece of mixed media art!  We gave them everything they could ever ask for; from glitter to cardstock.  And they went nuts.  Like, glitter on the floor and their faces nuts! 
SO MUCH FUN!

You will not believe how much glitter was left on the table. 
Although making a big mess is all part of the CREATIVE PROCESS!

Bright colors and Glitter are all the rage right now. 
  
A stinkin' adorable project that we had on the last day was a Pet Rock and Sanctuary.  Basically, our kids decorated a pet rock, painting it whatever animal they wanted, and they then created a little habitat/home for it using a clear pail, odds and ends, and a whole lot of imagination!  From shark tanks to butterfly homes, the crafts these kids made were so  creative.   There were many who liked to jazz up their homes with lots of bright colored doodles all over their pails and flower cut outs strewn all over the inside.  We also noticed there were some who liked to keep things simple, with a bit of Spanish moss here and a bit of green fluffy moss there.  Maybe a little washi tape around the rim of the can along with a couple cute bows tied onto the handle.

This craft camp is a lot of fun for kids, and it's a great way to make new friends and to learn how to make a bunch of different crafts!  This program is available at all stores during Spring, Summer and Fall.  Stay connected with us on our company website (benfranklinhawaii.com), Facebook (@BenFranklinCrafts) and Instagram (@bfcrafts)!

Saturday, March 4, 2017

Starfish Wishes!

Hey Crafters!
If you guys haven't been down to any of our stores recently,
you seriously need to make the trip.  ESPECIALLY if you are a wood crafter!
We have so many unfinished wood pieces for everyone to paint and decorate
that it's insane!  Never had we had this big of a variety in our stores.
And for you ocean-themed décor lovers out there, you will love all of the nautical
items we have been getting in as well!
Coral sprays, seaglass pieces, laser-cut mermaids and scientific octopus illustrations; 
If you can name it, we've got it.  Today, you can mark this post as "Starfish Spam" because it is just starfish-themed wood crafts galore!
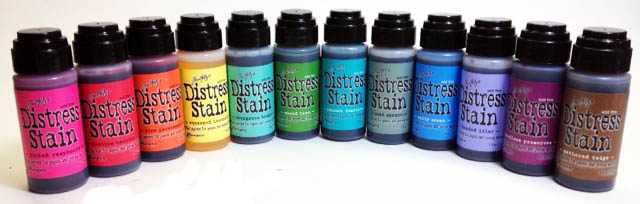
Another magical technique that I learned from our amazing Visual Merchandiser, JFlo, is the use of Tim Holtz' Distress Stains to give an interesting and colorful look to the wood pieces.  Because many of the woods are lighter in color, the stains will appear as a vibrant watercolor effect on the surface!
You can even stain the wood with multiple colors and distress it even more with acrylic paints for a vintage "shabby chic" look.
Below I have a small box distressed with light pink and cream-colored stains which was then distressed with a few streaks of Delta Americana acrylic paint in the color Chocolate. This particular paint color gives more of a gel stain feel with some fine golden glitter mixed in.  It looks SO GREAT with it and definitely adds that extra special something!

I then hot-glued a small white wooden starfish cutout, which were sold in a pack with a variety of sizes.  This one seemed perfect.  Don't think you can't distress this little starfish too, because it will look awesome with some stain and paint as well!  And the little white speckles around the starfish?
White Sakura Gelly Roll.  YEP!


This strand of beaded cord was too cute to pass up!  I needed to put it on something as a decorative and beach-y, ocean-y accent.  So, I took a small wooden easel sign, colored it with a few stains in cream and a few shades of green and blues and then distressed the edges with Ceramcoat paint in the color Wedgewood Blue.  I then hot-glued a small piece of the cord to the side!
This can make a cute table-number sign, menu board, a desk memo board or even just a cute frame for your precious memories.
Finally, just to appreciate the pure essence of a starfish, here we have... a starfish!
This is a pallet that I painted with Delta Americana's Waterfront, which is a bright and fun shade of turquoise!  I then distressed the edges with a brown stamp pad.  Yes, you read right!  Stamp pads are great for distressing because you've already got your ink on a felt pad and all you need to do is rub the edges of a project with it.  Perfect every time! 
I still felt like the blue needed to be toned down a bit more to achieve that vintage ocean-themed look I was going for, so I went with Tim Holtz' Distress stains in Burlap and Walnut.  These are both brown tones, with burlap being the lighter cream, yellow tone and walnut being a deep and rich brown.  I had to be careful with Walnut, so I just took a synthetic flat brush, tapped it onto the stain bottle's felt top and streaked the color onto the wood. Using a little water, I was able to spread the dark color on and make it look more like aged wood without it appearing too streaky.  To add a little extra something, I streaked a little Ceramcoat Metallic 14K Gold over the surface.  It also gave the surface more dimension.  Then, I hot-glued a pretty white starfish onto it!  Simple yet elegant. 
Not just aged, but Vintage and Chic!

Stop by to check out our selection of wood pieces today and I am guaranteed that you will find that perfect piece for your desk, coffee table, bedroom, anything!  You will be amazed.
Also, don't forget to stop by our scrapbooking and hard crafts departments for some Distress Stains and Acrylic Paints!
Have fun and see you next week!
Erika @ PC


Thursday, January 19, 2017

Double-Stick Tape Paper Crafts!

Birthday party but no favors?  
Cute gift but no cute gift box?  
Gift card but no gift-card sized envelope?
*insert photo of am angry person here*
These are problems that everyone has and can relate to.


The solution?  Craft it!  Look at these great ideas!
To be honest, it's not that hard.  With the right tools and handy dandy Meriken Double stick tape,
you can make some cute and easy favors, envelopes and boxes that are perfect for any occasion! 
For example, we used the We-R-Memory Envelope Punch Board to make small envelopes perfect
for gift cards or money envelopes for New Years.  The We-R-Memory Gift Box Punch Board was also really useful for making cubic boxes of different sizes for those too-small-to-wrap presents.  They could also be used to make wedding, birthday, baby shower or graduation favors.

Use double stick tape to make a custom "glitter tape"!
Just stick it on, pour your glitter, and Voila!


Also, don't forget to check out our Accu-cut machines!  Each store carries different dies shapes, templates and letters.  This is one of our favor/treat bags punched out of a textured brown cardstock!
We then embossed a honu onto it using NUVO's embossing powder in Gold Enchantment and added a natural accent using green and ivory raffia!  So simple, yet pretty to look at. :)
 
Double-stick tape is out Item of the Month for
January, so stock up before they're all gone!
These are going like hotcakes!
 
For more idea using amazing double-stick tape, visit us at the Pearl City store
 to see all of our great samples and Daily Demos.
 
See you next week!
Erika @ PC


Friday, October 28, 2016

Minimal Fall Garland

Well, it's almost the end of October, and it honestly makes me feel so sad!
The Autumn season is fleeting!  It's time to make the best of it.
We've got one more month to go, so it's never too late to put up some fall décor.
The project I have today is very minimalist and requires only a few supplies. 
Don't fret!  It's simple quality is what makes it ADORABLE.  Also, it's great for kids!
Although, because this requires basic sewing skills, close supervision might be needed for younger children under 7. 
Let's get started!
 
+ + + + + + + + + + + + + + + + + + + + + + + + +
 
 
Supplies Needed
Felt in Autumn Colors
Embroidery Floss in Autumn Colors
Embroidery needles
Scissors
Yarn or Jute Twine
Permanent Marker (optional)

+ + + + + + + + + + + + + + + + + + + + + + + + +
 
 
First, cut out leaf shapes from your pieces of felt!  I chose orange, olive green, golden yellow, maroon and brown.  The simpler your leaf shape, the better.  You can use a marker to draw your
leaves first as well.


Second, use the embroidery floss to sew on some veins.  I have a step-by-step-process pictured below.  Basically, you want to work your way up from the bottom of your lead and sew the veins from the sides to the middle.

After the veins, go ahead and cut out some letters if you'd like.  I cut out the word "FALL", but other words like "GIVE THANKS" or "AUTUMN" would be really cute as well!  You can use any color, but for this garland, I chose black so that the word stands out from the leaves.


After that, hot glue your leaves and letters onto some yarn or jute twine and hang it up! 
Now you can enjoy the beauty of autumn leaves in your home.  For us in Hawaii,
(who can only see the leaves change color on dying mango trees) this would be a great
garland to make and put up year after year.
 
Have fun!
Erika @ PC


Tuesday, July 5, 2016

Frosted Turquoise Hawaii Sign

You know those days where you are just itching to get out of the house to search for inspiration?
That's me every single time I have a day off!  Hop into the car and head out to the mall, the library,
the park...  Anywhere that will get your creative juices flowing!
I visited a little shop with some very beachy vibes last week and found a Hawaii sign that I loved the look of and tried to recreate it today.

~ Here's what you'll need! ~


 1. 8-inch wooden letters
2. Ceramcoat or Delta Americana Acrylic Paint
3. Gel Wood Stain
4. Mod Podge
5. Crystal Glitter

- - - - - - - - - - - - - - - - - - - - - - - - - - - - - - - - - - - - - - - - - - - - - - - - - - - - - - - -
 Let's get started!


The first thing to do is take your base color and brush it on! 
I mixed up a nice light turquoise color using Delta Americana's Coastal Waters and Ceramcoat's white.  Let this coat dry completely.


Next, I used the Delta Gel Wood Stain in the color Walnut.  It's a nice dark brown that will bring a nice contrast to the turquoise. 


 Then brush on a thin coat of Mod Podge and sprinkle on that magical crystal glitter!  


 After the Mod Podge is dry and you have that nice layer of shiny crystal dust on it, feel free to embellish it!  Want a beach theme?  Add some shells, starfish or a rope border!  Something a little more elegant?  Maybe a few rhinestones or flowers.  As for me, I took a few frosted rocks from a 
vase filler pack and hammered them to get smaller pieces.  I then hot glued them on for a "dew" look. 
That's all she wrote!  It's a really simple rainy-day project that's great for a cool
piece of home decor.  (Plus, the kids would LOVE painting their monograms...)
I hope everyone has an awesome week!

Erika @ PC

Tuesday, May 3, 2016

"Oh Whale..." Glass Box

"Whale" have I got an adorable project for everyone this week...
(*crickets chirping*)
Doodlebug has a great ocean-themed collection for us that is perfect for summer scrapbooking pages.  Bright colors, sea life, beach balls, palm trees and of course, mermaids!  But is all honesty, I do prefer the whales.  One, they are amazing creatures, and two, who could resist that vibrant color palette?  It went really well with the Ceramcoat Watermelon and Butter Yellow paints.
 
 
This is one of the glass top wooden boxes that all stores got in for Spring.  Because this particular design was a little more shallow than the others, I decided to use it as a shadow box instead of a storage container.  I Mod-Podged a piece of the whale paper onto the bottom of the box and then gave the inside of the box two coats of Butter Yellow Ceramcoat.  I then painted the outside with Watermelon.  After that dried, I used a dry bristle brush to distress the sides with a bit of Metallic 14K Gold Ceramcoat. 
I then wrote a cute pun right onto the whale paper as a finishing touch.
That's pretty much it for this project, but like always, experiment, make it your own and have fun!
 
Erika @ PC


Wednesday, April 6, 2016

Grad Party Card "Book"

Good day, Crafters!
Graduation season is right around the corner (Can you see it in our stores?), so you know what that means!  GRAD PARTY!!!  Yes, the daunting task of planning and prepping for your graduate's special event can be a stressful one, but we're here to help and make it fun.  
Today I will show you guys how to create an awesome Vintage-style Money Book.


Yes, I said "book"!  Who says a grad party has to be school-themed?  I'm showing you that you don't have to follow the color scheme or theme of the graduate's Alma Mater.  
The theme can be a lot more personal.  This card box is in the form of a book to represent a graduate who loved literature and all things vintage for example.  It's different, unique and makes a great conversation starter as a centerpiece too!
 

 This was built from just one piece of 20 x 30 inch foam board and then decorated to look like a really old book.  I Mod-Podged brown cardstock onto both covers as well as the spine and then distressed it by rubbing it with a Memento stamp pad in the color Cocoa. I also misted some gold Mr. Huey's spray onto the covers to give it some shimmer.  I then covered the sides of the exposed foam board with brown creme wax, painted the pages with a mix of butter yellow and white Ceramcoat acrylic, and then streaked some wax on that to create the "pages".  

 This project will be featured on an upcoming episode of  The Joy of Crafting, so be sure to check it out if you want the full walk-through of how to create this awesome card "book"!


Erika @ PC

Thursday, March 3, 2016

Elegant Jewelry Box part 2


                                  Hey Crafters,

Today I have part 2 of the elegant jewelry box project from last week for you and I am so excited to unveil the final result. If you’re just tuning in and want to see part one, you can find it a few posts down from this one :).
When I signed off last week, I had a gorgeous jewelry box that could have stayed just as it was, but it just seemed to be begging for more, and who am I to say no? The photos on the left are where we left off; all ready to be embellished!

I began by creating my backing. We have a huge selection of printed card stocks, but for this particular project I wanted something one-of-a-kind. That being the case, I started with a blank cream card stock and added my own print. After measuring the spaces I intended to cover, I used one of LBell’s large script stamps and the distress ink in walnut to cover the background with a pretty script. Over this I used a variety of stamps from bo bunny and Lbell to apply embossing powder in gold for that 3D effect you see. With my background made, all I needed to do was cut and glue my squares in place with mod podge.

In last week’s sneak peak, you may have noticed a print of a pretty corner embellishment. I found this free-use vintage french scroll online and just had to use it for this project. I printed it to the size I needed then cut it and a piece of graphite paper down, and taped them in place so I could easily transfer the outline of the image to the panels of my box. A burnishing tool is perfect for doing this. Once the image was transferred I used my versa tool to burn the outline and a bit of shading in to the wood.

At this point all of my major changes were complete; all that was left are a few minor touches. I decided the hardware could use some extra flare, so I pulled the clasp that came with the box off and added these cute tassels I made, (another super easy project, although we do have a boat load of awesome pre-made tassels if you prefer,) then added a few 'super magnets' to the inside of the box to help keep the doors closed nicely. A sheet of white adhesive felt to line the drawers rounded it out.

Finally, I finished it all off by adding a very light coat of Americana’s gold paint to the scroll work and sealed it all with a glossy coat of mod podge. Voila! One gorgeous, custom made jewelry box that would feel right at home on any dresser or vanity and adds a touch of old world elegance

This project was so much fun and I think it turned out just beautiful. Have questions about this project or want some help getting started on it or something else? Don’t hesitate to drop in and ask for me.

Chelsea @Mapunapuna