Showing posts with label tree. Show all posts

Monday, December 11, 2017

Cube Tree Ornament

Merry Christmas!
All of us at Ben Franklin are having so much fun decorating everything Christmas themed, from home decor, to ornaments, and from trees to centerpieces! Here is a quick tutorial on how to make a cube shaped "snow globe"!


Supplies: 
cube glass ornaments
powdered snow
E6000 glue
long pointed tweezers
festive red ribbon
oil based white paint marker
1 inch tall trees

optional: sea glass spray in 'ice' color


Spray very top of ornament with very light coating of 'ice' Sea Glass spray. This will make it look more frosted!
Use white oil based paint marker to make small dots over the top and the sides, to make it look like snow is falling!


Coat bottom of tiny tree with E6000 glue. Using tweezers, place tiny tree through the top of the ornament. 


 Add powdered snow!


Write 'Let it Snow' on the outside of your ornament with the oil based marker and adorn the top with your cute ribbon!
Ta Da!

Bethany @Enchanted Lake 

Monday, December 19, 2016

Holiday Wood Designs

 
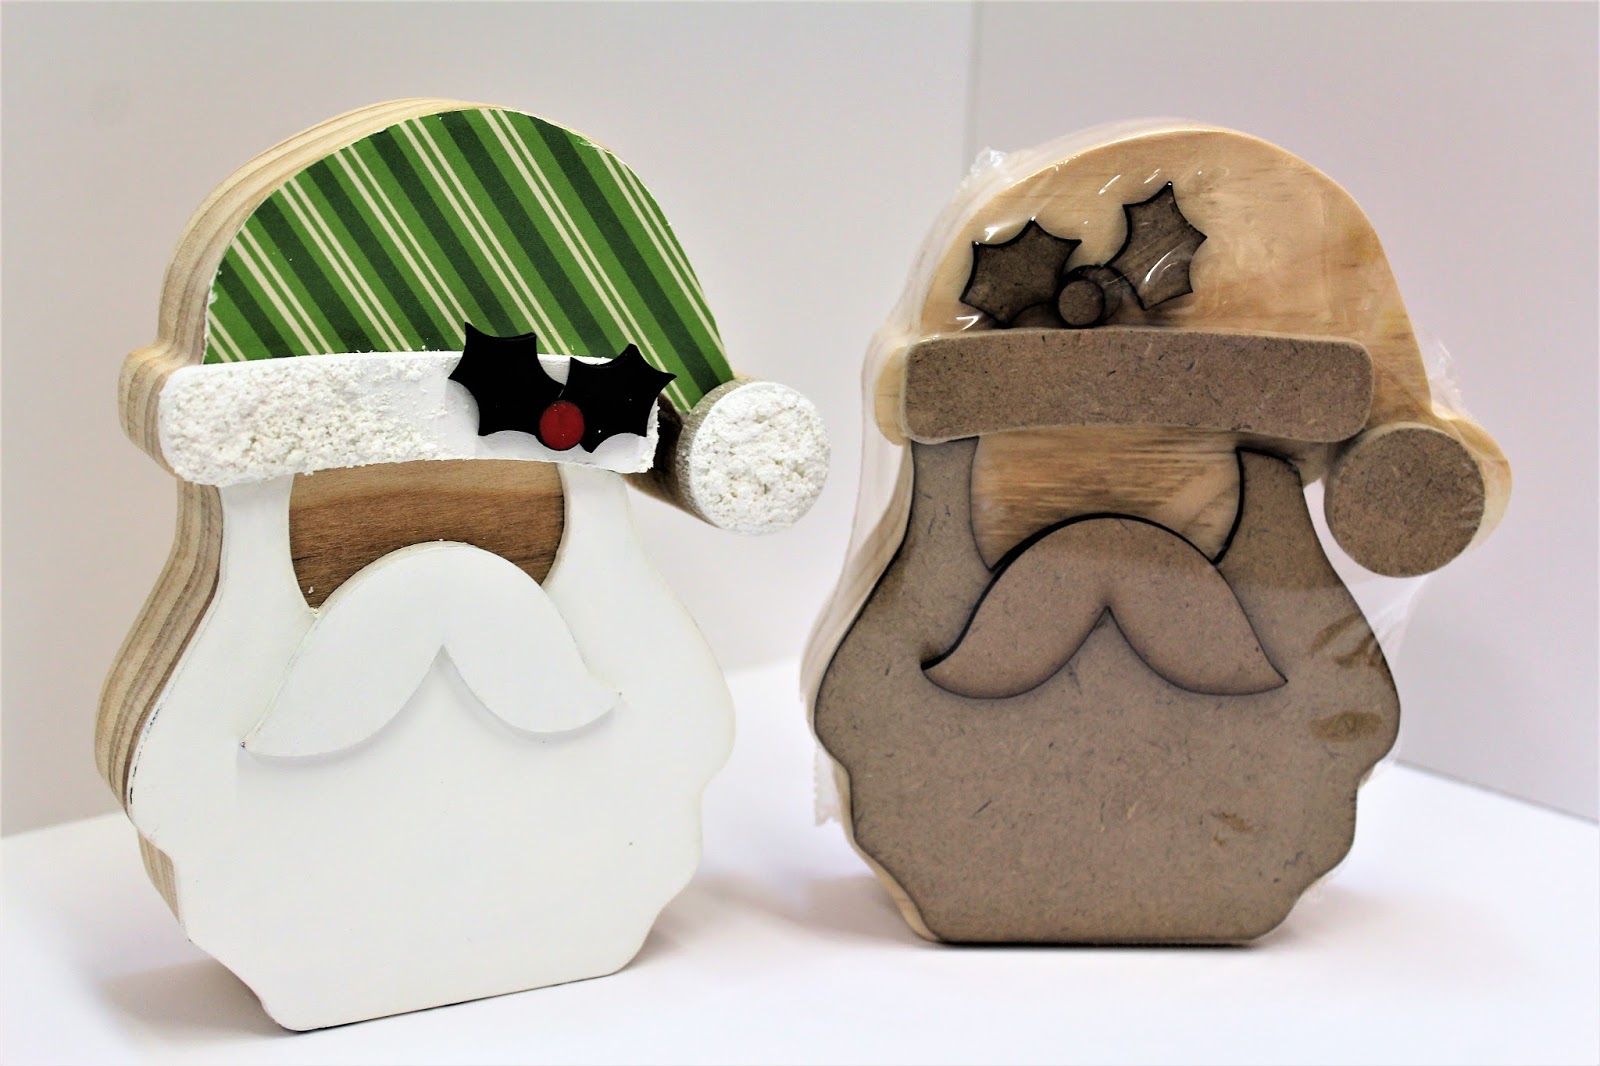
Happy Holidays! I hope everyone out there is having fun getting their Christmas craft on! I'm really enjoying painting fresh new home decor and digging into card making and cookie baking. So many favorite things. Here are a few samples of some pretty wood decor pieces I decorated. My favorite thing about these is that the shapes are cute, pre-cut, and that the wood surface allows you to do almost anything to it! So many possibilities!


Supplies:
wooden word or Santa or ornament shape
acrylic paint (dark green, green, dark burgundy, red, ivory, white, tan) 
bristle brush
1/2 inch wide nylon brush w/flat end
jute/twine
hot glue gun/glue sticks
buttons 


First, paint the front of every other letter with a very dark green. Use a brush that will give you even and smooth coverage. This will be your base coat for the distressed and rustic look. Let the letters dry for 20 minutes, and paint diagonal stripes on your remaining letters using your 1/2 flat tipped nylon brush and Ivory acrylic paint. I like to use this brush for stripes because if I hold it at an angle, it is exactly the direction and width of the stripes I want to make. Wait about 10 minutes for the stripes to dry before painting the red stripes. After this next layer is dry to the touch, take your bristle brush, light red and lighter green, and "feather" light strokes over the painted areas. The idea is to keep your back and forth strokes in a horizontal movement and to not coat too thickly so that you can see the layer underneath peeking through.


Hot glue jute and buttons on to your letters as textural elements! They just add to that rustic charm.
 
 
Ben Franklin is carrying a few other cute holiday sets as well, including the word "Home" and a Santa face and ornament shaped photo stand. 
 

 You can use Mod Podge and sheets of patterned card stock paper to  cover larger flat areas, and then cut out with an X-acto blade. Even layer some textured/gritty Snow Tex on there to create realistic looking snow. Dry time would be about an hour or so depending on how thickly the Snow Tex was applied. E6000 glue can be used to put all the Santa pieces together. Ta Da!


Cute home decor!
 
Bethany @Enchanted Lake
Happy Crafting!

Monday, December 12, 2016

Let It Snow Ornament


Happy Christmas season, everyone! 
Today's project is a DIY "unbreakable ornament" for your tree!


All you need are these few things:

Unbreakable plastic ornament
Tiny tree
E6000 Glue
Snow Tex
Powdered Snow
Decocolor medium size Oil based Pen 
brush or plastic butter-knife


First, take your E6000 glue and adhere the tree to the inside of the lid of your ornament. The total cure time is one day, but to the touch the glue will be secure in 30 mins to an hour.

Then with a brush/plastic butter-knife, scoop out some Snow Tex into the bristles of your tiny tree. It is like a thick gritty paste, so don't be afraid to pile it on and make it thick! Total dry time is close to an hour, depending on thickly it is applied.


As your snow is drying, write a message on the outside of your plastic ornament!
This oil based paint pen is great for writing on slick surfaces like glass and plastic, I highly recommend them! The medium sized one in black is what I used to write "LET IT SNOW" on the front of my ornament. Write in smooth and even stokes, as if using a regular marker. Dry time for the writing is roughly 10 minutes to the touch.

Once the glue under the tree is dry to the touch, add in the loose powdered snow around the tree and screw the lid back on the ornament. And ta da!!!

Super cute and super easy!

Bethany @Enchanted Lake 


Tuesday, November 29, 2016

Pinecone Christmas Tree

Oh Christmas Tree, Oh Christmas tree...
How lovely are thy branches...
A tree always kicks off the Christmas season for my family!  It really doesn't feel
like the holidays until we bring a nice 6 foot tree home and shake out it's branches, its
refreshingly sharp smell wafting through the house...
If you want to bring a little of that feeling Christmas cheer to work, I have one craft that is simple,
festive and downright ADORABLE.

 
Mini Pinecone Christmas tree! 
All you need are a few items.
 
1. Pinecone
2. Green Acrylic Paint
3. Pom Poms
4. Firefly lights
5. Mini Terracotta Pot
 
First, Paint your pinecone!  I chose a traditional Christmas green, but you can mix up the colors if you'd like.  You can even leave it as is for a nice neutral and rustic palette.  White pompoms or Snow Tex would be great for trimming it.  Or why not try a cutesy pastel palette?  Maybe an ice blue tree with iridescent twinkle flakes and pink pompoms? 
 
Second: Glue your mini pompoms onto your pinecone after it's fully dry.  Then, take your firefly lights and wrap them around you tree starting from the top.  Because I had chosen the 10 bulb firefly lights, I was able to hide its small battery pack inside the Terracotta pot, which I placed the pinecone "tree" onto for a base.  You can go ahead and paint the pot as well! 
 
And that's all she wrote!
This is a great activity for kids as well, so don't pass up the chance to make some great holiday memories.  Have fun!
Erika @ PC


Monday, November 28, 2016

Wooden Tree Shadow Box! Hello Christmas!

Hey Everyone, today's project is so adorable! I really had fun putting it together, and it's such a great way to customize a holiday stacking display box to the theme of your home this year!


 Supplies:

4 sheets of card stock with patterns and solids that all match each other in style (I used a solid olive green, a red pinstripe, a red holiday text, a Christmas tree print, and a green and white polka dot print) the plus side is that a lot of patterned card stock is double sided, so one sheet can act as two!

scissors
hot glue gun/glue sticks
matte Mod Podge
E6000 clear glue
1/2" nylon brush
small round nylon brush for fine details
cup of water
acrylic paint in the colors black, white, lime sorbet, dark cherry
3 teir raw wood tree shapes (sold as a set)
wood car
package of tiny wreaths
small trimmings of faux pine branches
one tiny cardinal
package of tiny glitter light bulbs
8 in of string or baker's twine
2 eye screws
dimensional pop-up dots
white fine tip paint pen


First take your 1" nylon brush, Mod Podge, and selected card stock paper, and apply a generous but even coating on the side of the wood. Then smooth out card stock over the side. Wait 5 minutes to dry a bit, then carefully cut off the excess paper around the edges. Repeat for all sides of the top middle and bottom tier. ( I didn't do the back or the underneath.)


After cleaning your brush in the cup of water, paint the insides of the tree.
I used white for the inside back panel of all the tiers. 

For the middle tier, I mixed black and white to make grey, and used that for the side panels on the inside. I used the dark cherry for the front facing rim. 

For the bottom tier I painted all the side panels olive green, while leaving the back panel empty, and painting the front facing rim white.


Then after letting everything sit to dry separately for 5-10 minutes, I began working on painting the car. I used lime sorbet for the sides, black for the tires, grey for the front, and white for the roof. Now the best part about the fine white lines on this car is that I used a paint pen! So much faster and easier than using a brush. I just drew lines around the windows, on the hood, and on the tires! And then for the finishing touch, I used E6000 glue to adhere the wreath on the front of the car!

For the inside of the bottom tier, I used the Mod Podge again to glue the pretty tree card stock to the back panel.


After the paint is completely dry in the middle tier, take your optional patterned card stock and layer pop-up dots on the back. This will make the square look like it's floating out and fill up some of the space. It will act as a back drop for your ornaments.


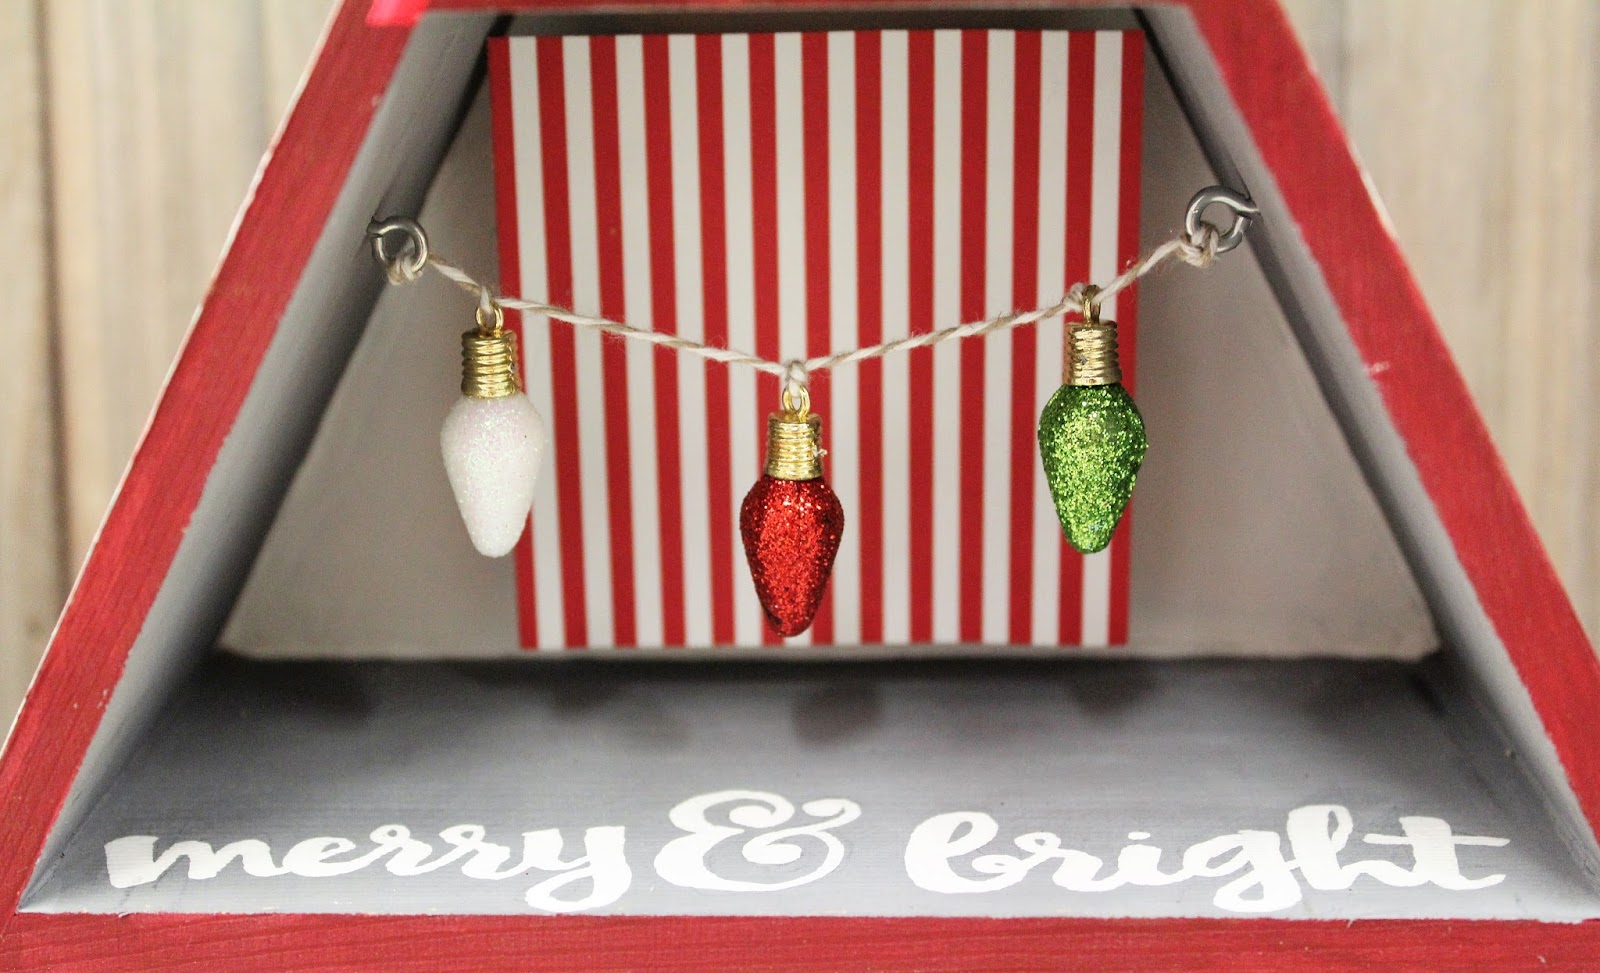
I used 3 ornaments and tied a knot in my string about 1 inch apart from one another so that they don't move around. Then I used the 2 eye screws, put them in the sides of the middle tier, and tied the string to them!


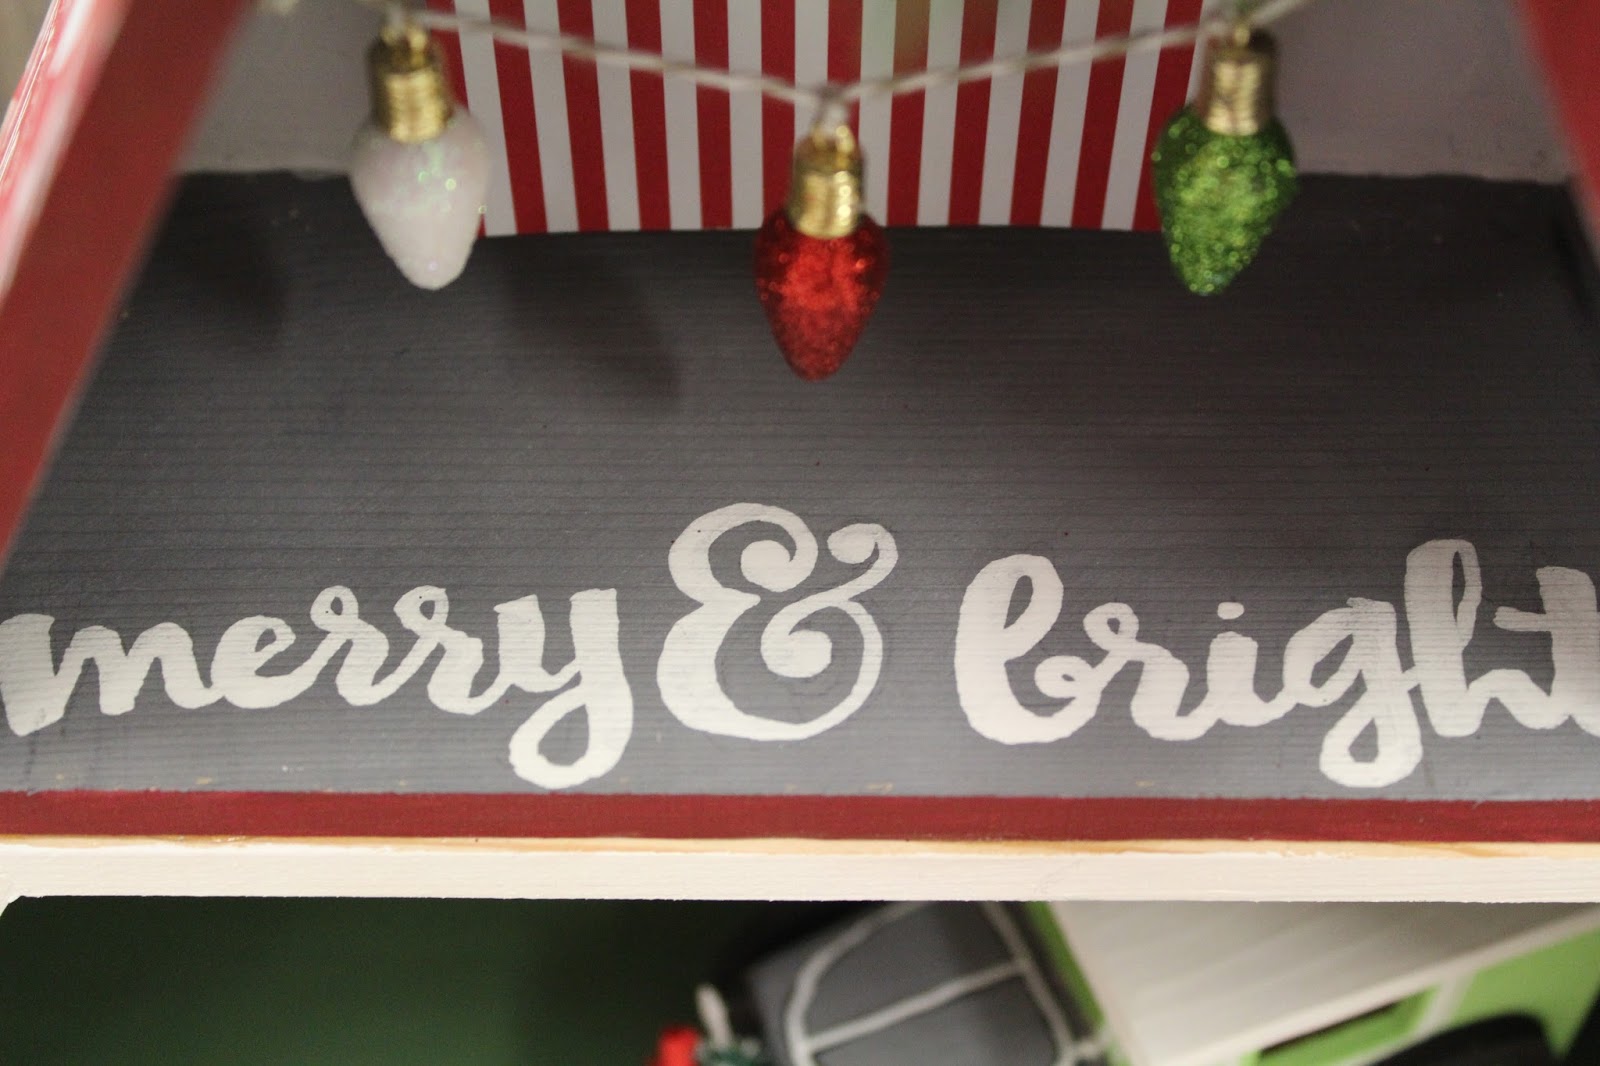
 On the bottom of the middle section I also used that same fancy paint pen to write out merry and bright! It's optional, but I thought the empty space was big enough to be able to fit some kind of word or saying.


The top tier was the easiest! After the white paint was completely dry, I glued my sprigs of greenery in there with the hot glue gun. Then I simply glued the red cardinal to one of the branches, and ta da! So darn adorable!


Happy Crafting and have a great holiday season!

Bethany @ Enchanted Lake  

Thursday, December 19, 2013

Crankin' Out Crafts Episode 322 - Ready To Decorate Christmas Tree


This project is great for the entire family - each family member has a side to decorate! In this episode JFlo will show you how to embellish with double sided tape and glitter.

These trees are easy to decorate!


Supplies:
Ready-To-Decorate Wood Tree
paint (optional)
glitter
double-stick tape
glue dots
scissors

These trees would make a great centerpiece or addition to your holiday display.

Friday, November 1, 2013

Crankin' Out Crafts Episode 308 - Woodsy Tree


Last, but not least, we have a wooden Christmas tree made up of three different sizes of popsicle sticks.

Popsicle Stick Christmas Trees

See the steps to make this project on our YouTube channel: Crankin' Out Crafts Episode 308 - Woodsy Tree

Supplies:
Jumbo popsicle sticks
Regular popsicle sticks
Craft picks
Styrofoam cone
Wooden block or knob
Scissors
Hot-glue gun and glue sticks
*optional - acrylic paint*

Using a high-temperature glue gun for this project creates a more durable bond and allows you extra time to get your pieces placed exactly where you want them.

Wednesday, October 30, 2013

Crankin' Out Crafts Episode 307 - Snowflake


Create large, eye catching decor pieces with a little bit of paint and some popsicle sticks.

Giant snowflake made with painted jumbo popsicle sticks

View our newest episode here: Crankin' Out Crafts Episode 307 - Snowflake

Supplies:
Jumbo popsicle sticks
Acrylic paint or spray paint
Ribbon
Hot-glue gun and glue sticks

It's always helpful to plan out your design first before trying to piece your snowflake together.


Monday, October 28, 2013

Crankin' Out Crafts Episode 306 - Santa's Friends Ornaments


Today's episode kicks off a week of crafting using popsicle sticks, those fun and wonderful things we all remember from school projects and summer crafting. Puna will start you off slow with some simple ornaments.

Santa's Friends Ornaments made with jumbo popsicle sticks


Supplies:
Jumbo popsicle sticks
Acrylic paint
Baker's twine
Scribbles
Eyelash yarn
Pipe cleaners
Pom poms
Hot-glue gun and glue sticks

Make a bunch of these fun ornaments with a group of kids and decorate away.

Thursday, September 19, 2013

Crankin' Out Crafts Episode 294 - Birch Bark Tree Centerpiece


Puna makes an adorable Christmas tree great for your home décor for the holidays.

Birch Tree

Check out our second project using our new Birch paper here: Crankin' Out Crafts Episode 294 - Birch Bark Tree Centerpiece

Supplies:
paper mache cone
birch wood paper 
tag punch (marvy uchida - pink)
paper trimmer 
scissor
pencil
hot glue
optional: berries or other embellishments, Mini Tree Star Topper

Monday, December 10, 2012

Crankin' Out Crafts Episode 187 - Deco Flex Tree


Need an easy holiday centerpiece? Try this tree made with Deco flex tubing and a Styrofoam cone. Puna will take you though the project, step-by-step.

Try the new Deco Flex Tubing to create a Christmas centerpiece!

Take a look at the episode here: Crankin' Out Crafts: Episode 187 - Deco Flex Tree

Supplies:
Deco flex tubing
Styrofoam cone
Buttons
Greening pins
Scissors
Hot glue gun and glue sticks

This pretty tree can be made on any size Styrofoam cone to complement your holiday table decorations.


Wednesday, December 5, 2012

Crankin' Out Crafts Episode 185 - Glittered Christmas Tree


Watch JFlo create this fast and easy Christmas Decoration using Glitter-It glue, stryofoam cone and glitter.

Make an easy and elegant centerpiece for your holiday display!


Supplies:
Styrofoam cone
glitter
Glitter-It Glue
paintbrush
scrap paper
candlestick holder

We carry styrofoam cones in different sizes, so you can create a mini forest for your tablescape! Try glittering different things to create unique displays and decorations.

Friday, November 30, 2012

Crankin' Out Crafts Episode 183 - Deco Mesh Flower


Here’s another decoration for those of you who need larger pieces for your tree or for an outdoor area like your porch, brought to you by Puna.

Create flowers with deco mesh & deco flex tubing!


Supplies:
10.5 inch wide deco mesh
Christmas berry spray
Deco Flex tubing
Floral wire
Scissors

Because these flowers are made with deco mesh, they work great for outdoor decorations too.

*Don't forget to scroll down to read today's earlier post from Kahului BFC! 

Wednesday, November 28, 2012

Crankin' Out Crafts Episode 182 - Tomato Cage Tree

Tomato cages are all the rage this holiday season. Join Puna as she shows you how to put together an easy outdoor decoration.

Decorate your yard for Christmas with a tomato cage tree!


Supplies:
Tomato cage
Deco Mesh
Pipe cleaners to match
Indoor/Outdoor Christmas lights
Ornaments
Poinsettia clips

If you’re making this tree for your yard or porch, remember to use only indoor/outdoor Christmas lights and plastic ornaments so that your tree will be able to withstand the weather.

Friday, November 23, 2012

Crankin' Out Crafts Episode 180 Pretty Bird and Snowy Scene Ornaments


We’ve got so many great ideas for ornaments using our hollow clear glass ornaments, that we’re giving you two episodes in one today. First JFlo is here to show you how a few small floral touches can dress up this open ornament, and then Puna will show you how to make a beautiful snowy scene in the ornament.

Pretty Bird Ornament 

Supplies for Pretty Bird Ornament:
Hollow clear glass ornament
Small bird decoration
Moss
Silk flowers
E6000
*optional – ribbon

Snowy Scene Ornament

Supplies for Snowy Scene Ornament:
Hollow clear glass ornament
White ultra-fine glitter
Twinkle snow flakes
1/8th inch dowel
Small wooden spool
Small piece of pine garland or pick
Lantern mini ornament
Black acrylic paint
White Deco Color pen
Spray bottle
Glitter-It
Scissors
E6000


Add battery operated tea-lights to the ornaments for that extra Christmas touch or as special decorations for a wedding celebration.

Wednesday, November 21, 2012

Crankin' Out Crafts Episode 179- Melted Snowman Ornament


JFlo is here again to show another great holiday ornament idea, especially for those of us who live in warmer climates.

Here's an ornament perfect for Hawaii.

Watch the episode on our YouTube Channel: Crankin' Out Crafts: Episode 179 - Melted Snowman Ornament

Supplies:
Hollow clear glass ornament
Clear glass gems in three different sizes
White ultra-fine glitter
Snow flakes
Small twigs
Two black seed beads
One black pony bead
One black button
Small piece of orange foamie or felt
Glitter-It
E6000
*optional – ribbon, snowflake, and Deco Color pen for personalization

Now you know what our Snowmen in Hawaii look like because of our wintry, 70 degree, Christmas weather.

Also, just a reminder that we will be open tomorrow - Thanksgiving Day, Nov.22nd from 9am-2pm. Come and shop our Super Early Bird Specials and Fa La La Sale. (Kahului will be closed for Thanksgiving and will have their Early Bird Sale on Friday, Nov.23rd from 6-11am.) Early Bird and Night Owl Coupons, too on Friday, Nov.23rd! Wishing you and your family a very Happy Thanksgiving!

*Don't forget to scroll down and read today's earlier post on Mason Jar Gift ideas brought to you by Market City BFC.