Tuesday, December 13, 2016

Simple Nativity Scene

12 days 'till Christmas already?!   WHAAAAT?
Yup, that's right! I hope everyone's holiday season isn't too crazy!
How's that holiday shopping? It seems to get harder and harder every year.
For those of you looking for an easy-peasy piece of holiday décor that would also
be great as a gift for a church-goer or who likes the sacredness of the Christmas season,
I have a beautiful and elegant wooden nativity scene!
All you need are a few salvaged items from your basic crafts pantry.
 
 
Supplies Needed
Jumbo Popsicle Sticks
Wooden Figures
Raffia
Jute Cord
White Felt
Wooden Bead
Rolled Paper Floral Wire
Snowflake or Star
Shell (optional)
Brown Stamp Pad (optional)
 
First, distress your popsicle sticks with a brown stamp pad.  It's really up to your personal style.  I wanted to give this a primitive and antique feel, but you can leave it plain if you'd like.  Second, hot glue all your sticks into a triangle form.  I made sure to make one flat so that it could stand on its own when not on a Christmas tree.  Next, I cut out a semi-circle piece of white felt for Mary's veil, then hot-glued the curve to the crown of her head.  I then cut a piece of the rolled paper wire for Joseph's can and curved the top to create a small cane.   For Baby Jesus, I cut a small piece of felt and wrapped it around a small wooden bead.  I hot-glued the little bundle into a tiny shell.  
 
After the Mary and Joseph figures were hot-glued onto the floor of the stable, I hot-glued a couple pieces of raffia on either side of the couple and then placed Baby Jesus at the very center.  To finish it up, I glued a "North Star" (snowflake) at the apex of the stable roof and then glued a piece of jute rope onto the back for hanging on a tree.
 
There you have it!  A cute little nativity that although primitive,
makes a great and meaningful gift. 
 
See you next week!
Erika @ PC


Monday, December 12, 2016

Let It Snow Ornament


Happy Christmas season, everyone! 
Today's project is a DIY "unbreakable ornament" for your tree!


All you need are these few things:

Unbreakable plastic ornament
Tiny tree
E6000 Glue
Snow Tex
Powdered Snow
Decocolor medium size Oil based Pen 
brush or plastic butter-knife


First, take your E6000 glue and adhere the tree to the inside of the lid of your ornament. The total cure time is one day, but to the touch the glue will be secure in 30 mins to an hour.

Then with a brush/plastic butter-knife, scoop out some Snow Tex into the bristles of your tiny tree. It is like a thick gritty paste, so don't be afraid to pile it on and make it thick! Total dry time is close to an hour, depending on thickly it is applied.


As your snow is drying, write a message on the outside of your plastic ornament!
This oil based paint pen is great for writing on slick surfaces like glass and plastic, I highly recommend them! The medium sized one in black is what I used to write "LET IT SNOW" on the front of my ornament. Write in smooth and even stokes, as if using a regular marker. Dry time for the writing is roughly 10 minutes to the touch.

Once the glue under the tree is dry to the touch, add in the loose powdered snow around the tree and screw the lid back on the ornament. And ta da!!!

Super cute and super easy!

Bethany @Enchanted Lake 


Tuesday, November 29, 2016

Pinecone Christmas Tree

Oh Christmas Tree, Oh Christmas tree...
How lovely are thy branches...
A tree always kicks off the Christmas season for my family!  It really doesn't feel
like the holidays until we bring a nice 6 foot tree home and shake out it's branches, its
refreshingly sharp smell wafting through the house...
If you want to bring a little of that feeling Christmas cheer to work, I have one craft that is simple,
festive and downright ADORABLE.

 
Mini Pinecone Christmas tree! 
All you need are a few items.
 
1. Pinecone
2. Green Acrylic Paint
3. Pom Poms
4. Firefly lights
5. Mini Terracotta Pot
 
First, Paint your pinecone!  I chose a traditional Christmas green, but you can mix up the colors if you'd like.  You can even leave it as is for a nice neutral and rustic palette.  White pompoms or Snow Tex would be great for trimming it.  Or why not try a cutesy pastel palette?  Maybe an ice blue tree with iridescent twinkle flakes and pink pompoms? 
 
Second: Glue your mini pompoms onto your pinecone after it's fully dry.  Then, take your firefly lights and wrap them around you tree starting from the top.  Because I had chosen the 10 bulb firefly lights, I was able to hide its small battery pack inside the Terracotta pot, which I placed the pinecone "tree" onto for a base.  You can go ahead and paint the pot as well! 
 
And that's all she wrote!
This is a great activity for kids as well, so don't pass up the chance to make some great holiday memories.  Have fun!
Erika @ PC


Monday, November 28, 2016

Wooden Tree Shadow Box! Hello Christmas!

Hey Everyone, today's project is so adorable! I really had fun putting it together, and it's such a great way to customize a holiday stacking display box to the theme of your home this year!


 Supplies:

4 sheets of card stock with patterns and solids that all match each other in style (I used a solid olive green, a red pinstripe, a red holiday text, a Christmas tree print, and a green and white polka dot print) the plus side is that a lot of patterned card stock is double sided, so one sheet can act as two!

scissors
hot glue gun/glue sticks
matte Mod Podge
E6000 clear glue
1/2" nylon brush
small round nylon brush for fine details
cup of water
acrylic paint in the colors black, white, lime sorbet, dark cherry
3 teir raw wood tree shapes (sold as a set)
wood car
package of tiny wreaths
small trimmings of faux pine branches
one tiny cardinal
package of tiny glitter light bulbs
8 in of string or baker's twine
2 eye screws
dimensional pop-up dots
white fine tip paint pen


First take your 1" nylon brush, Mod Podge, and selected card stock paper, and apply a generous but even coating on the side of the wood. Then smooth out card stock over the side. Wait 5 minutes to dry a bit, then carefully cut off the excess paper around the edges. Repeat for all sides of the top middle and bottom tier. ( I didn't do the back or the underneath.)


After cleaning your brush in the cup of water, paint the insides of the tree.
I used white for the inside back panel of all the tiers. 

For the middle tier, I mixed black and white to make grey, and used that for the side panels on the inside. I used the dark cherry for the front facing rim. 

For the bottom tier I painted all the side panels olive green, while leaving the back panel empty, and painting the front facing rim white.


Then after letting everything sit to dry separately for 5-10 minutes, I began working on painting the car. I used lime sorbet for the sides, black for the tires, grey for the front, and white for the roof. Now the best part about the fine white lines on this car is that I used a paint pen! So much faster and easier than using a brush. I just drew lines around the windows, on the hood, and on the tires! And then for the finishing touch, I used E6000 glue to adhere the wreath on the front of the car!

For the inside of the bottom tier, I used the Mod Podge again to glue the pretty tree card stock to the back panel.


After the paint is completely dry in the middle tier, take your optional patterned card stock and layer pop-up dots on the back. This will make the square look like it's floating out and fill up some of the space. It will act as a back drop for your ornaments.


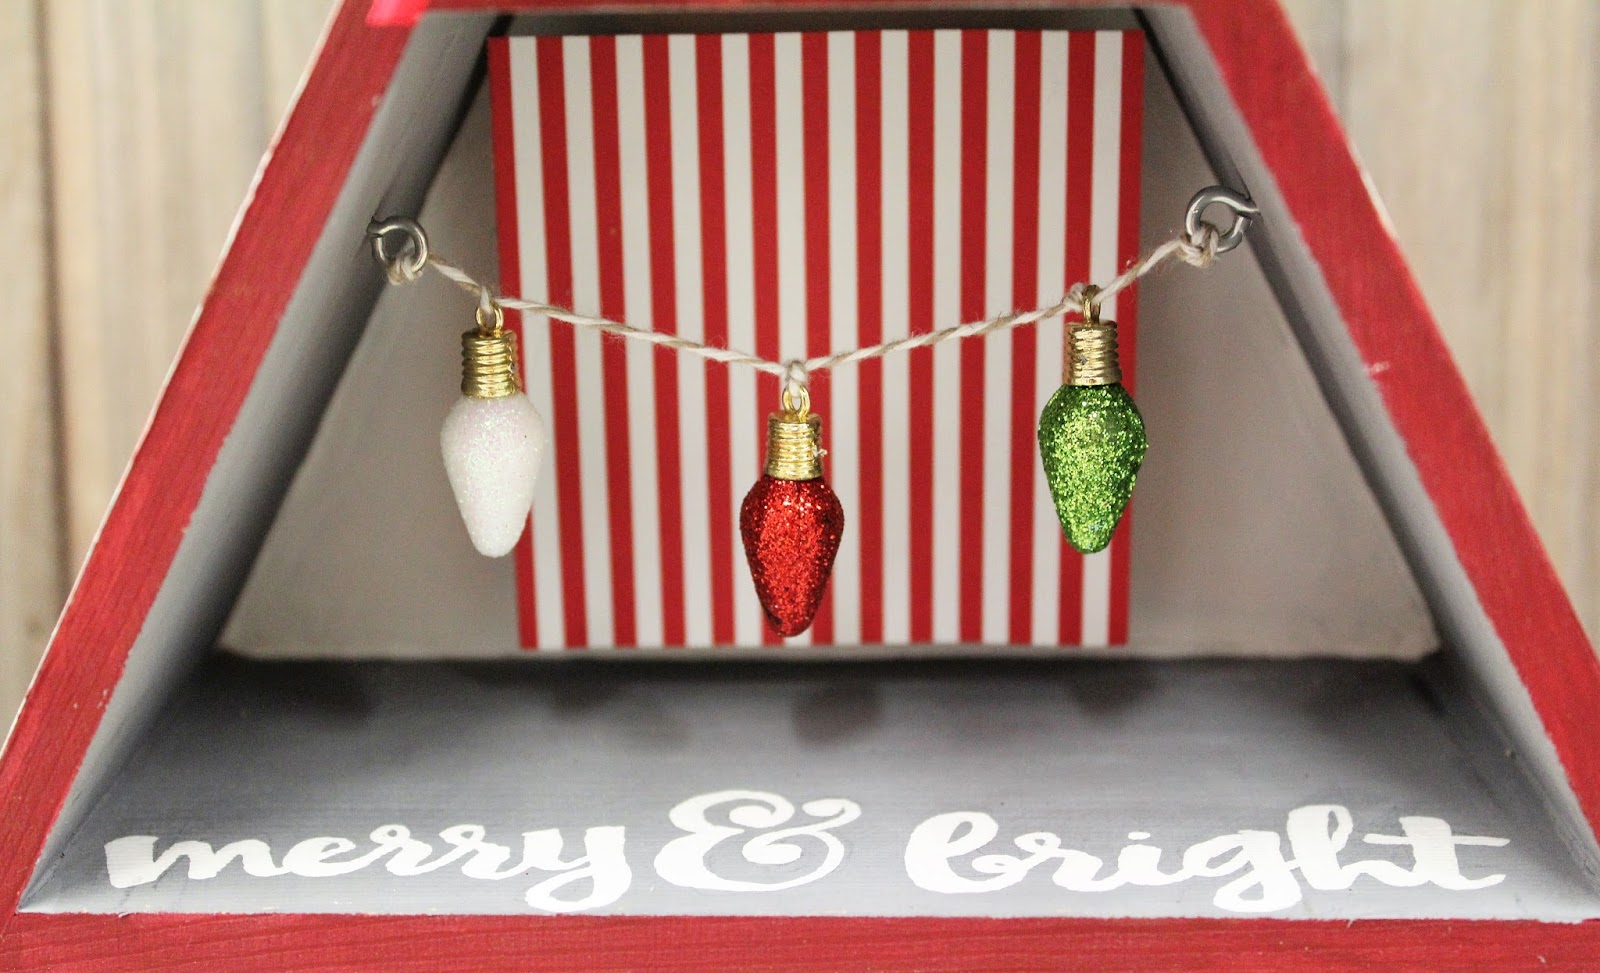
I used 3 ornaments and tied a knot in my string about 1 inch apart from one another so that they don't move around. Then I used the 2 eye screws, put them in the sides of the middle tier, and tied the string to them!


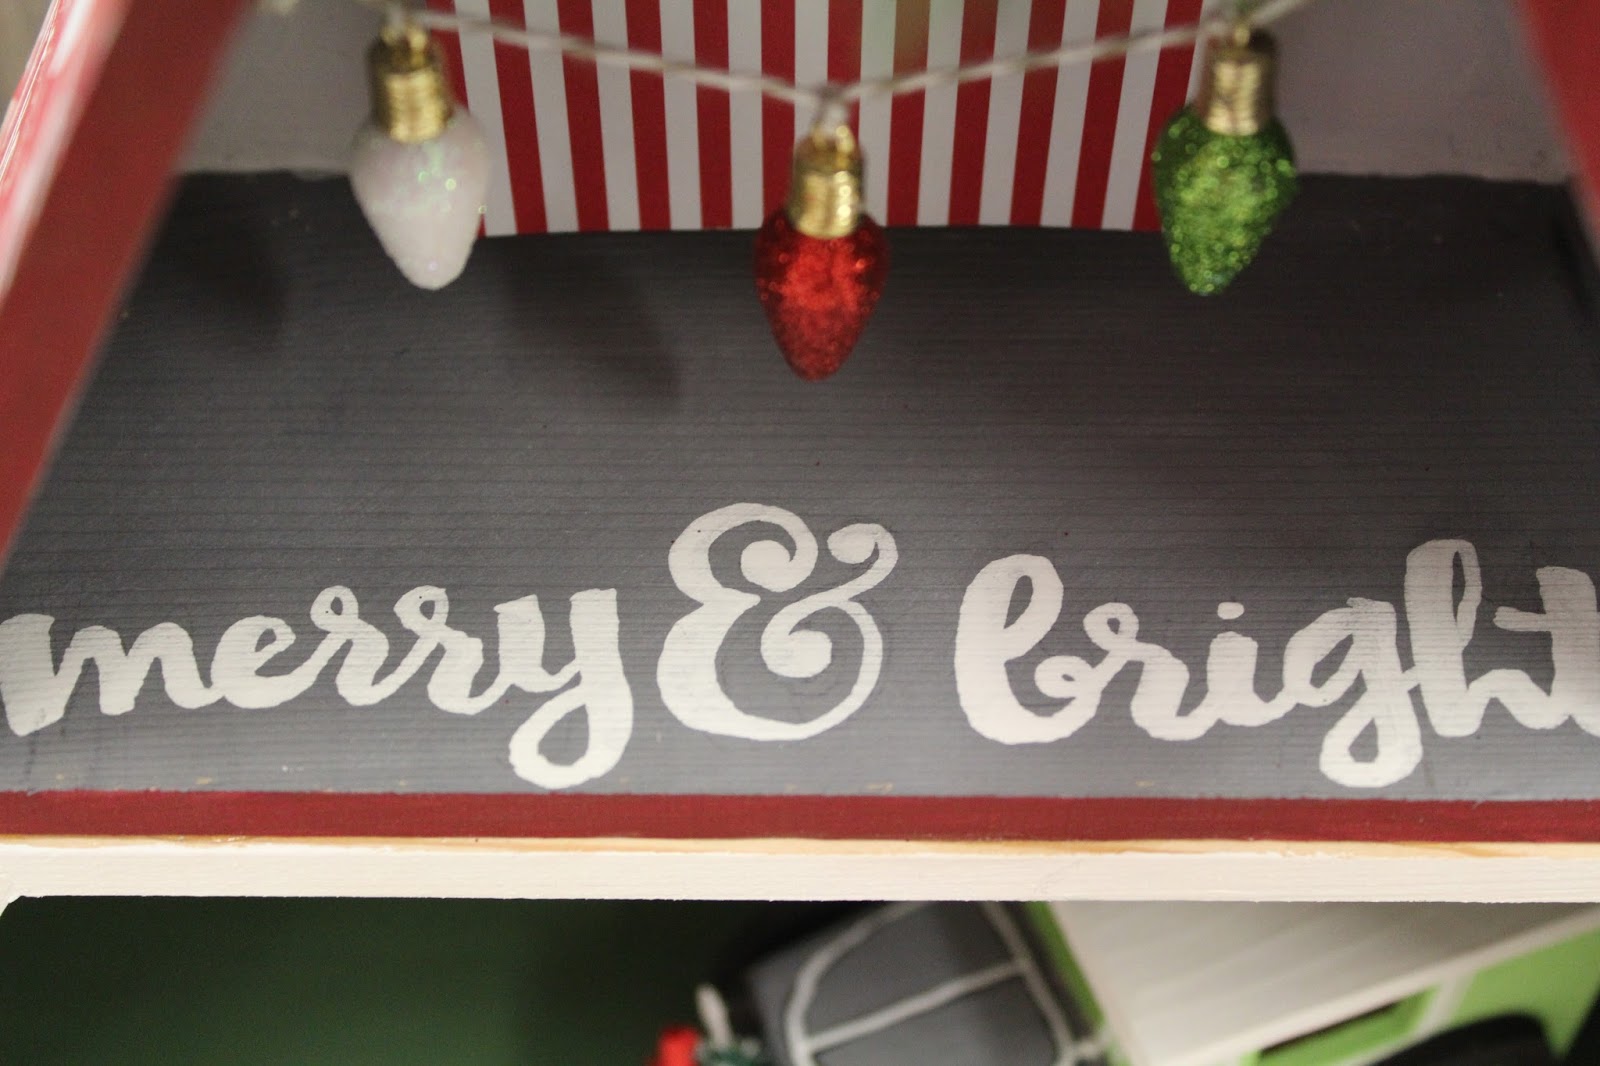
 On the bottom of the middle section I also used that same fancy paint pen to write out merry and bright! It's optional, but I thought the empty space was big enough to be able to fit some kind of word or saying.


The top tier was the easiest! After the white paint was completely dry, I glued my sprigs of greenery in there with the hot glue gun. Then I simply glued the red cardinal to one of the branches, and ta da! So darn adorable!


Happy Crafting and have a great holiday season!

Bethany @ Enchanted Lake  

Monday, November 21, 2016

NFL Ornaments

If your Thanksgiving traditions include some good ol' American Football,
then this the perfect project for you!  Because for the Super Fan, the
craze is year-round.  You collect every single piece of merchandise that sports
your team's logo.  Posters up in your room, multiple jerseys and maybe even a
few pairs of team pajamas.  Also, does your dog or cat have their own little jersey?
 If you are this person, or know someone who lives like this, then
this is the perfect craft for them!  Not to mention an AWESOME gift!
 
NFL ORNAMENTS!
 
 
You only need a few things...
 
Glitter-It
Glitter (Fine or Coarse)
Funnel (not pictured)
2 inch Ornament balls
Deco Color pens
Ribbon (optional)
 
 
Using the glue is very simple!  All you need to do is take the metal top off, squirt about a tablespoon of the glue into the ornament and swirl it around.  Make sure you get all those pesky dry spots so that the glitter covers the entire thing.  Don't forget the areas just around the opening!  If there is any excess, you can pour it into the next ornament or back into the bottle.
 
Next, pour your choice of glitter in.  If you want to do more than one color, you're going to pour the color you want on the bottom FIRST.  For example, I made a Denver Broncos ornament and used the royal blue glitter at the bottom and orange glitter on top.  Using a funnel, I poured about two tablespoons of glitter in.  It helps to pour LESS than what you think you'll need.  You can always add more.  Next, I added the orange.  Just slowly turn the ornament ball and let the glitter roll and spread. Don't roll it too fast, otherwise your glitter will clump. 
 
After your entire ornament has been glittered, return the metal top to its proper place and finish it off with a cute (matching) bow!  (Optional, of course, but it adds a nice touch.)  You can hand-letter your team's name onto your ornament using an oil-based marker like the DecoColor paint pen I used here.  You definitely want it to be oil-based because acrylic-based markers will just scratch off.  Ain't nobody got time fo' THAT.
 
And that's all she wrote!
I'm sure that football fan in your life will love this.  Hey, if they already
have a team Christmas tree planned this year, it would be nice to see something handmade
amongst all those licensed products, wouldn't it? 
Handmade things are made with love!
 
Have fun!
Erika @ PC


Tuesday, November 15, 2016

Magical Rose Decor

Can we talk about the new Beauty and the Beast trailer that just came out??
I am so excited.  Can't wait!  
For all you Beauty and the Beast fans and straight up "Disnerds" out there
looking for the perfect project to keep you busy during the long wait or just
to spruce up your home with a little magic, this is the one for you!
It's fun and it will definitely be a conversation starter and will definitely make
a perfect gift for the holidays.

 
Supplies Needed
Glass Dome
Silk Rose(s)
Floral Cutters
Suji Cord
Clear Tape
Glue Dots
Firefly Lights

First, cut the rose to the length you want.  Remember, it needs to be short enough to be suspended in the dome.  Make sure it is at least two inches shorter than the height of the dome.
Second, cut a short length of suji cord and attach to the larger petals toward the underside of the rose using a glue dot.  Pinch the glue dot and one end of the suji between two large petals.
Next, tape the other end of the cord to the top of the dome.  
If you have a few stray rose petals or another rose on hand, cut a couple of petals off of it and put it on the base.
After that, put the dome back onto its wooden base, curl some firefly 
lights around your rose and Voila! 
   
I hope everyone has a wonderful time making these!
We want to see how your magical roses turn out.  Post your photos
on Instagram and use the tag #bfcrafts!

Erika @ PC

Wednesday, November 9, 2016

Pocket Winter Wonderland

    Hello again, fellow Crafters! This week, I have an adorable little project that
can capture the beauty of the Christmas landscape into a cute little box.
This is a great activity for kids and make a great gift for fairy garden and miniatures
lovers alike!
 
All you need for this project are:
 
1. Small Wooden or Paper Mache Box
2. Mini Christmas Trees
3. White Air-dry clay
4. Moss
5. Paint (I used Delta Americana)
6. Snow-Tex & Twinkle Flakes
7. Your Imagination!
 
For those of you who have made fairy gardens before, this is basically the same concept.
Anything goes!  Picture the scene you want, start with the inside coat of paint and then start
gluing your pieces of landscape in!  Here, I pictured a winter scene taking inspiration from the scenery in Rankin Bass' Rudolph the Red-nosed Reindeer.
Be creative and have fun!
 
See you next week!
Erika @ PC